
Application Tracker
A concise guide to using the Application Tracker to manage college deadlines & requirements,
Once a college is added to a student's list, it will also appear on their Application Tracker.
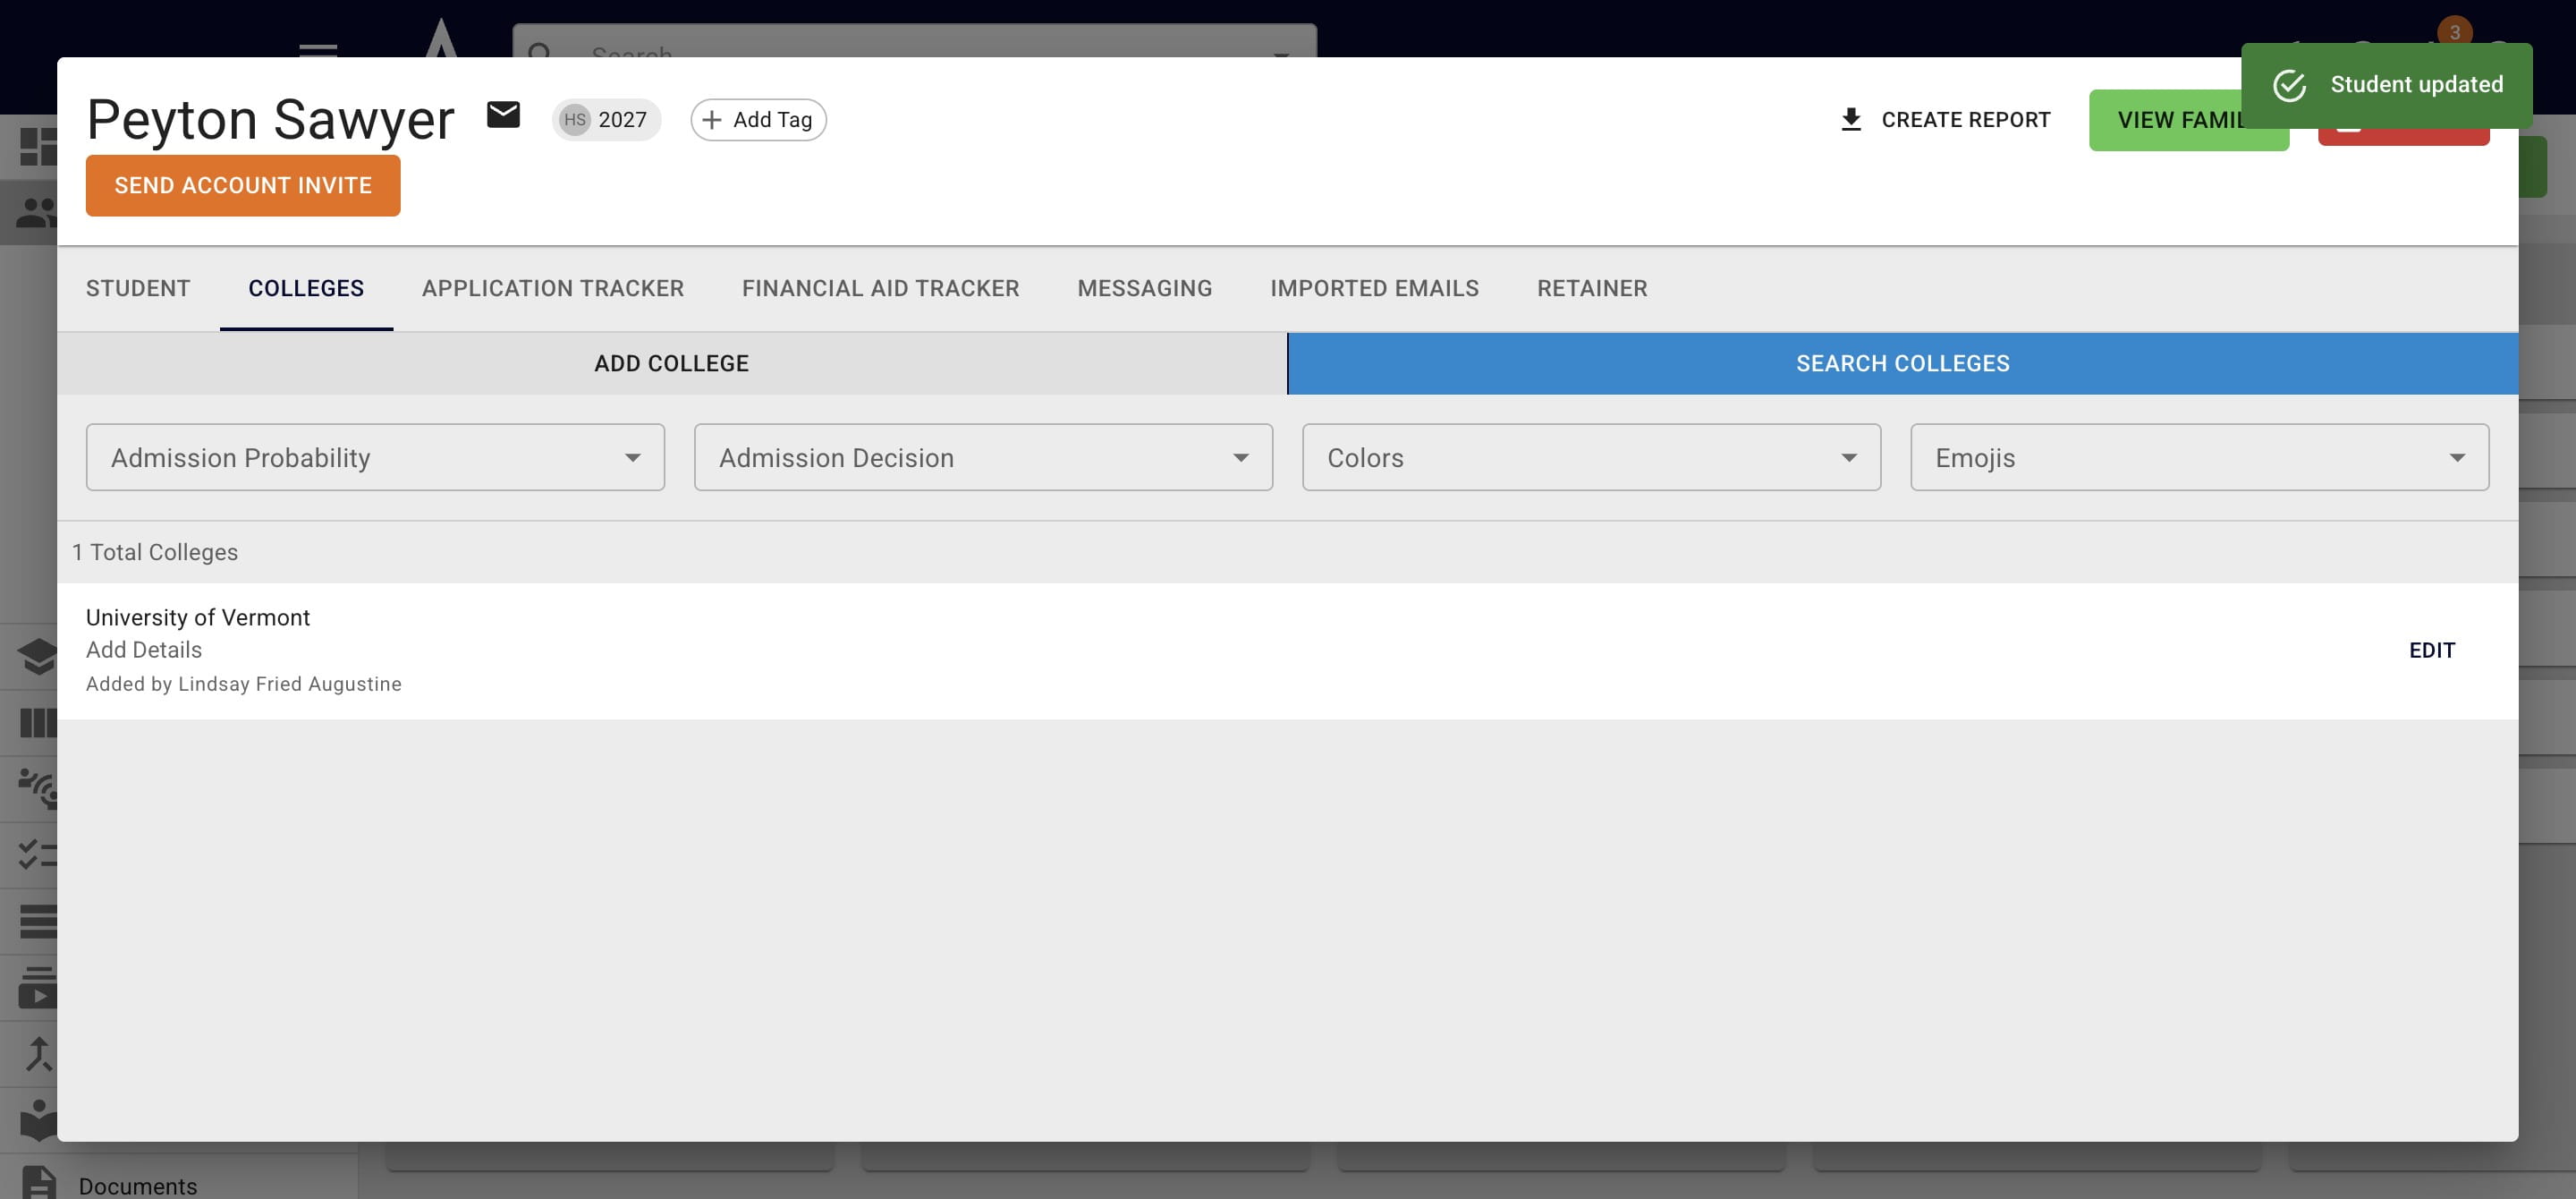
Over 1,000 colleges' admission deadlines & requirements are stored & annually updated in Achieve. However, if there's a school that we don't currently have admission information for, please let us know - we're always happy to add more!
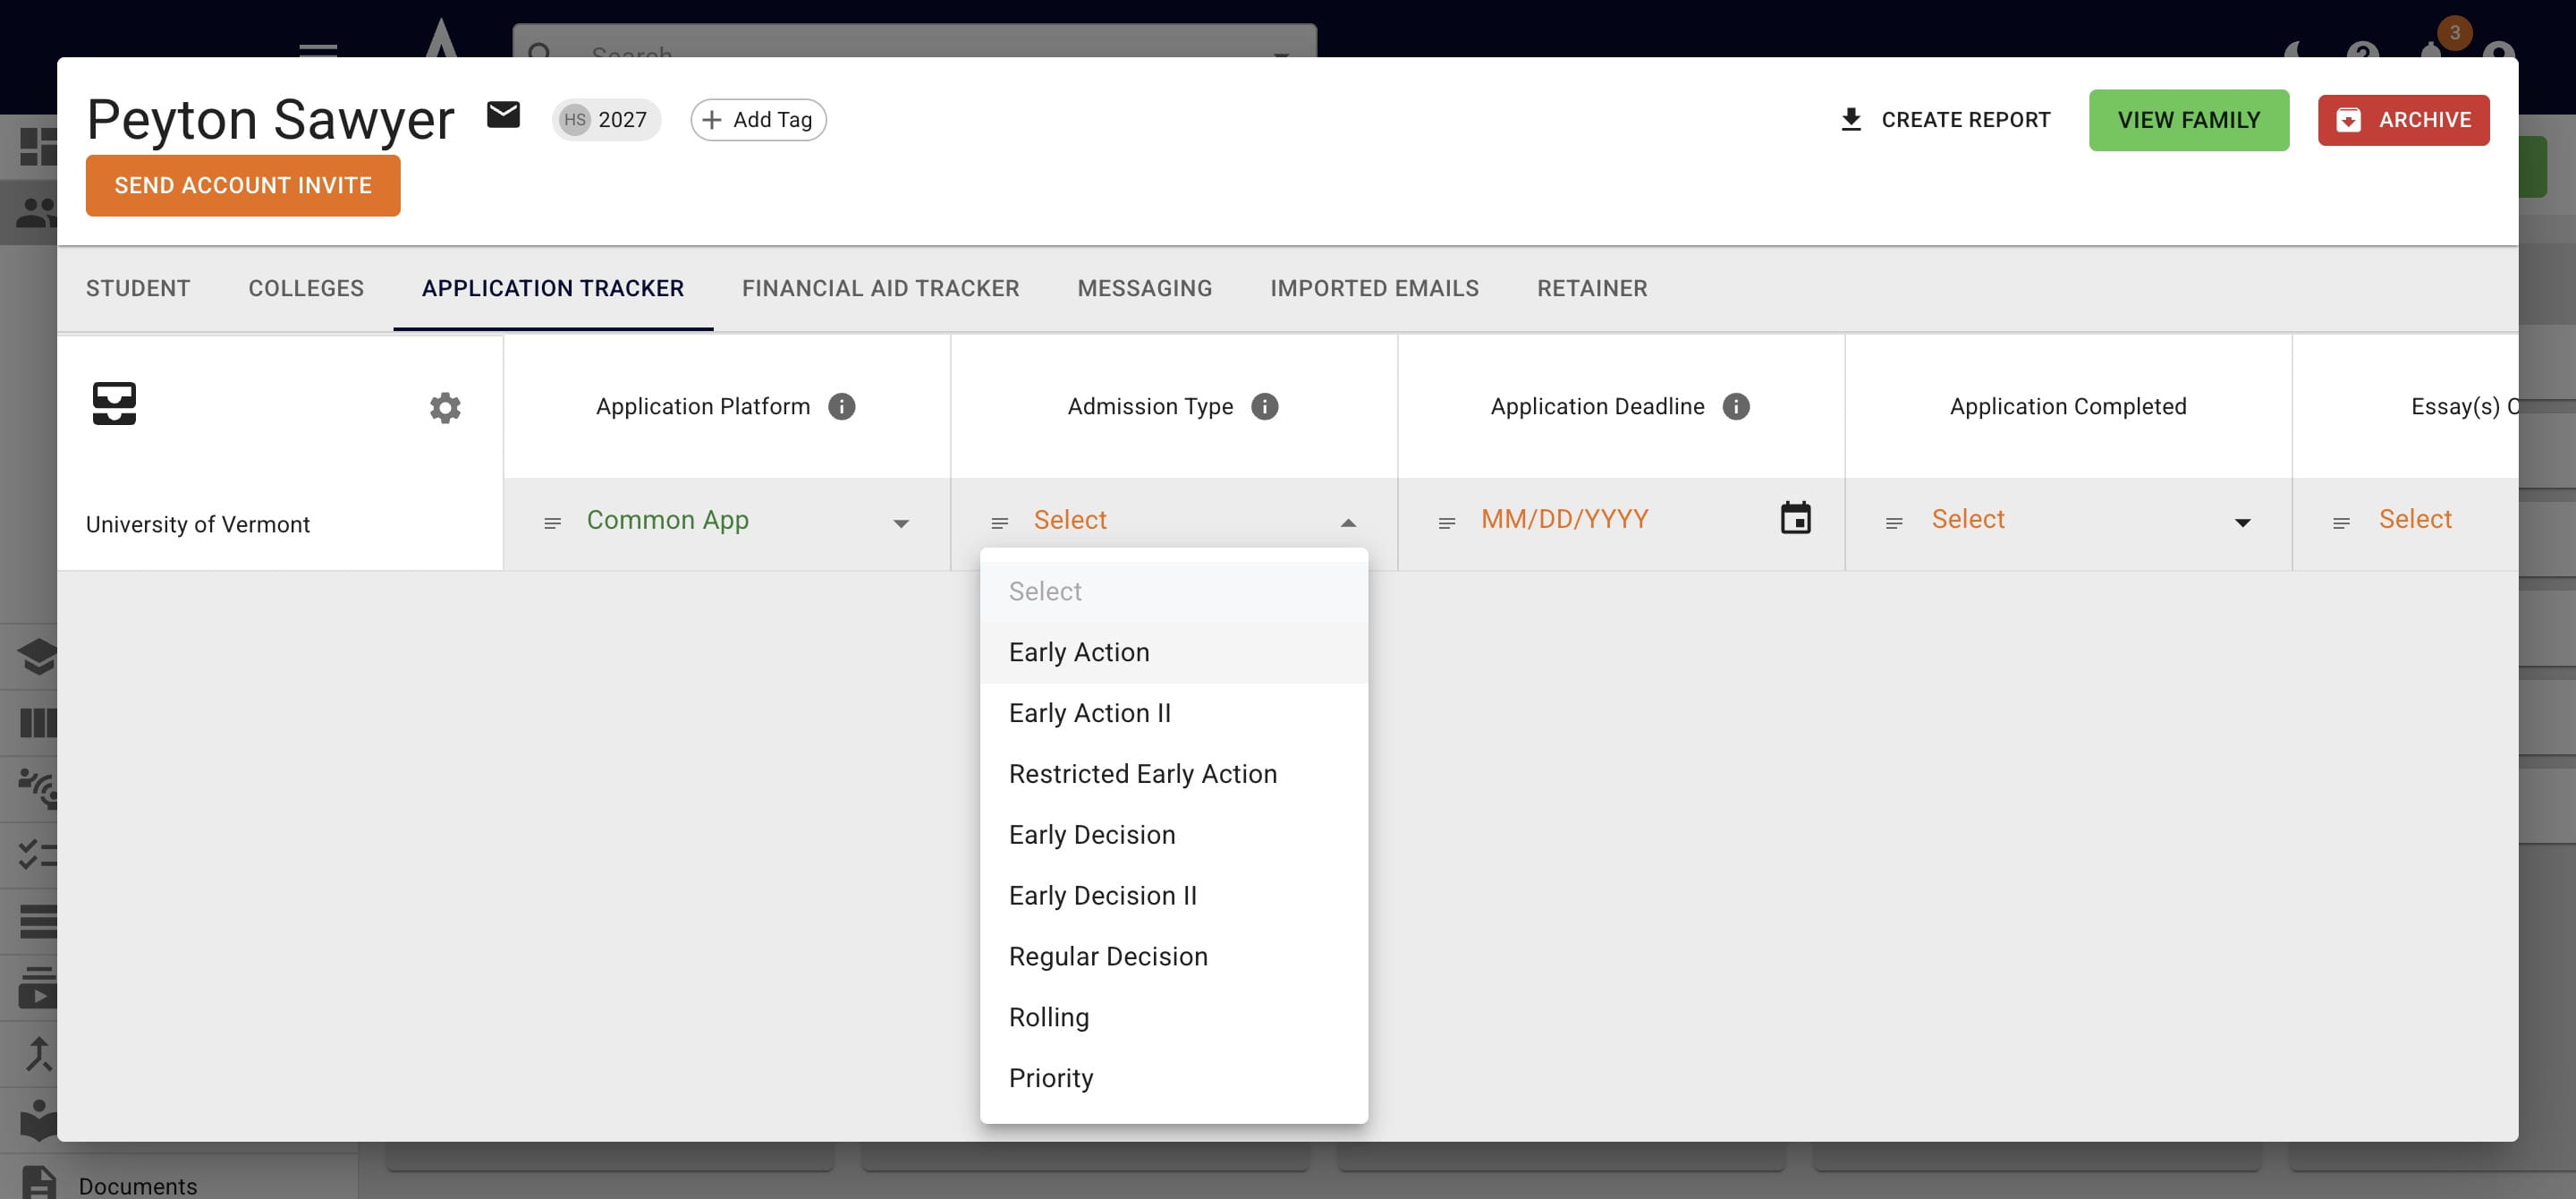
To make the application information appear, choose the applicable Admission Type.
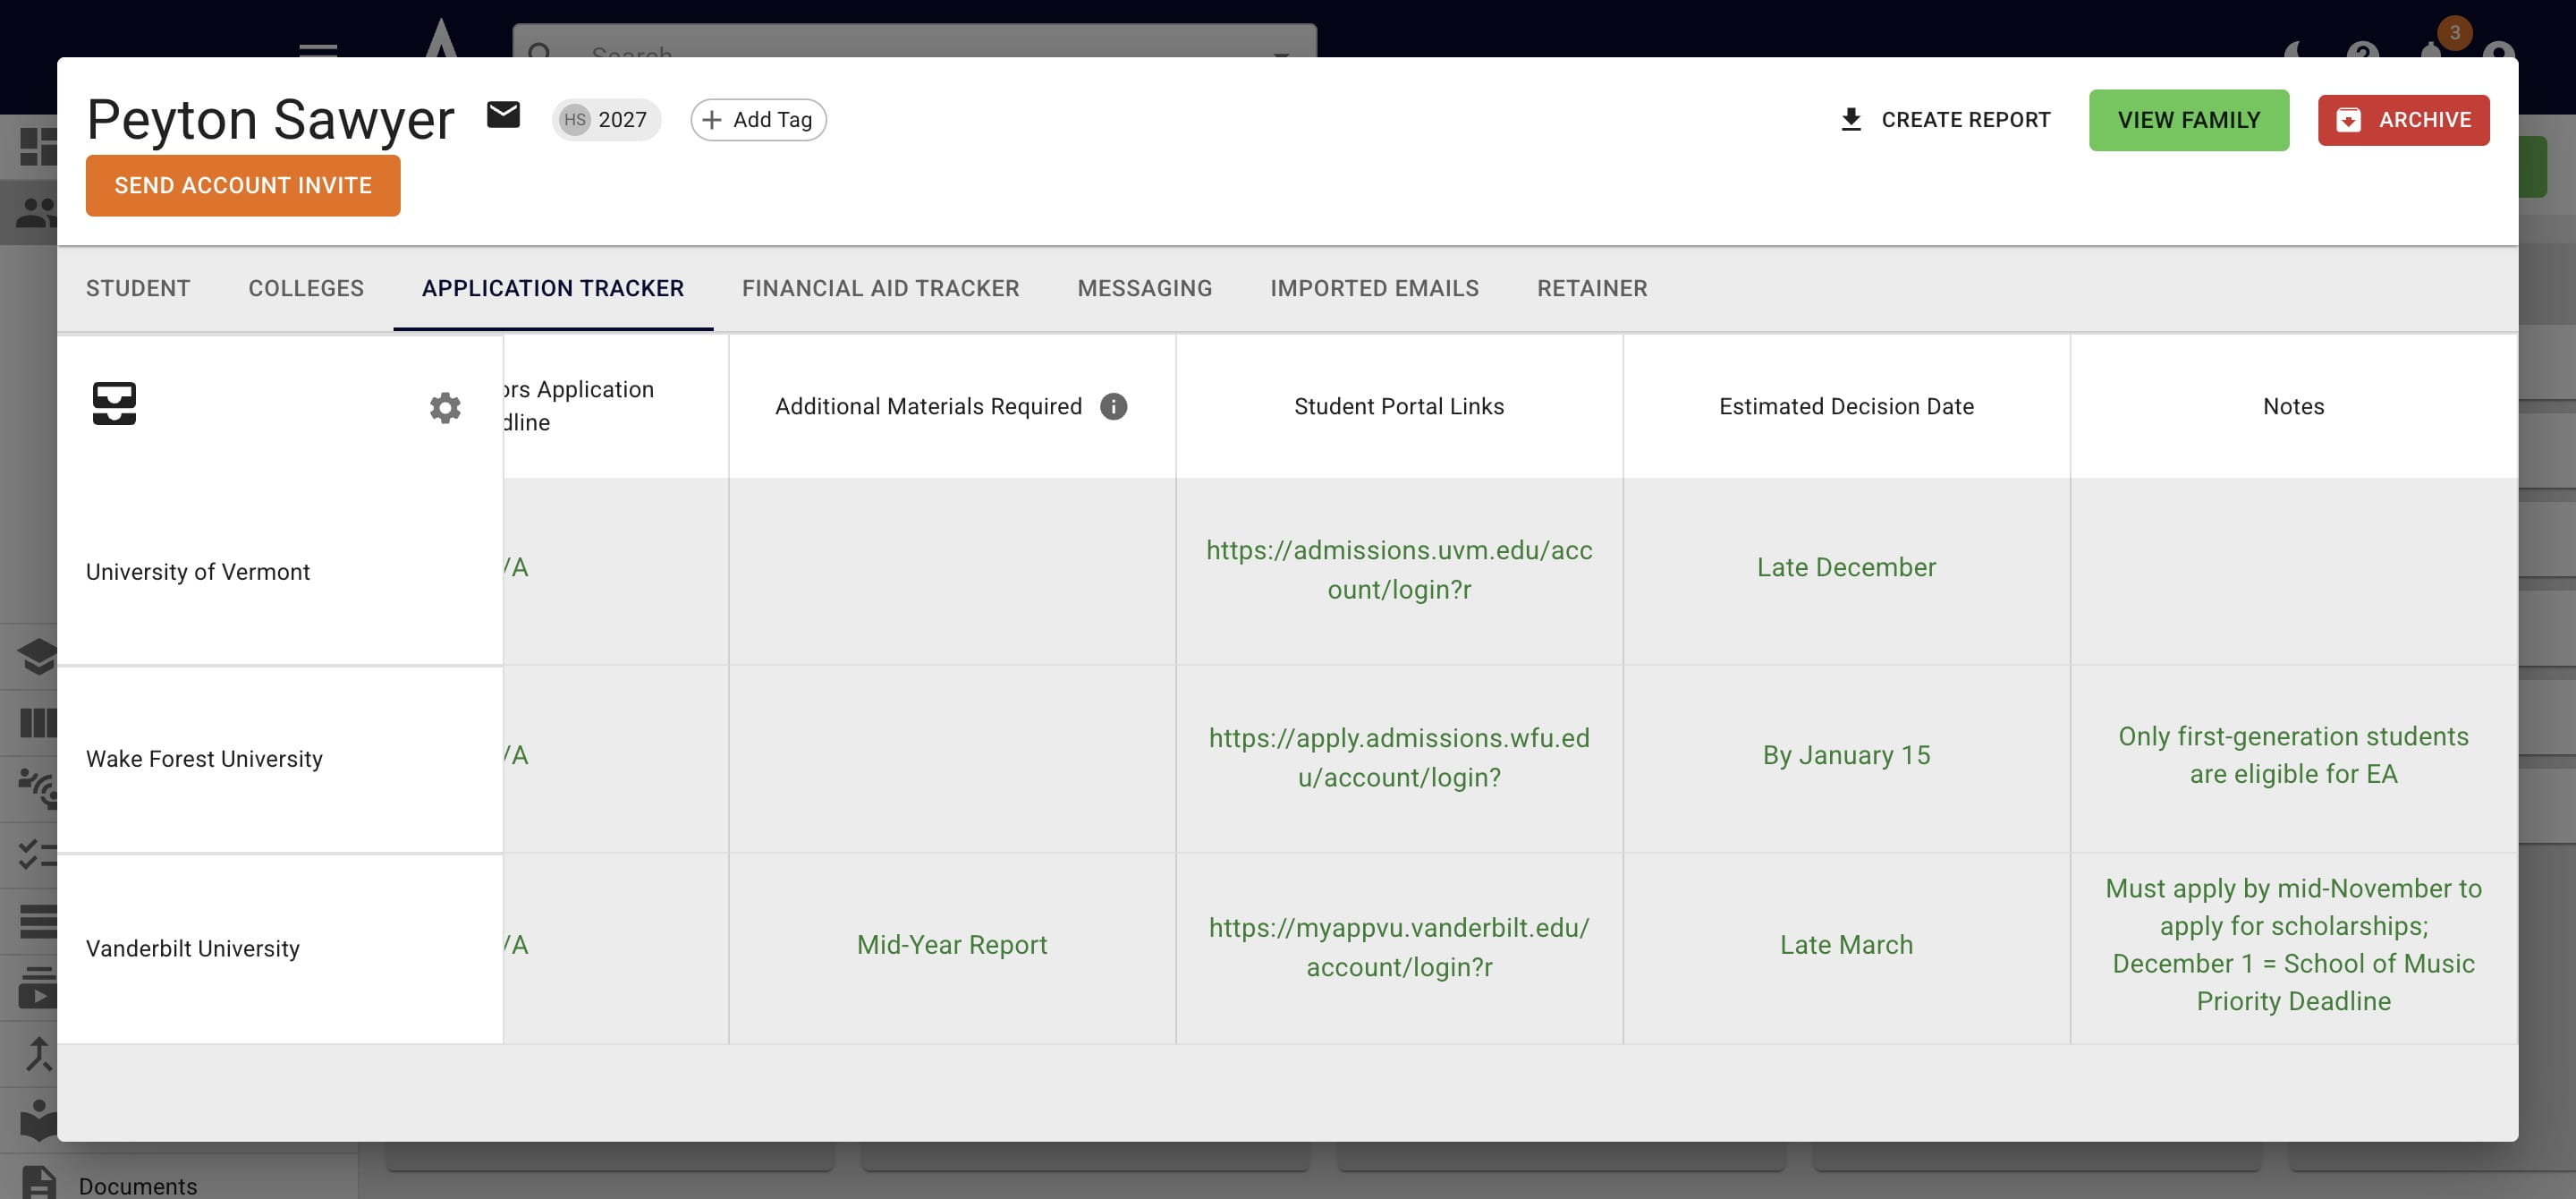
Under the Notes column, you'll see any applicable idiosyncrasies related to that admission type. Examples include if only a certain demographic can utilize that admission type, if students need to apply early for scholarship purposes, and/or if certain major have different deadlines.
You can override the date under the Application Deadline column as needed. The list will then automatically re-sort to be in sequential order.
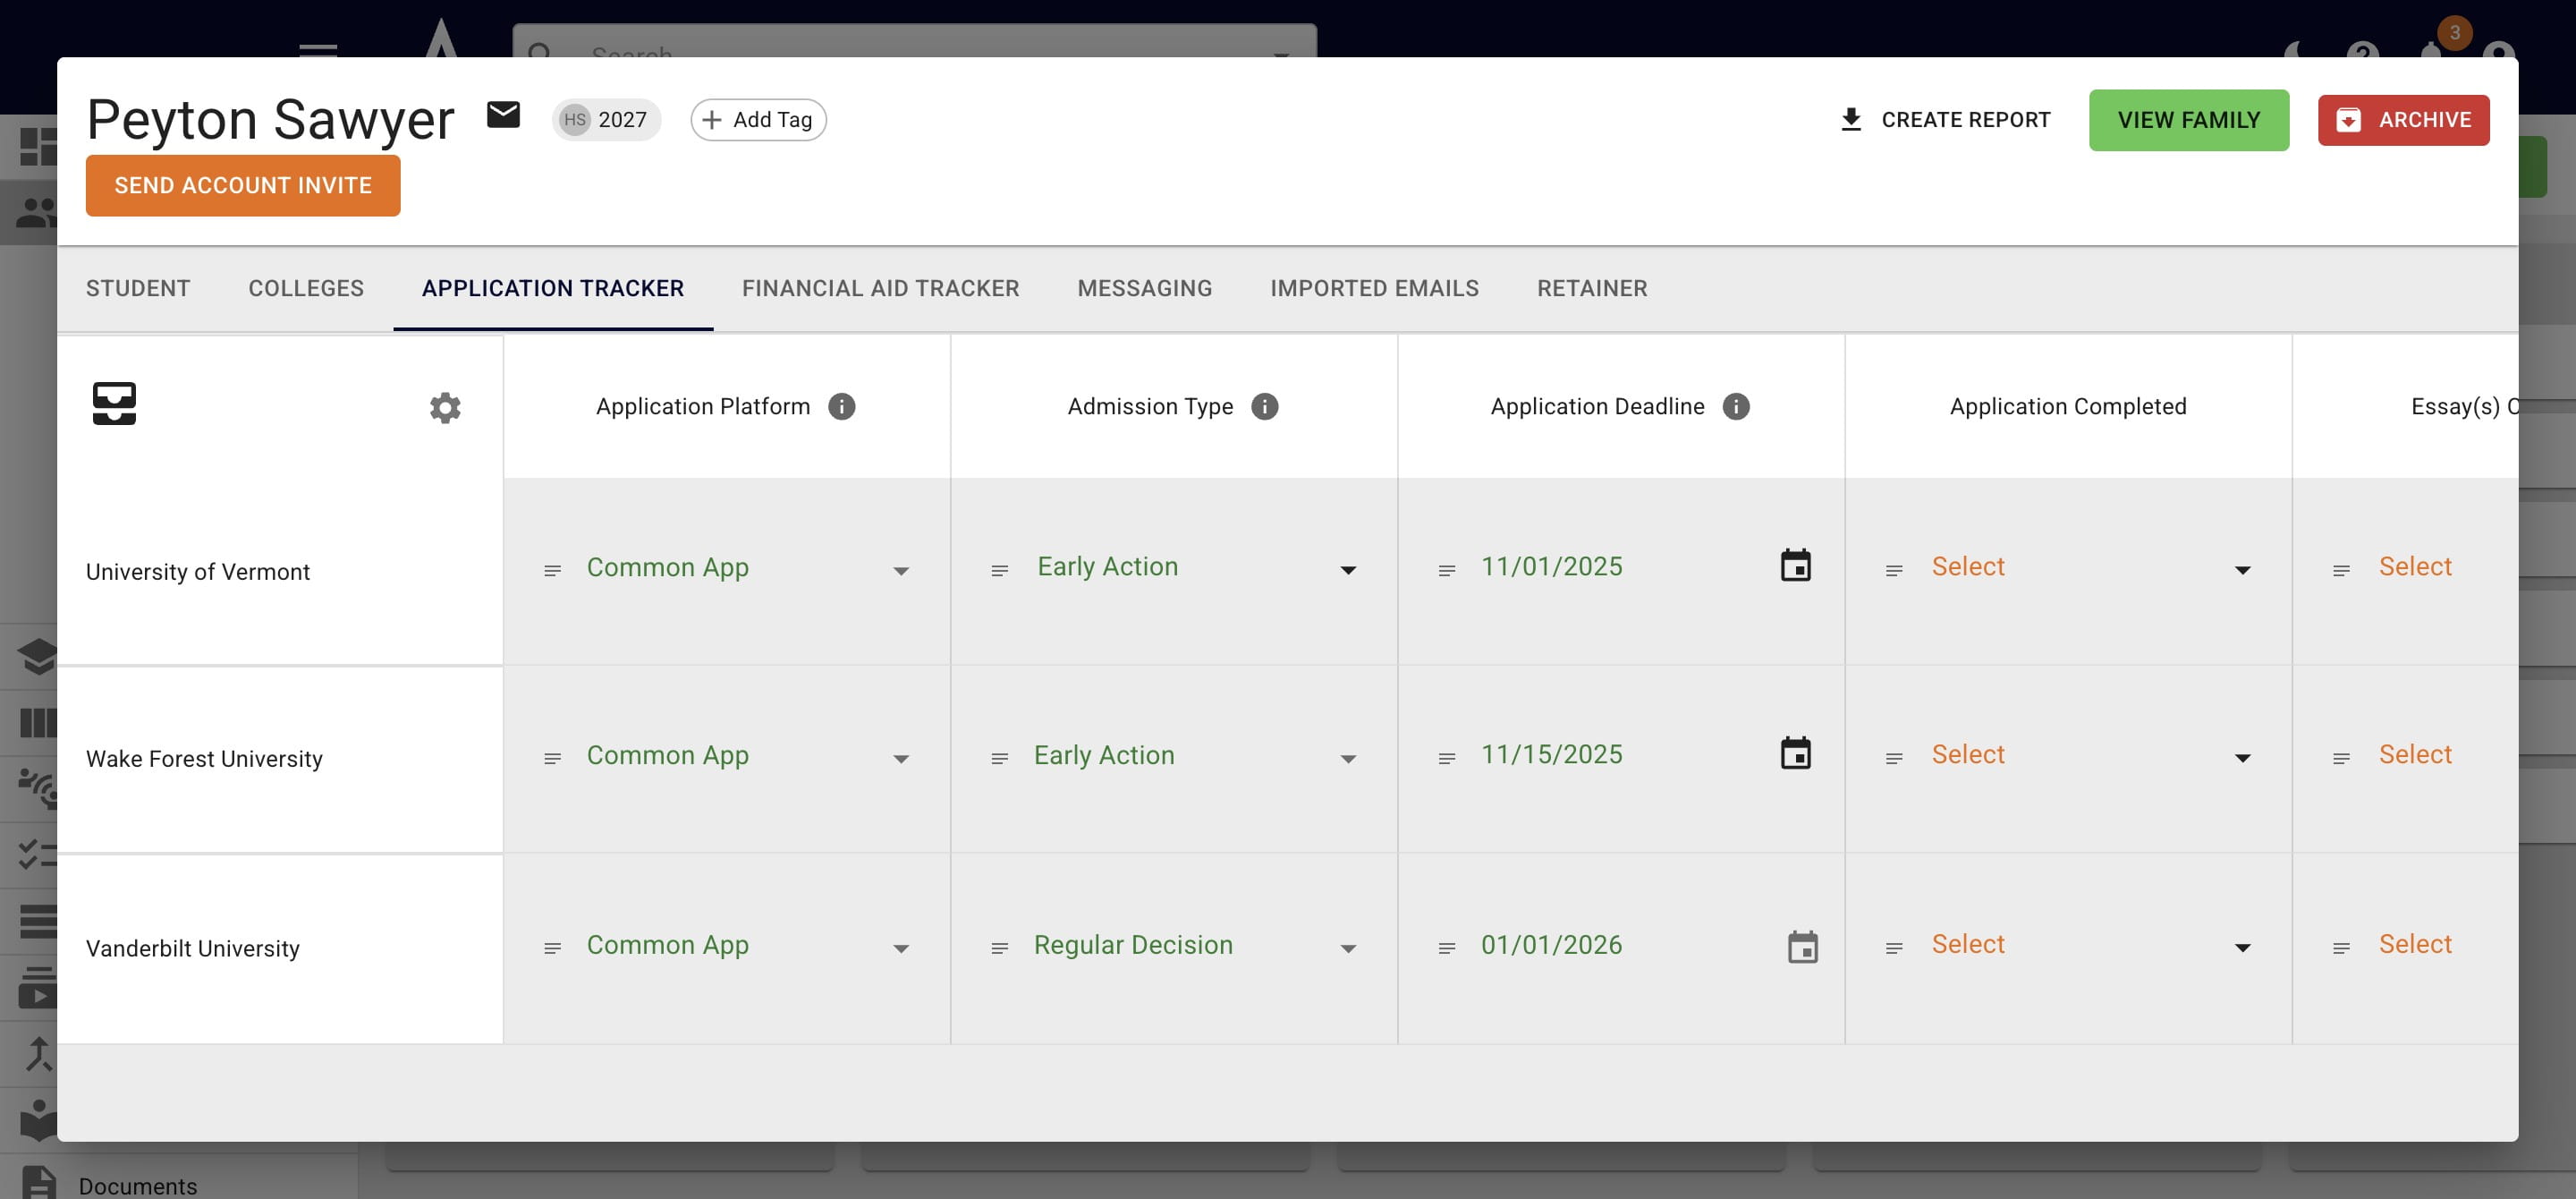
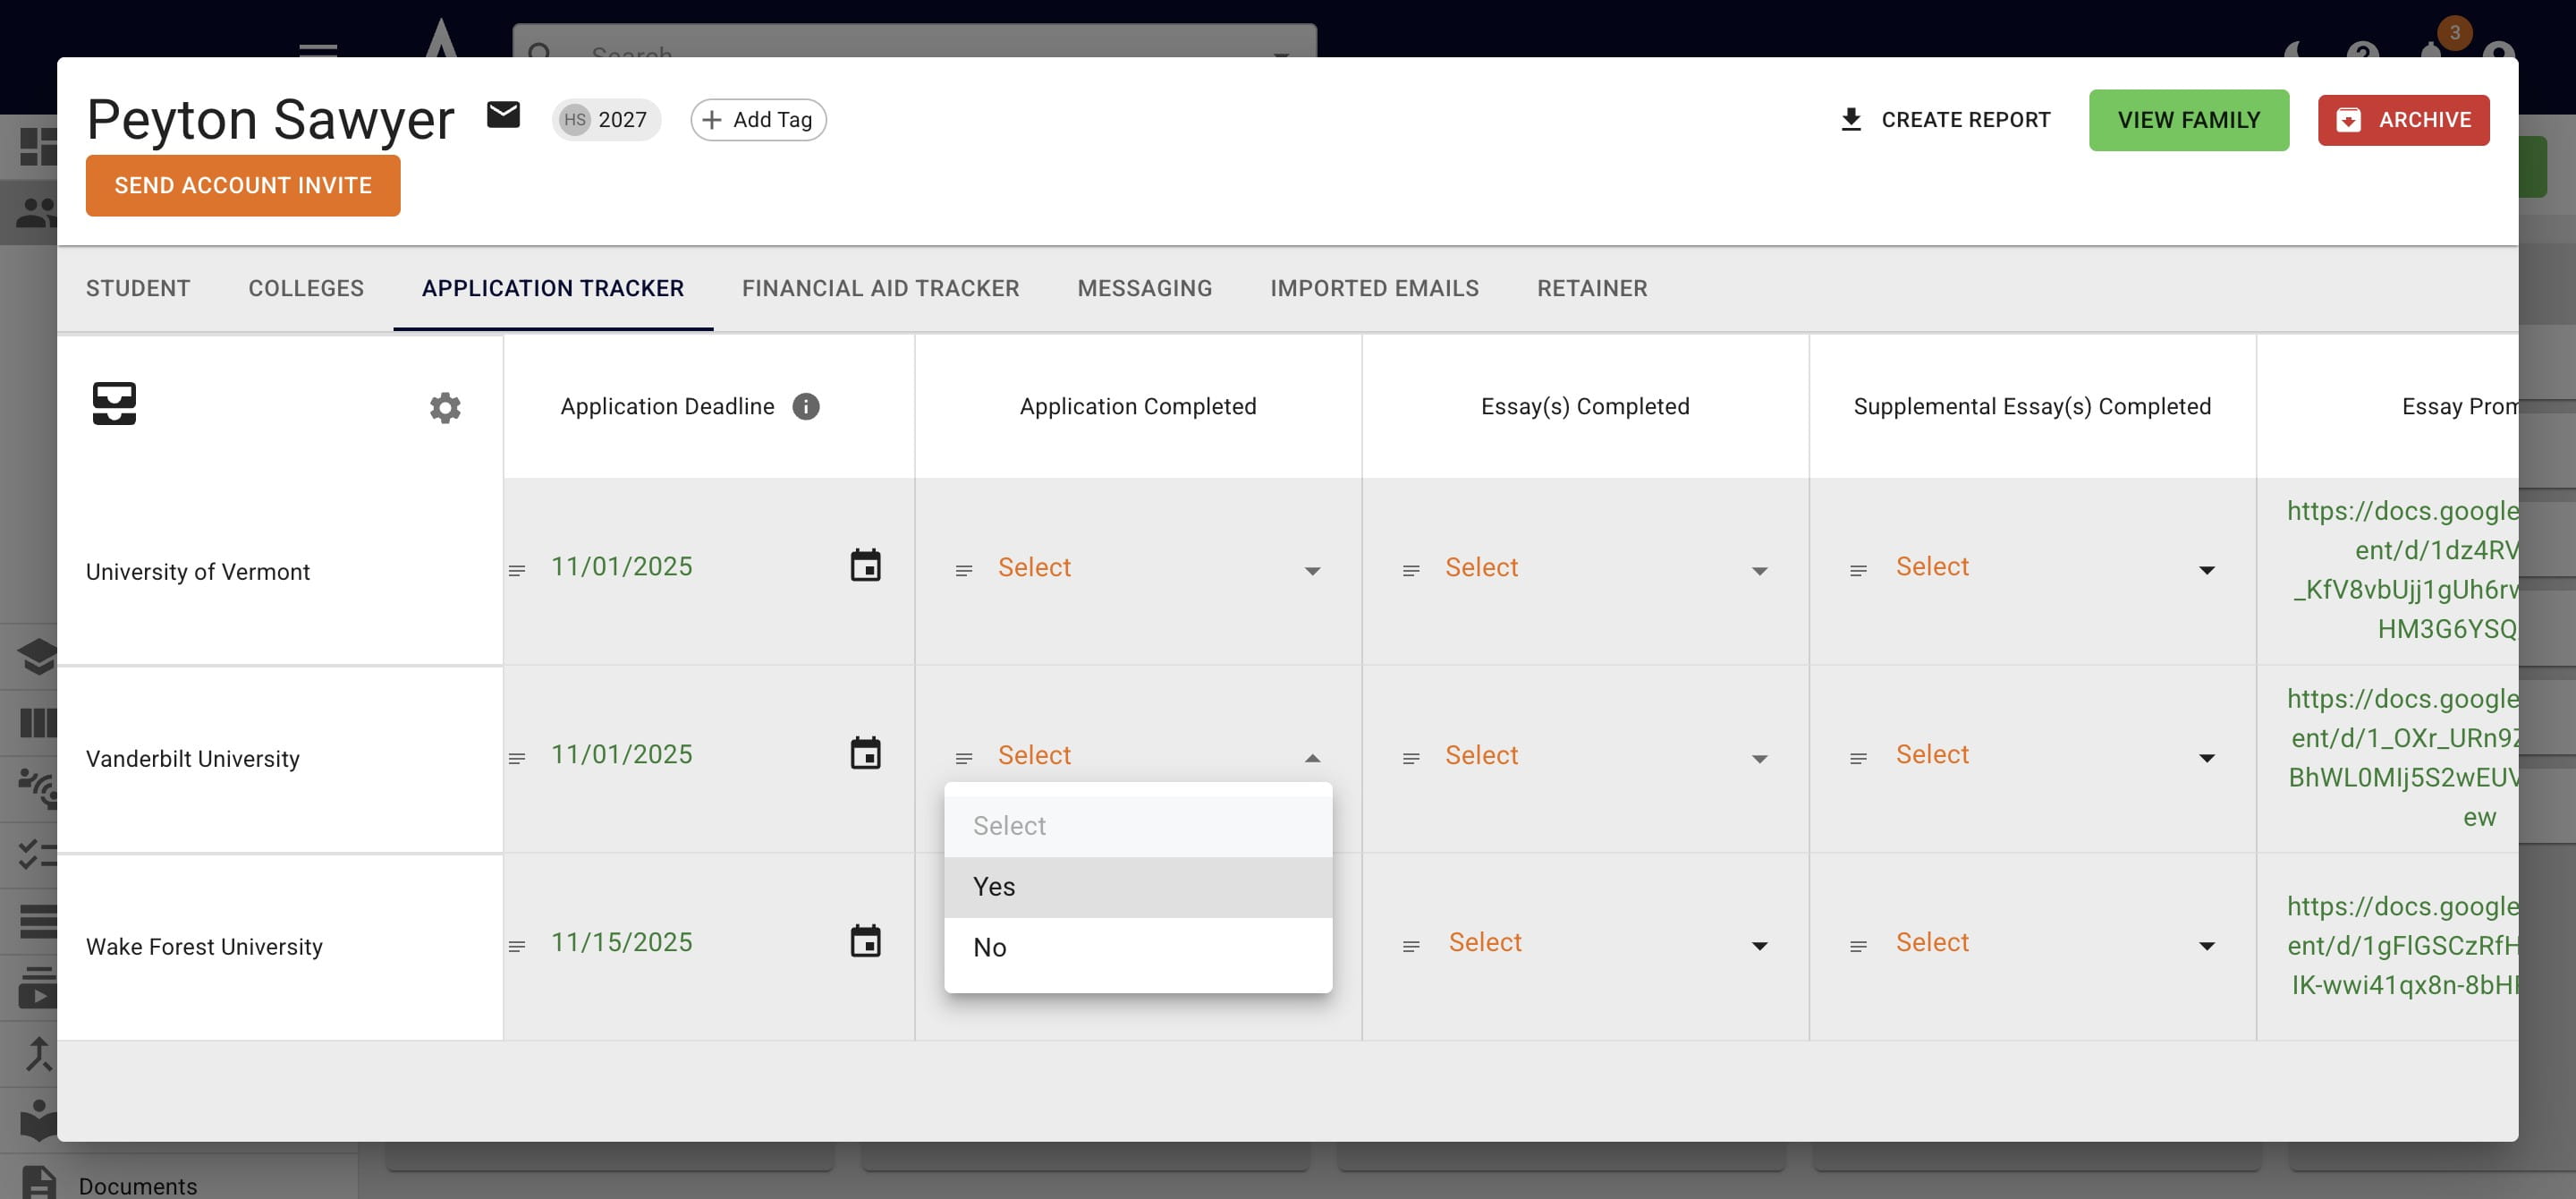
If you say Yes for Application Completed, a task will appear to ensure the student reviews & submits that application.
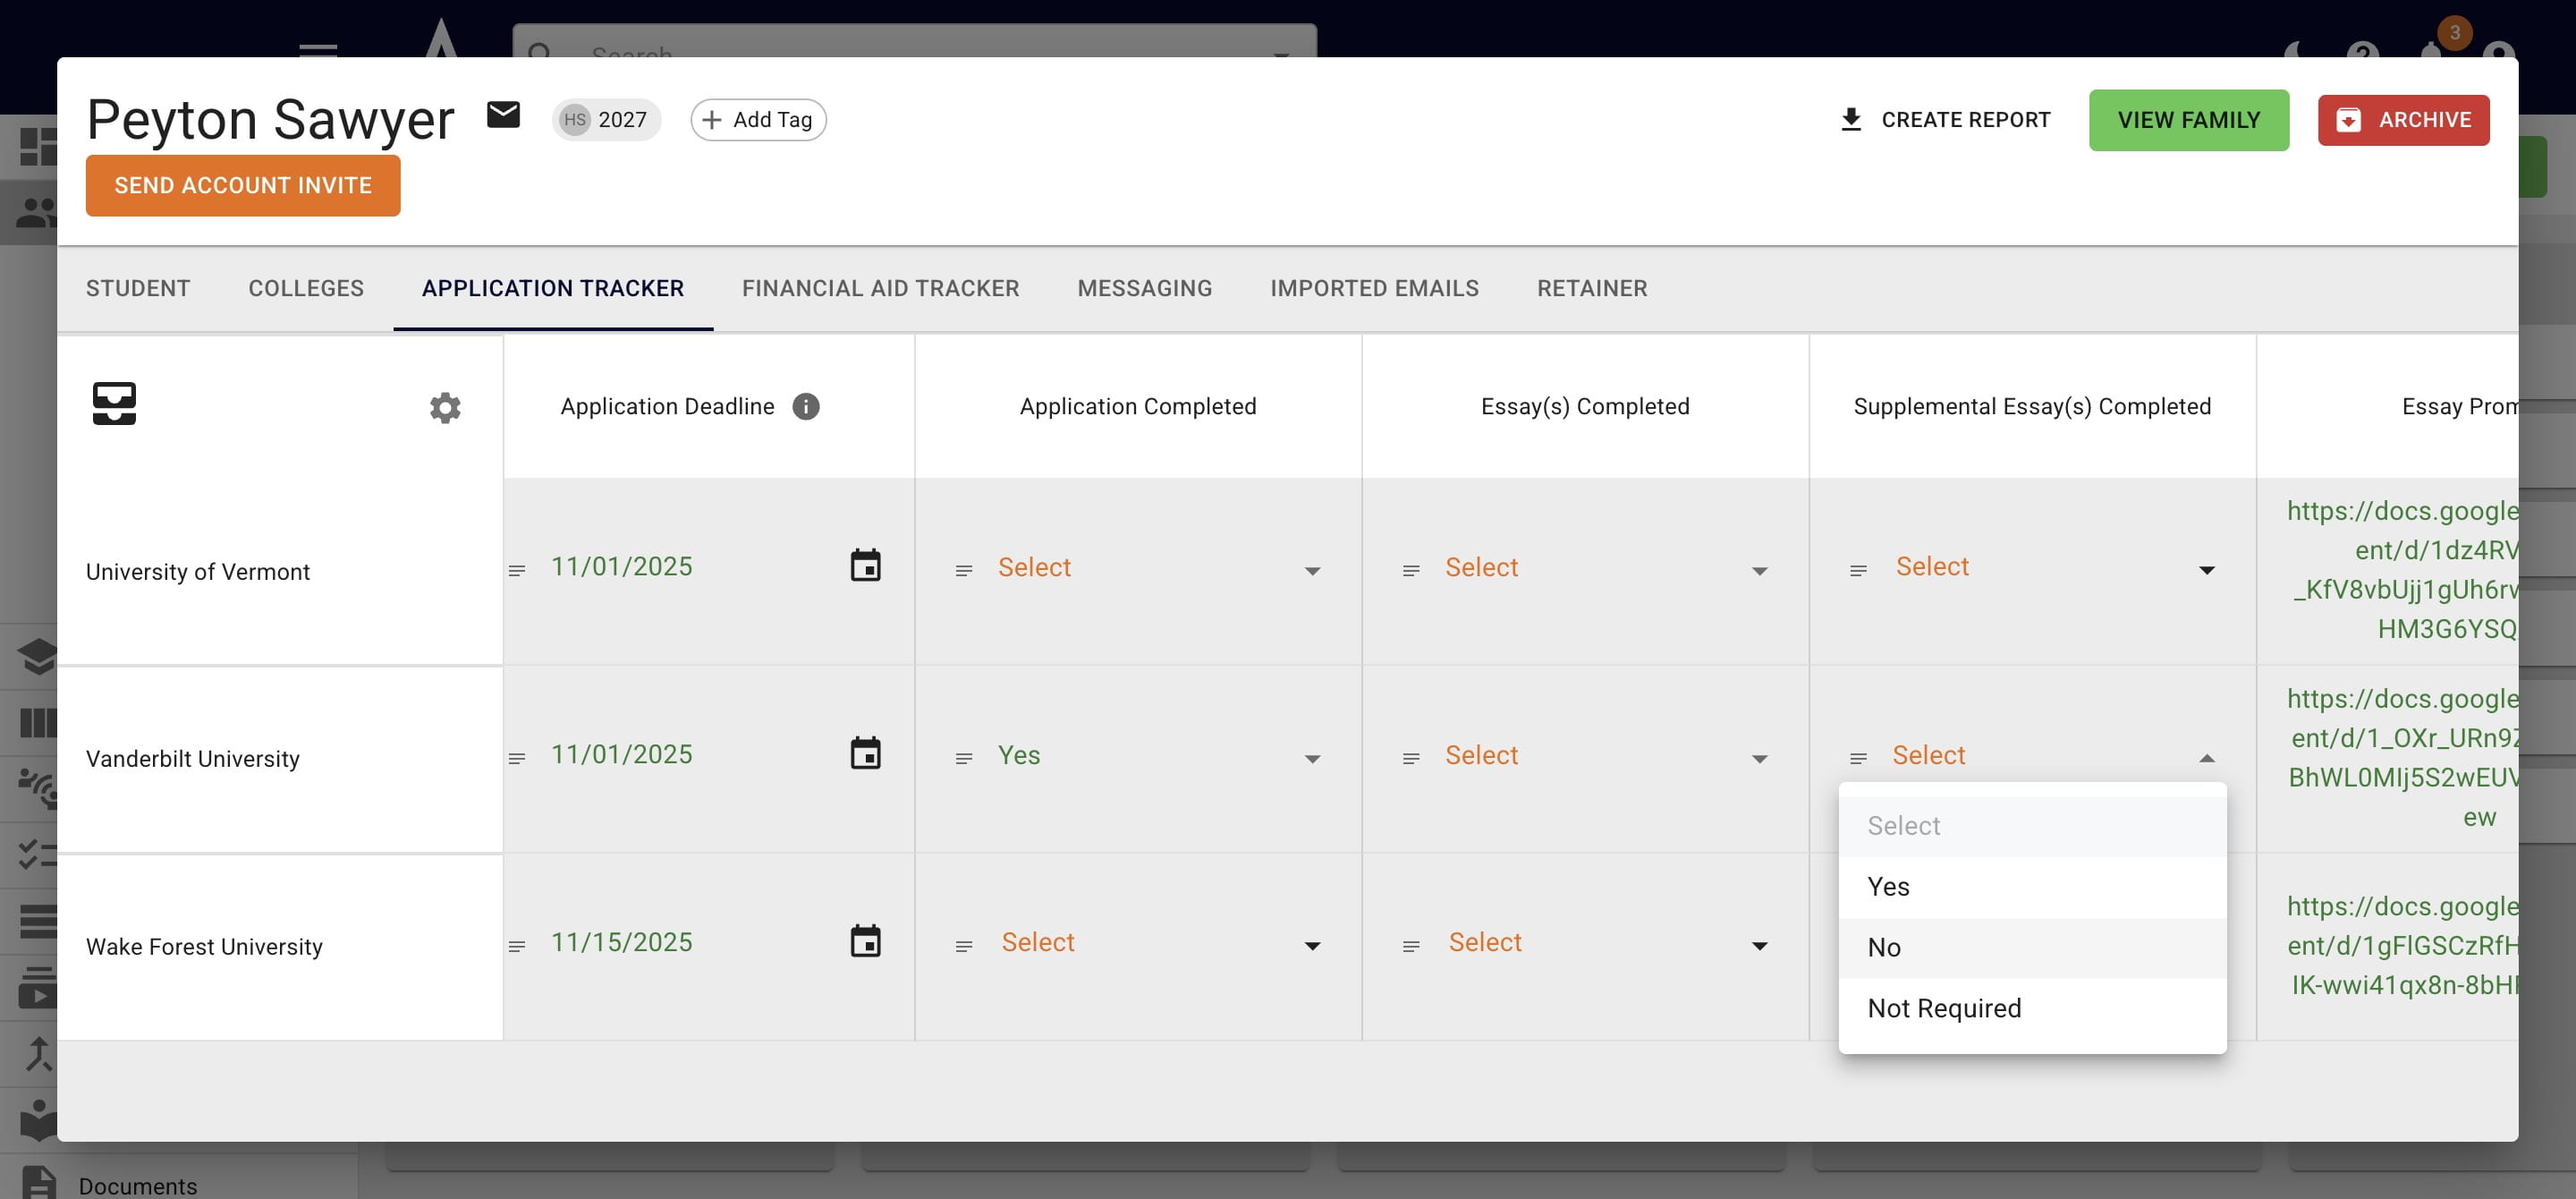
Similarly, if you say No for Supplemental Essay(s) Completed, a task will appear to have the student work on that essay.
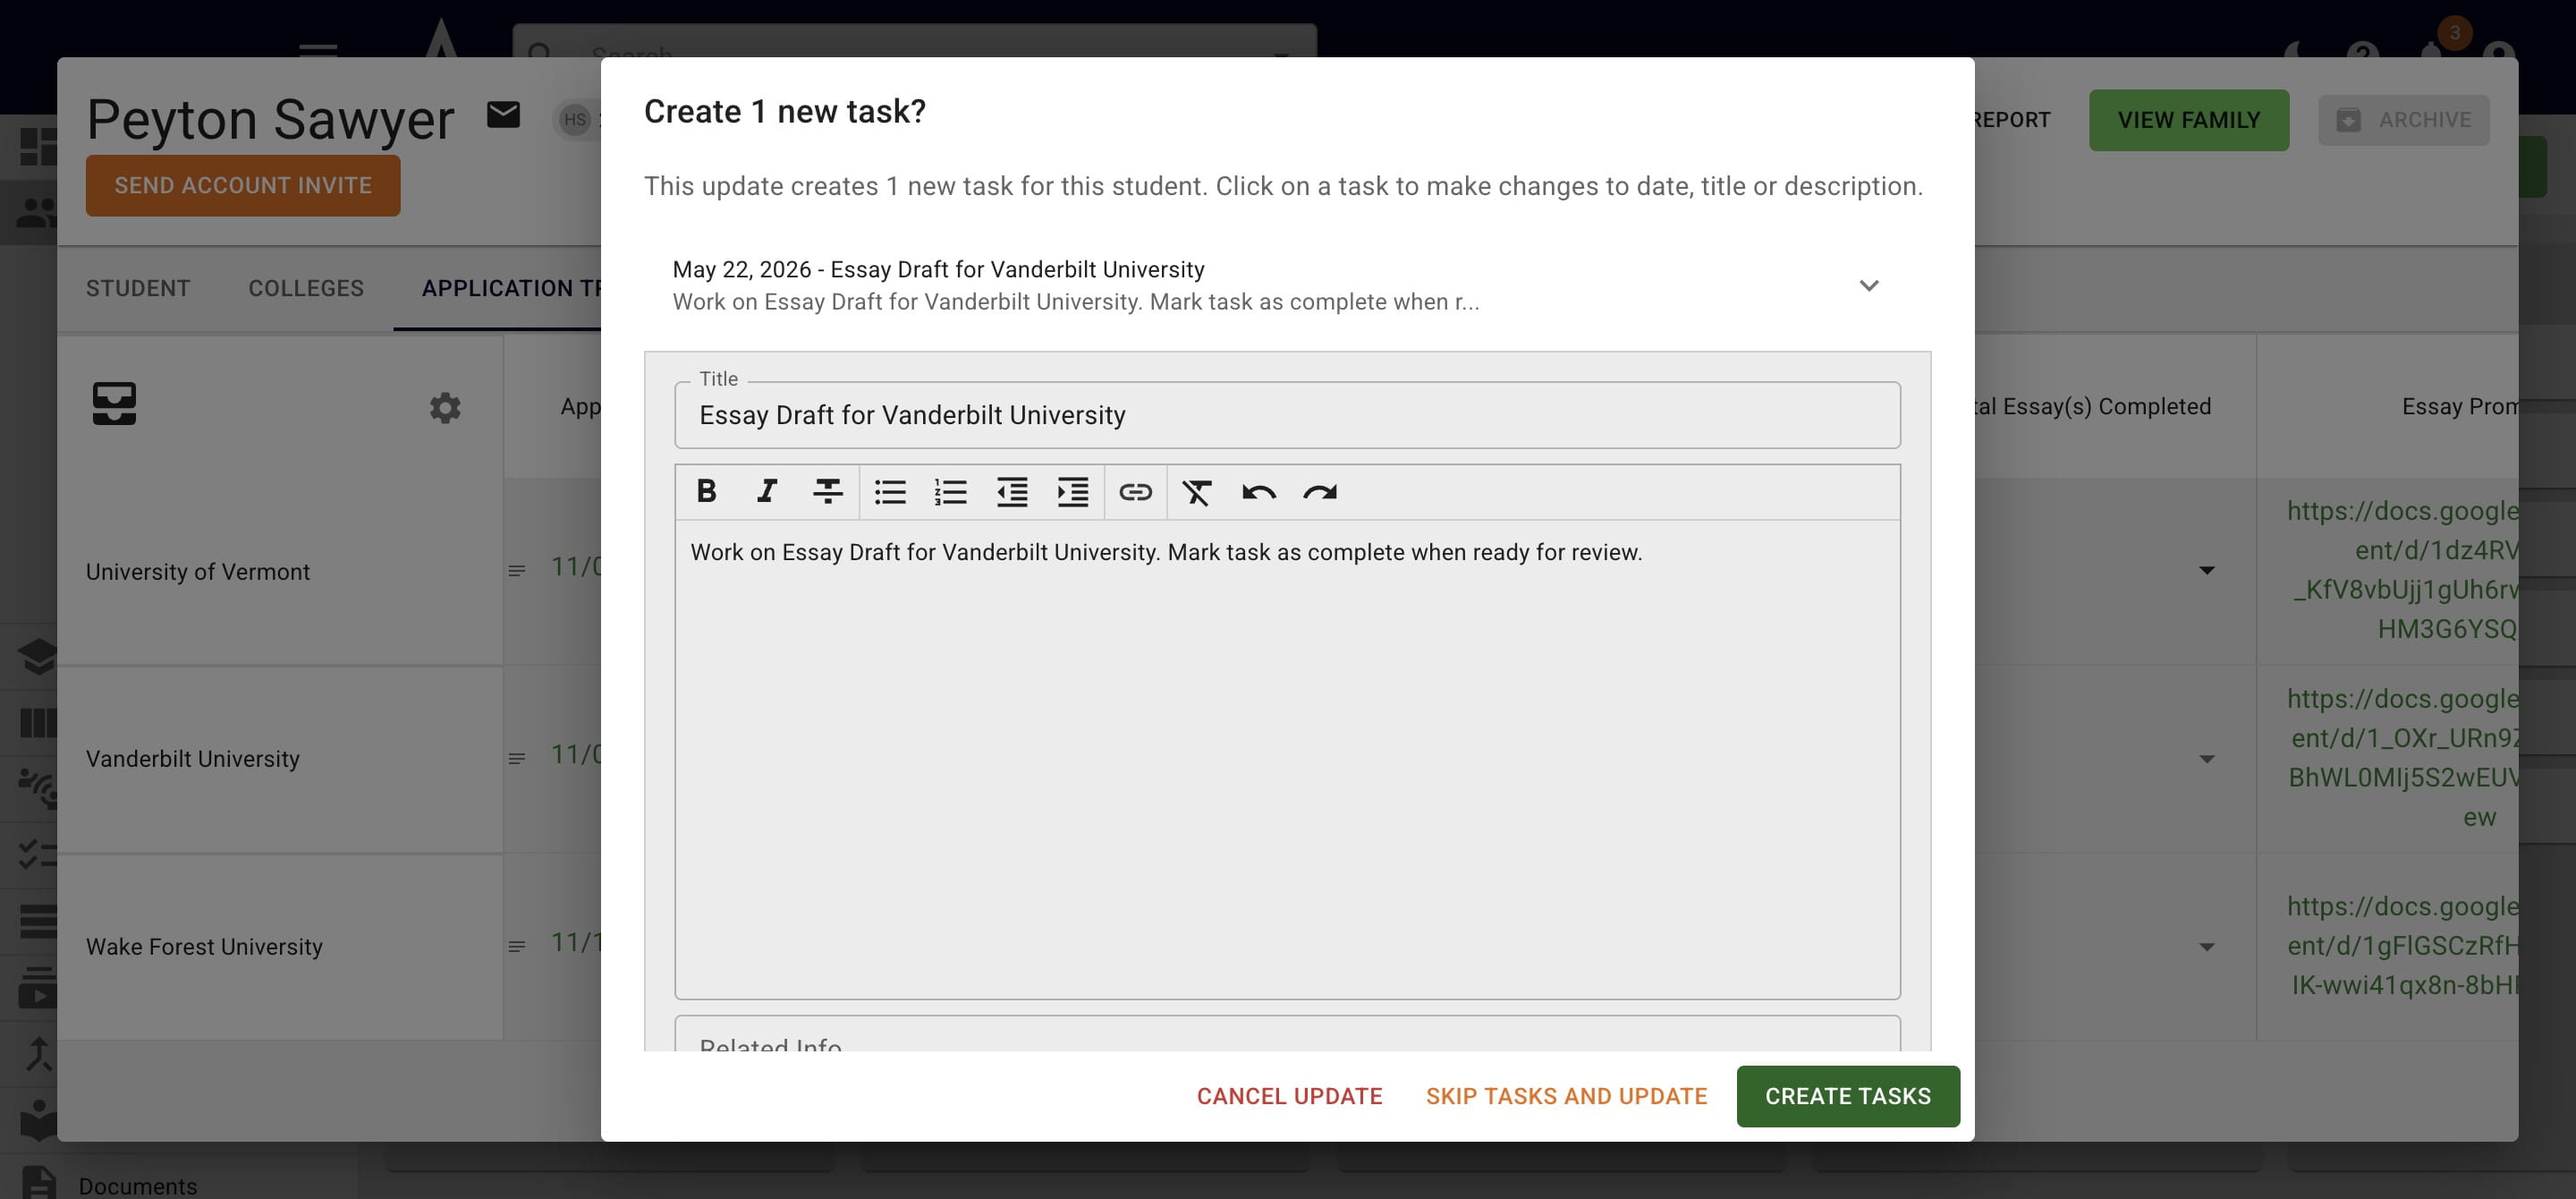
For both of these tasks, you edit the wording as needed and choose to either create the task or skip assigning it.
To customize the columns that appear in the app tracker, press on the Gear icon. Then (un)check the boxes to change which default columns appear.
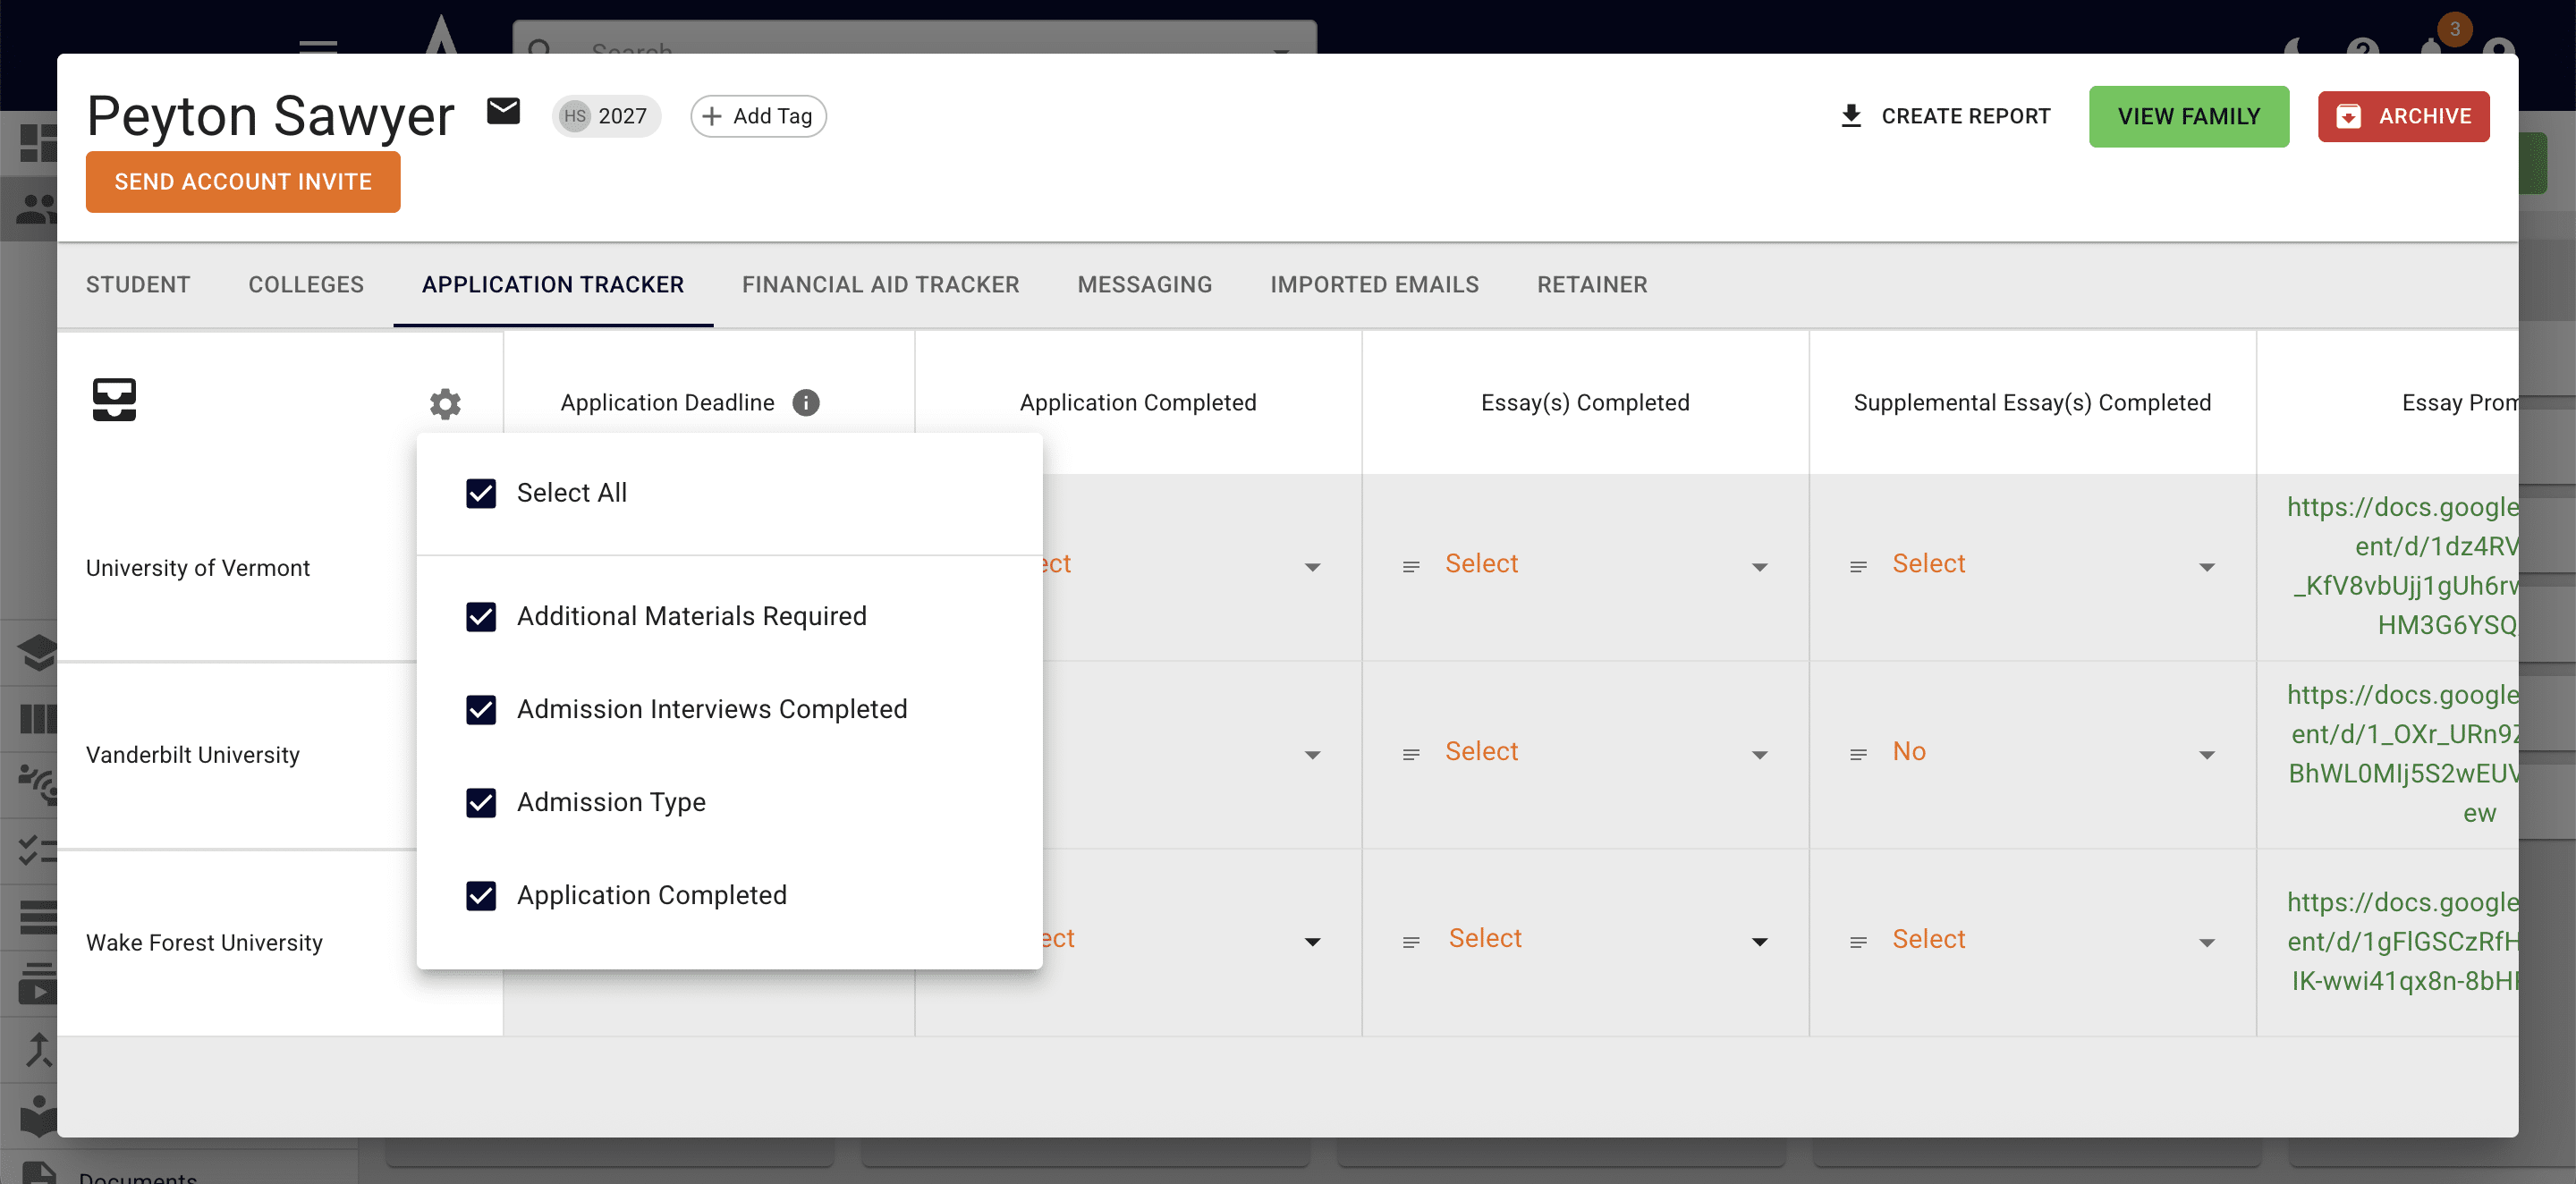
At the very end of the list, you'll see a Custom Columns option. Click on that to add your own columns to the app tracker.
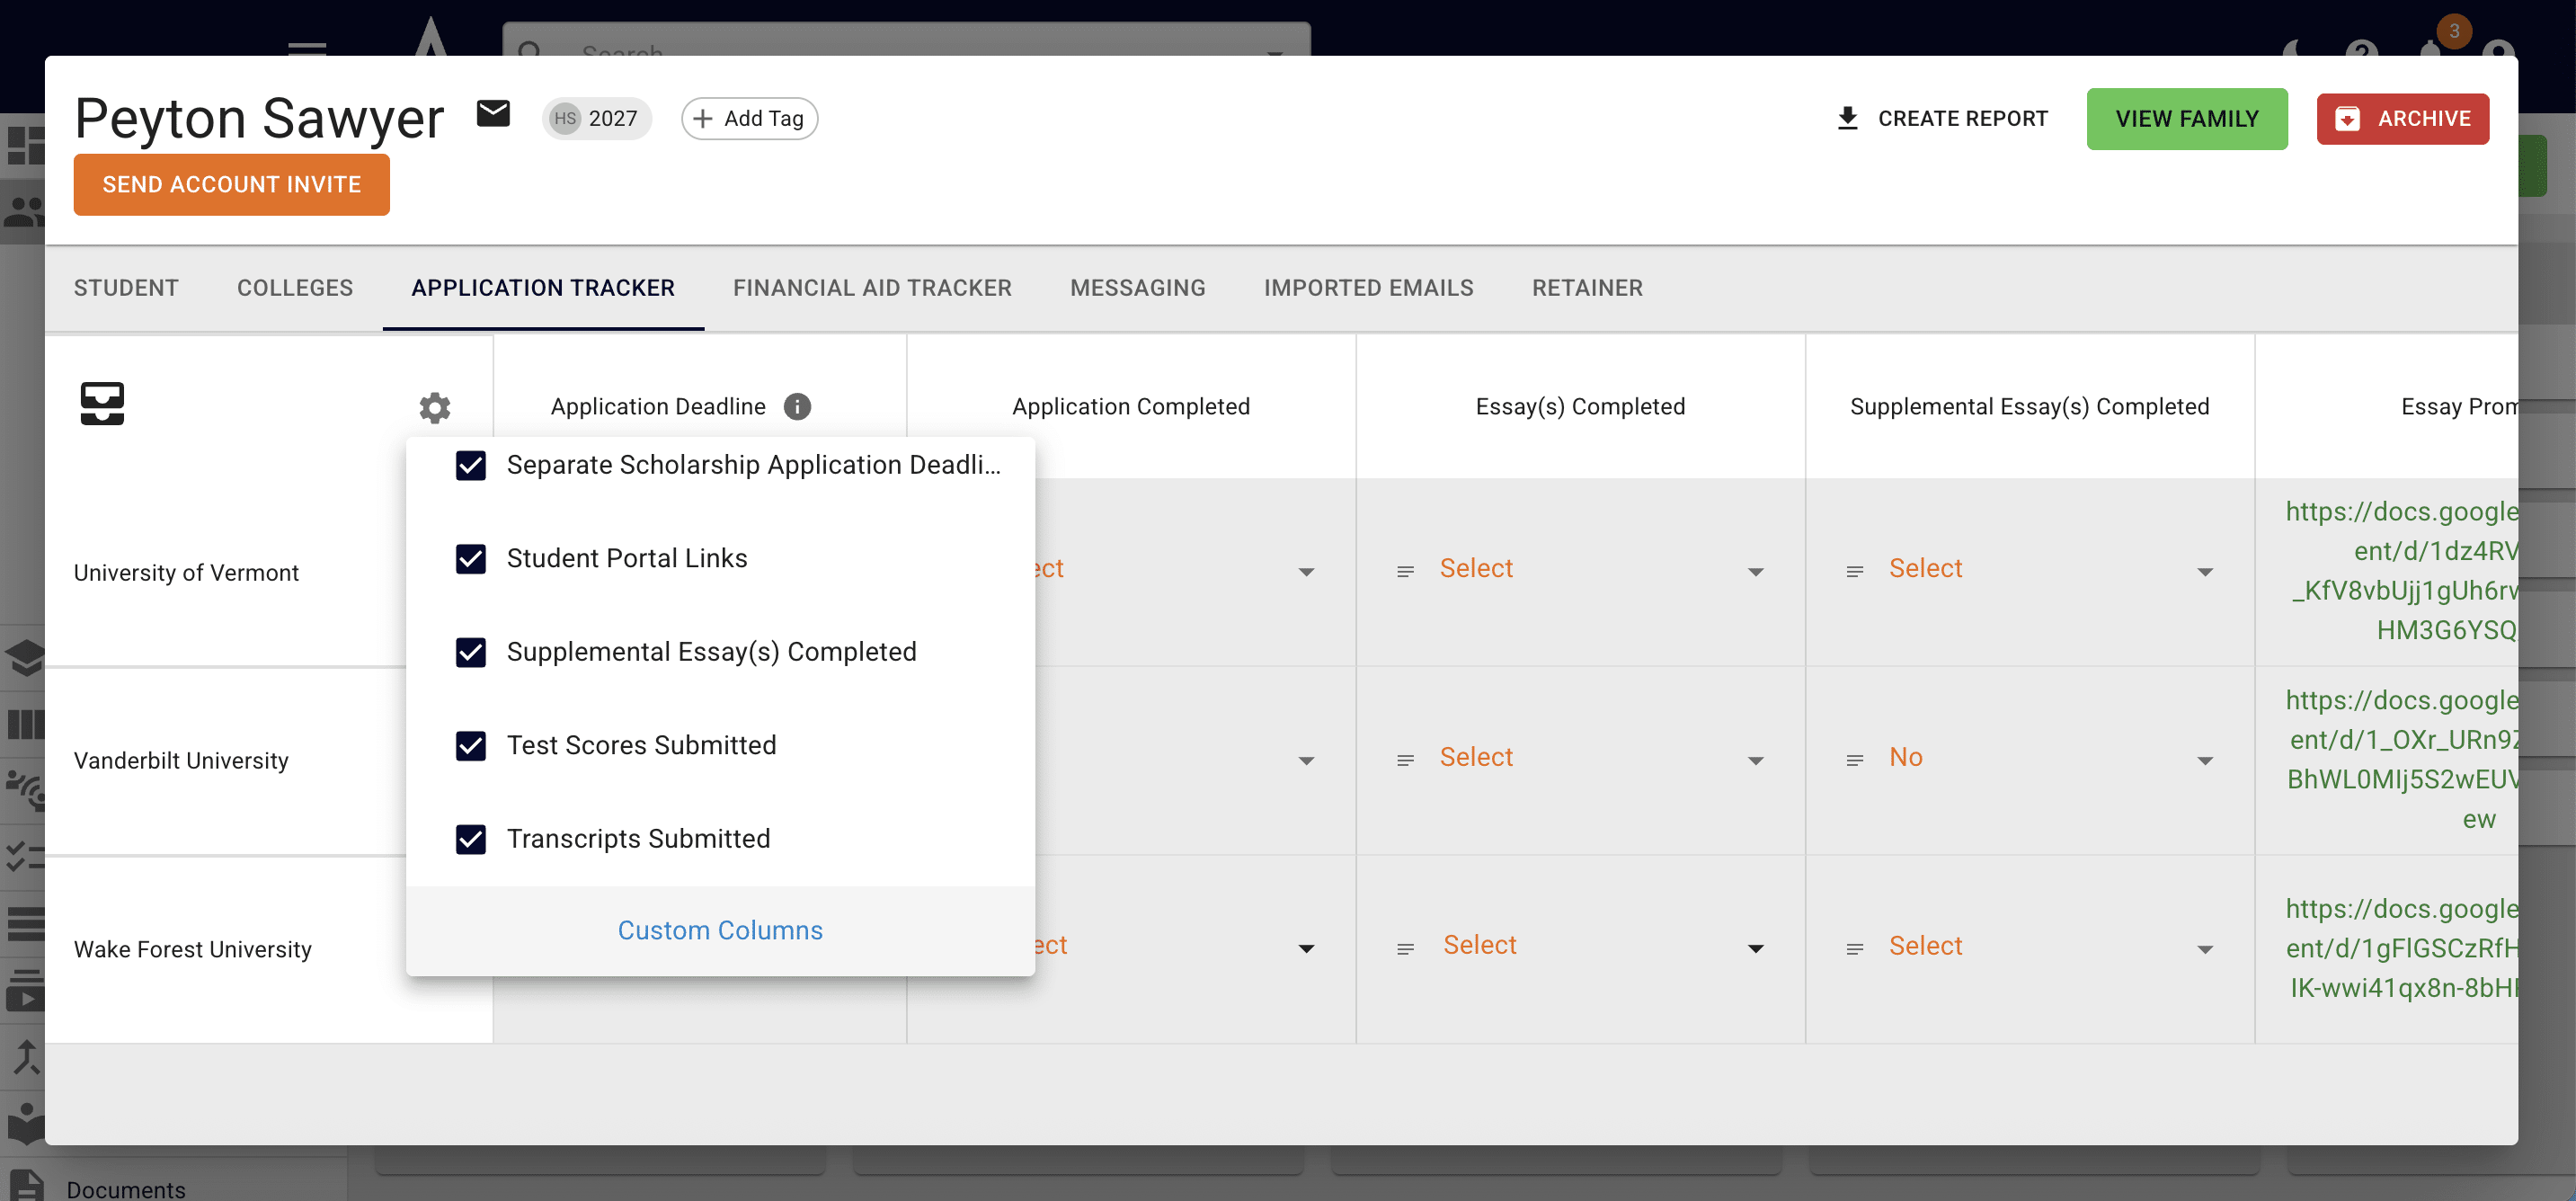
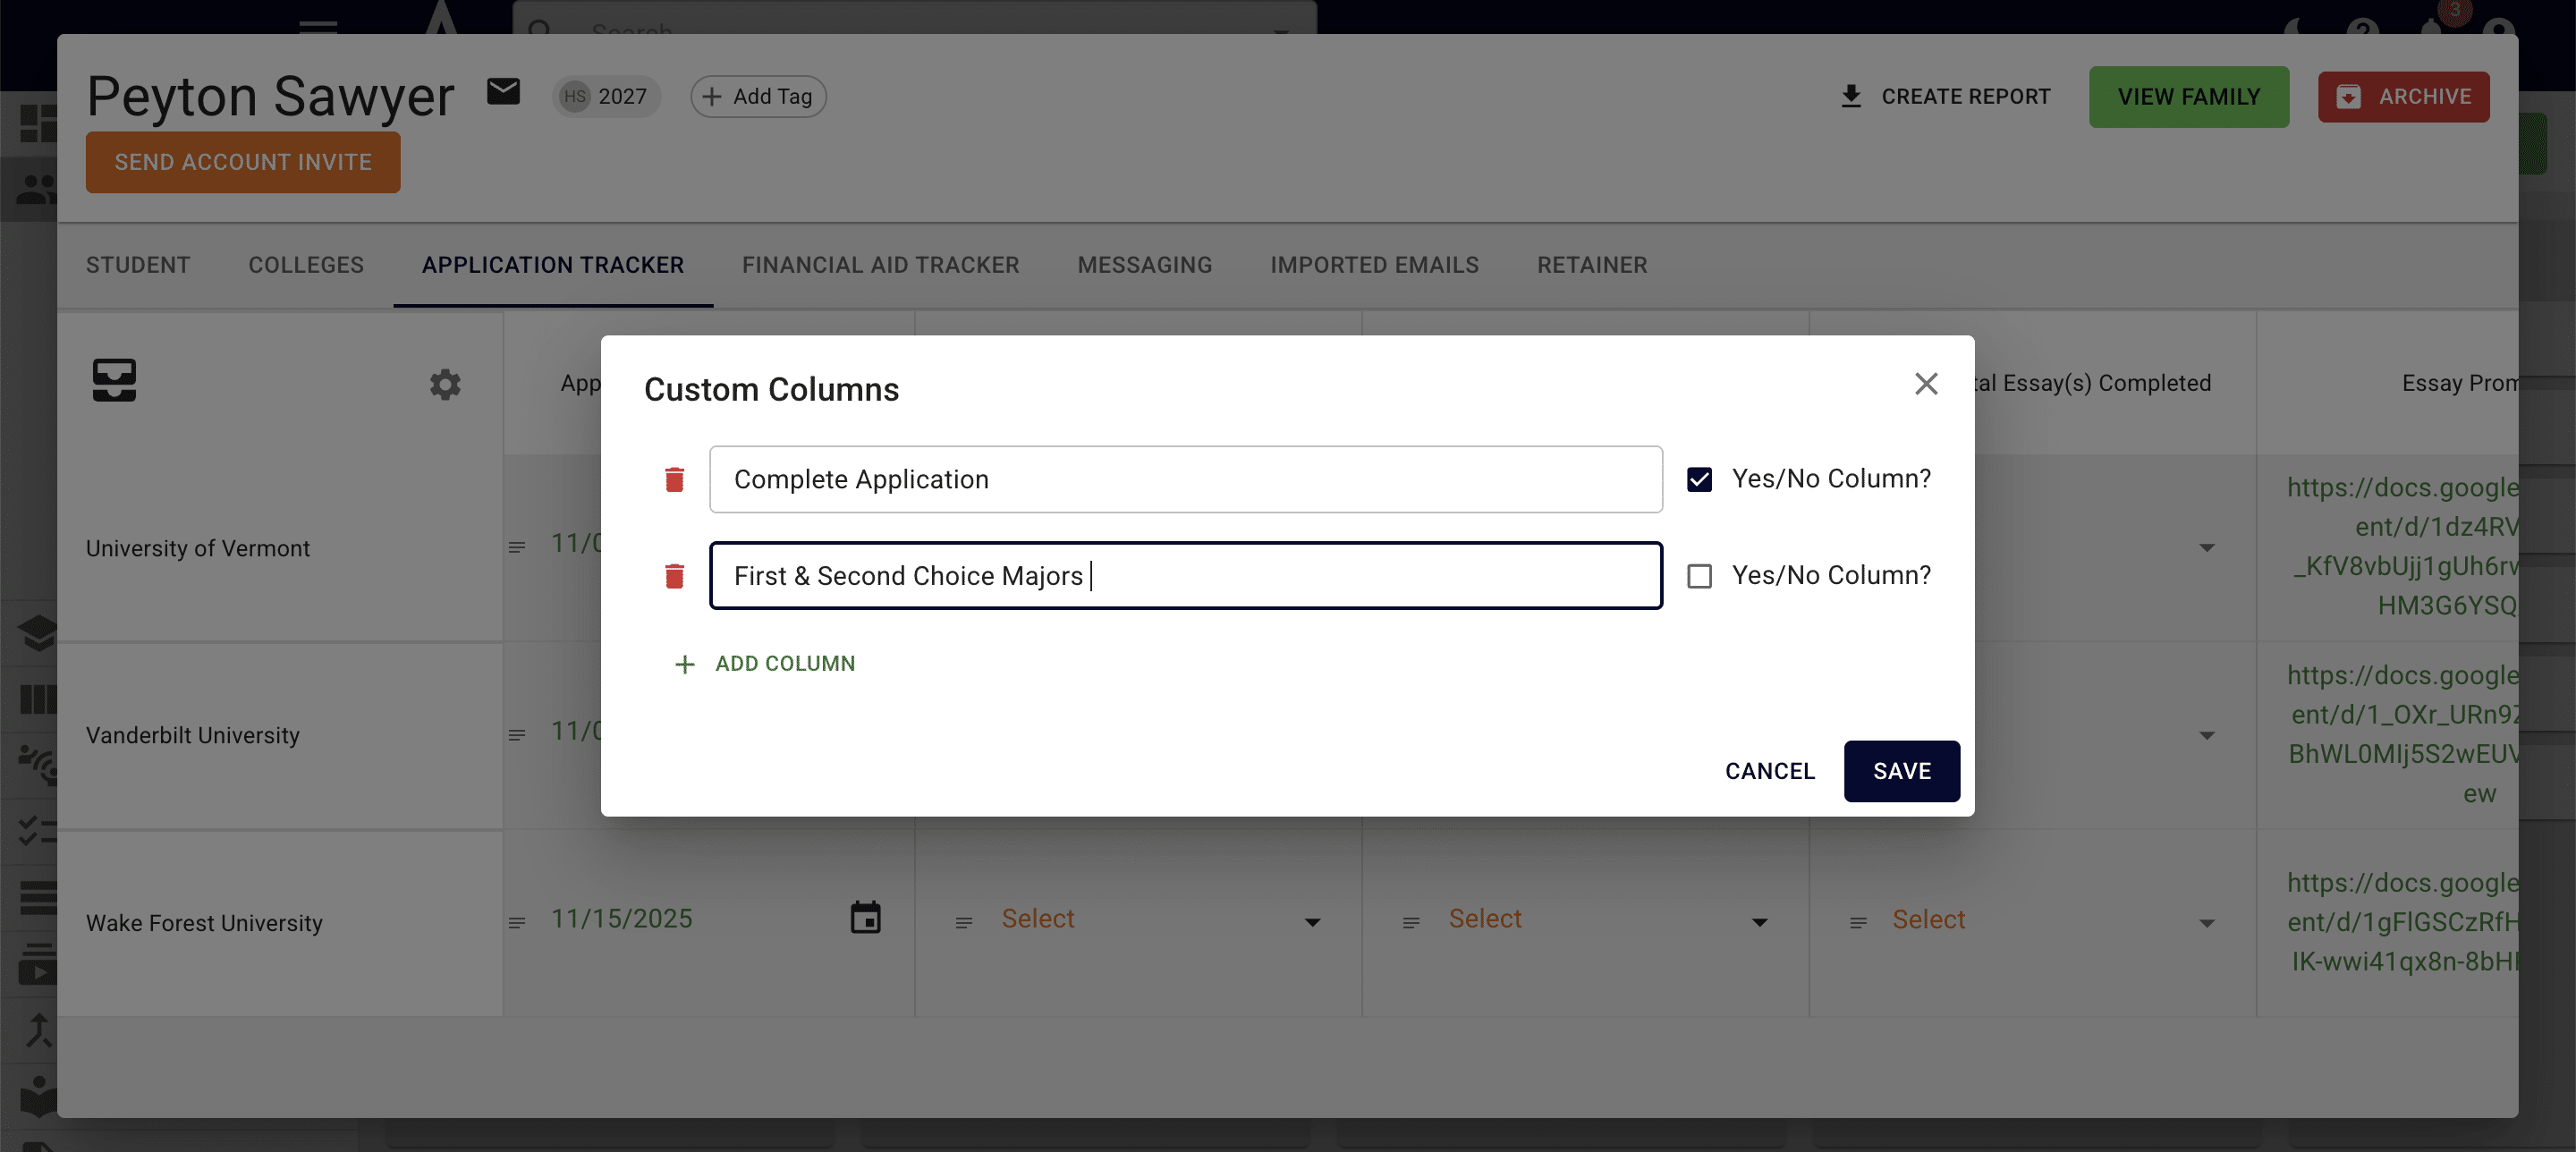
A pop up will appear that allows you to add as many columns as you'd like. For each column, you'll choose if you want it to be a Yes/No drop down or open text field. Press Save when you're done adding columns.
New columns automatically get added to the very end of the application tracker. Drag and drop the columns to get them in your preferred order.
Done 🚀