
Creating One-Time Payments
This guide explains how to create and manage one-time payments in Achieve.
Did you know we can automate the entire invoice process? Ask your CSM for more details!
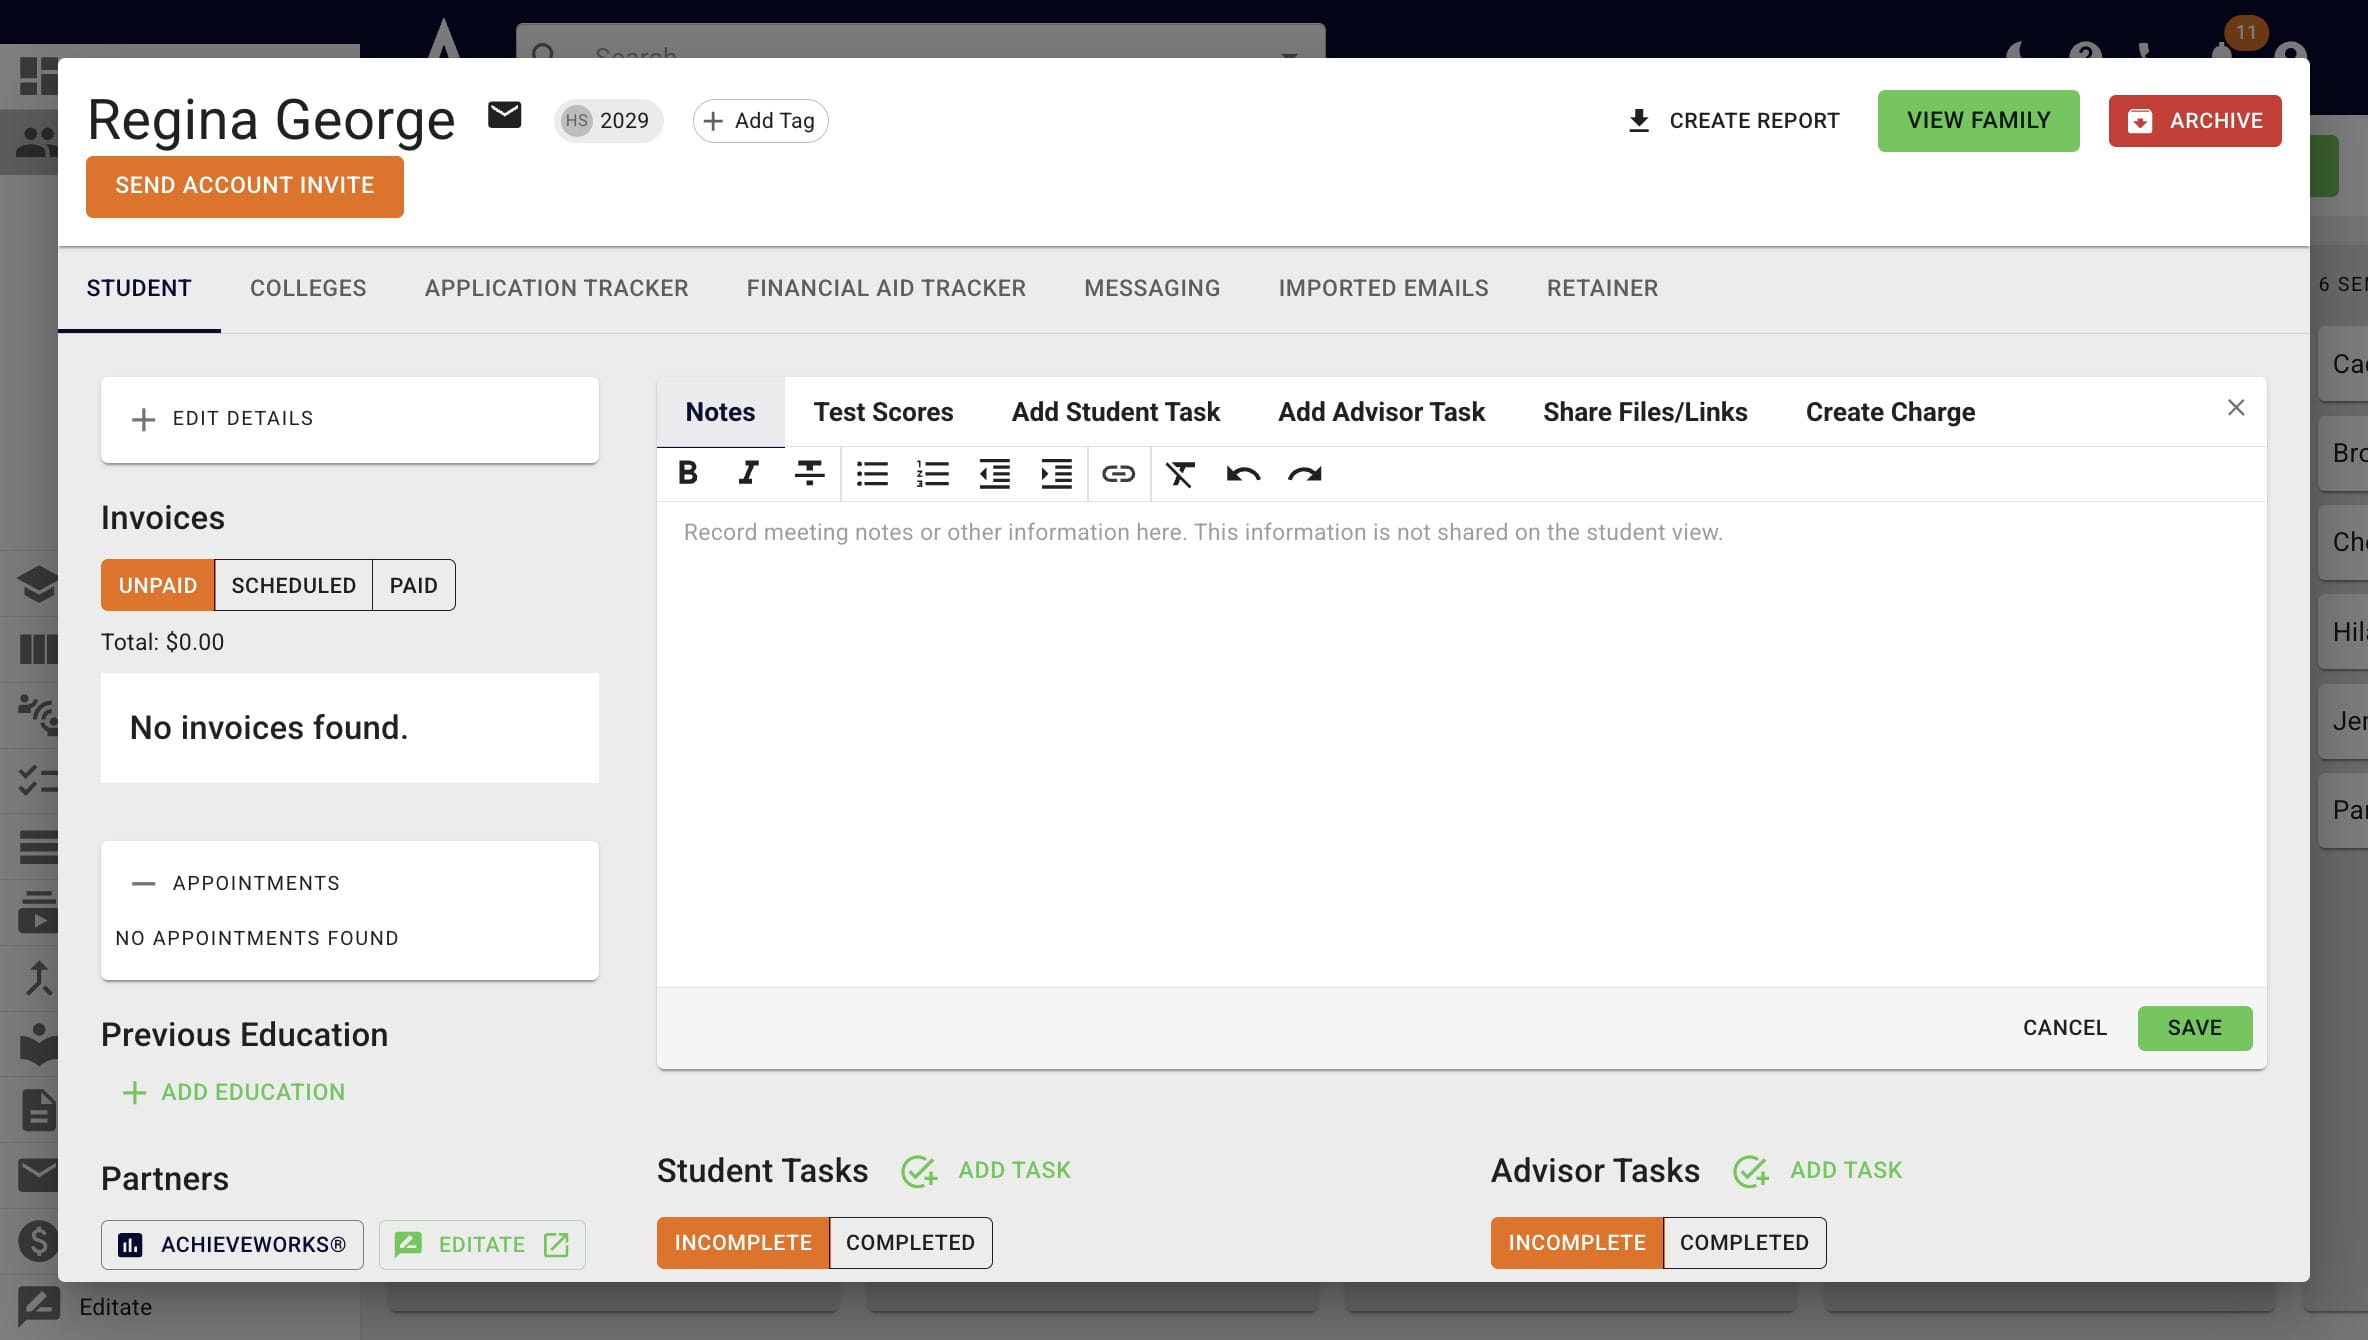
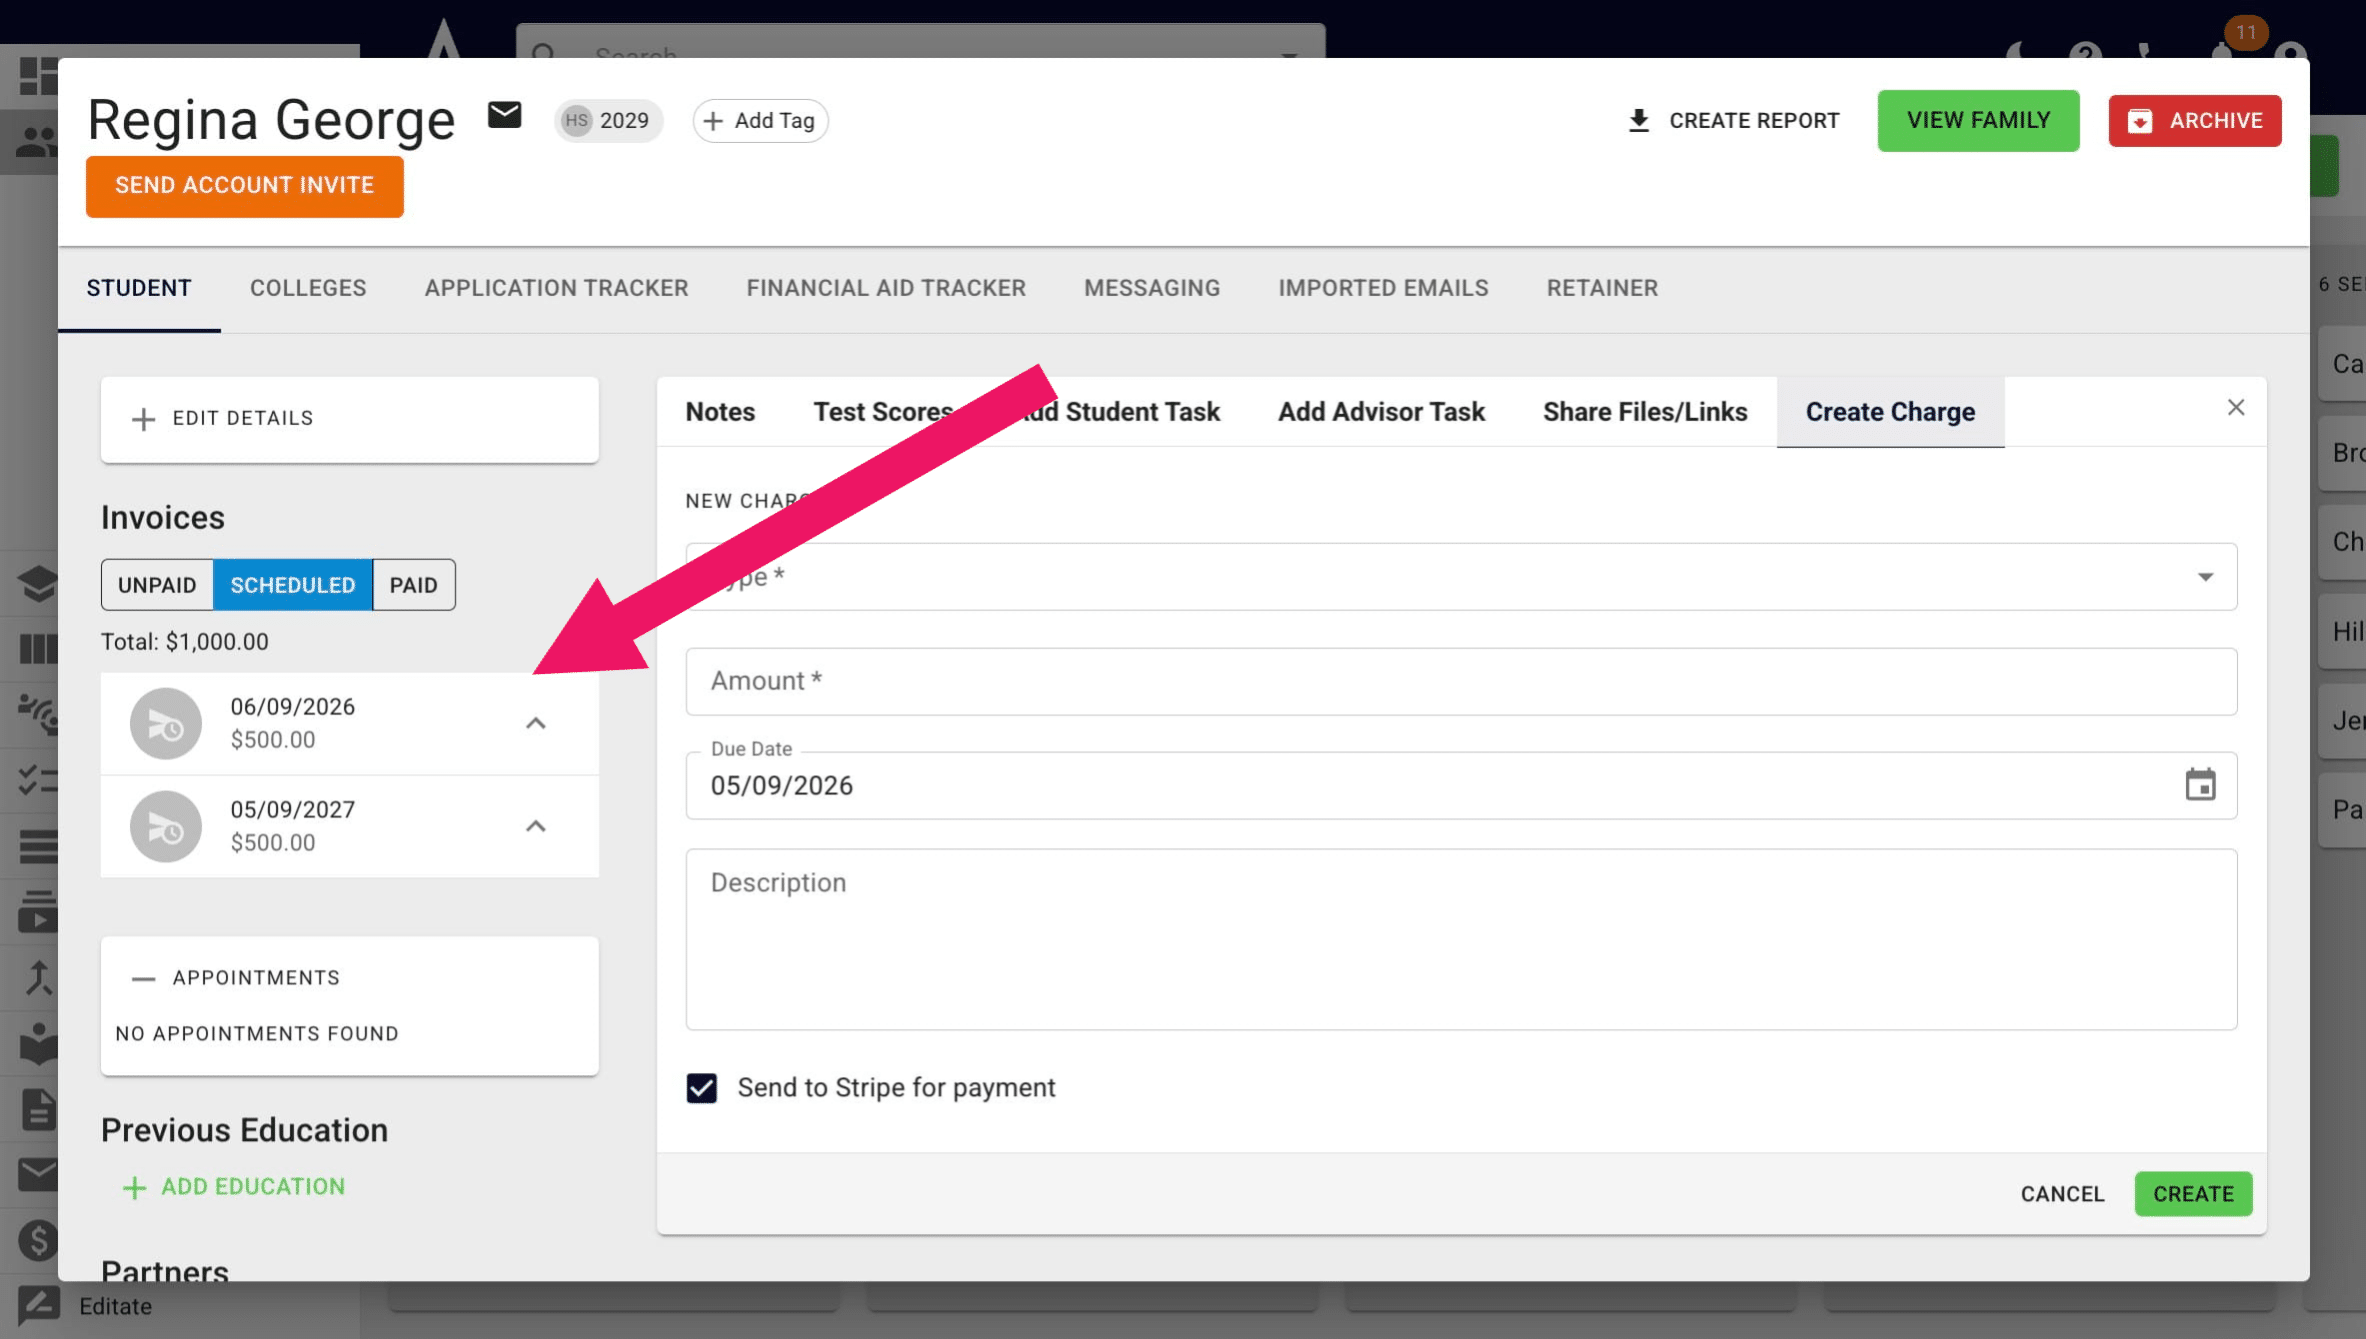
Within a student's Achieve profile, click on Create Charge.
Within the Type drop-down, click One Time.
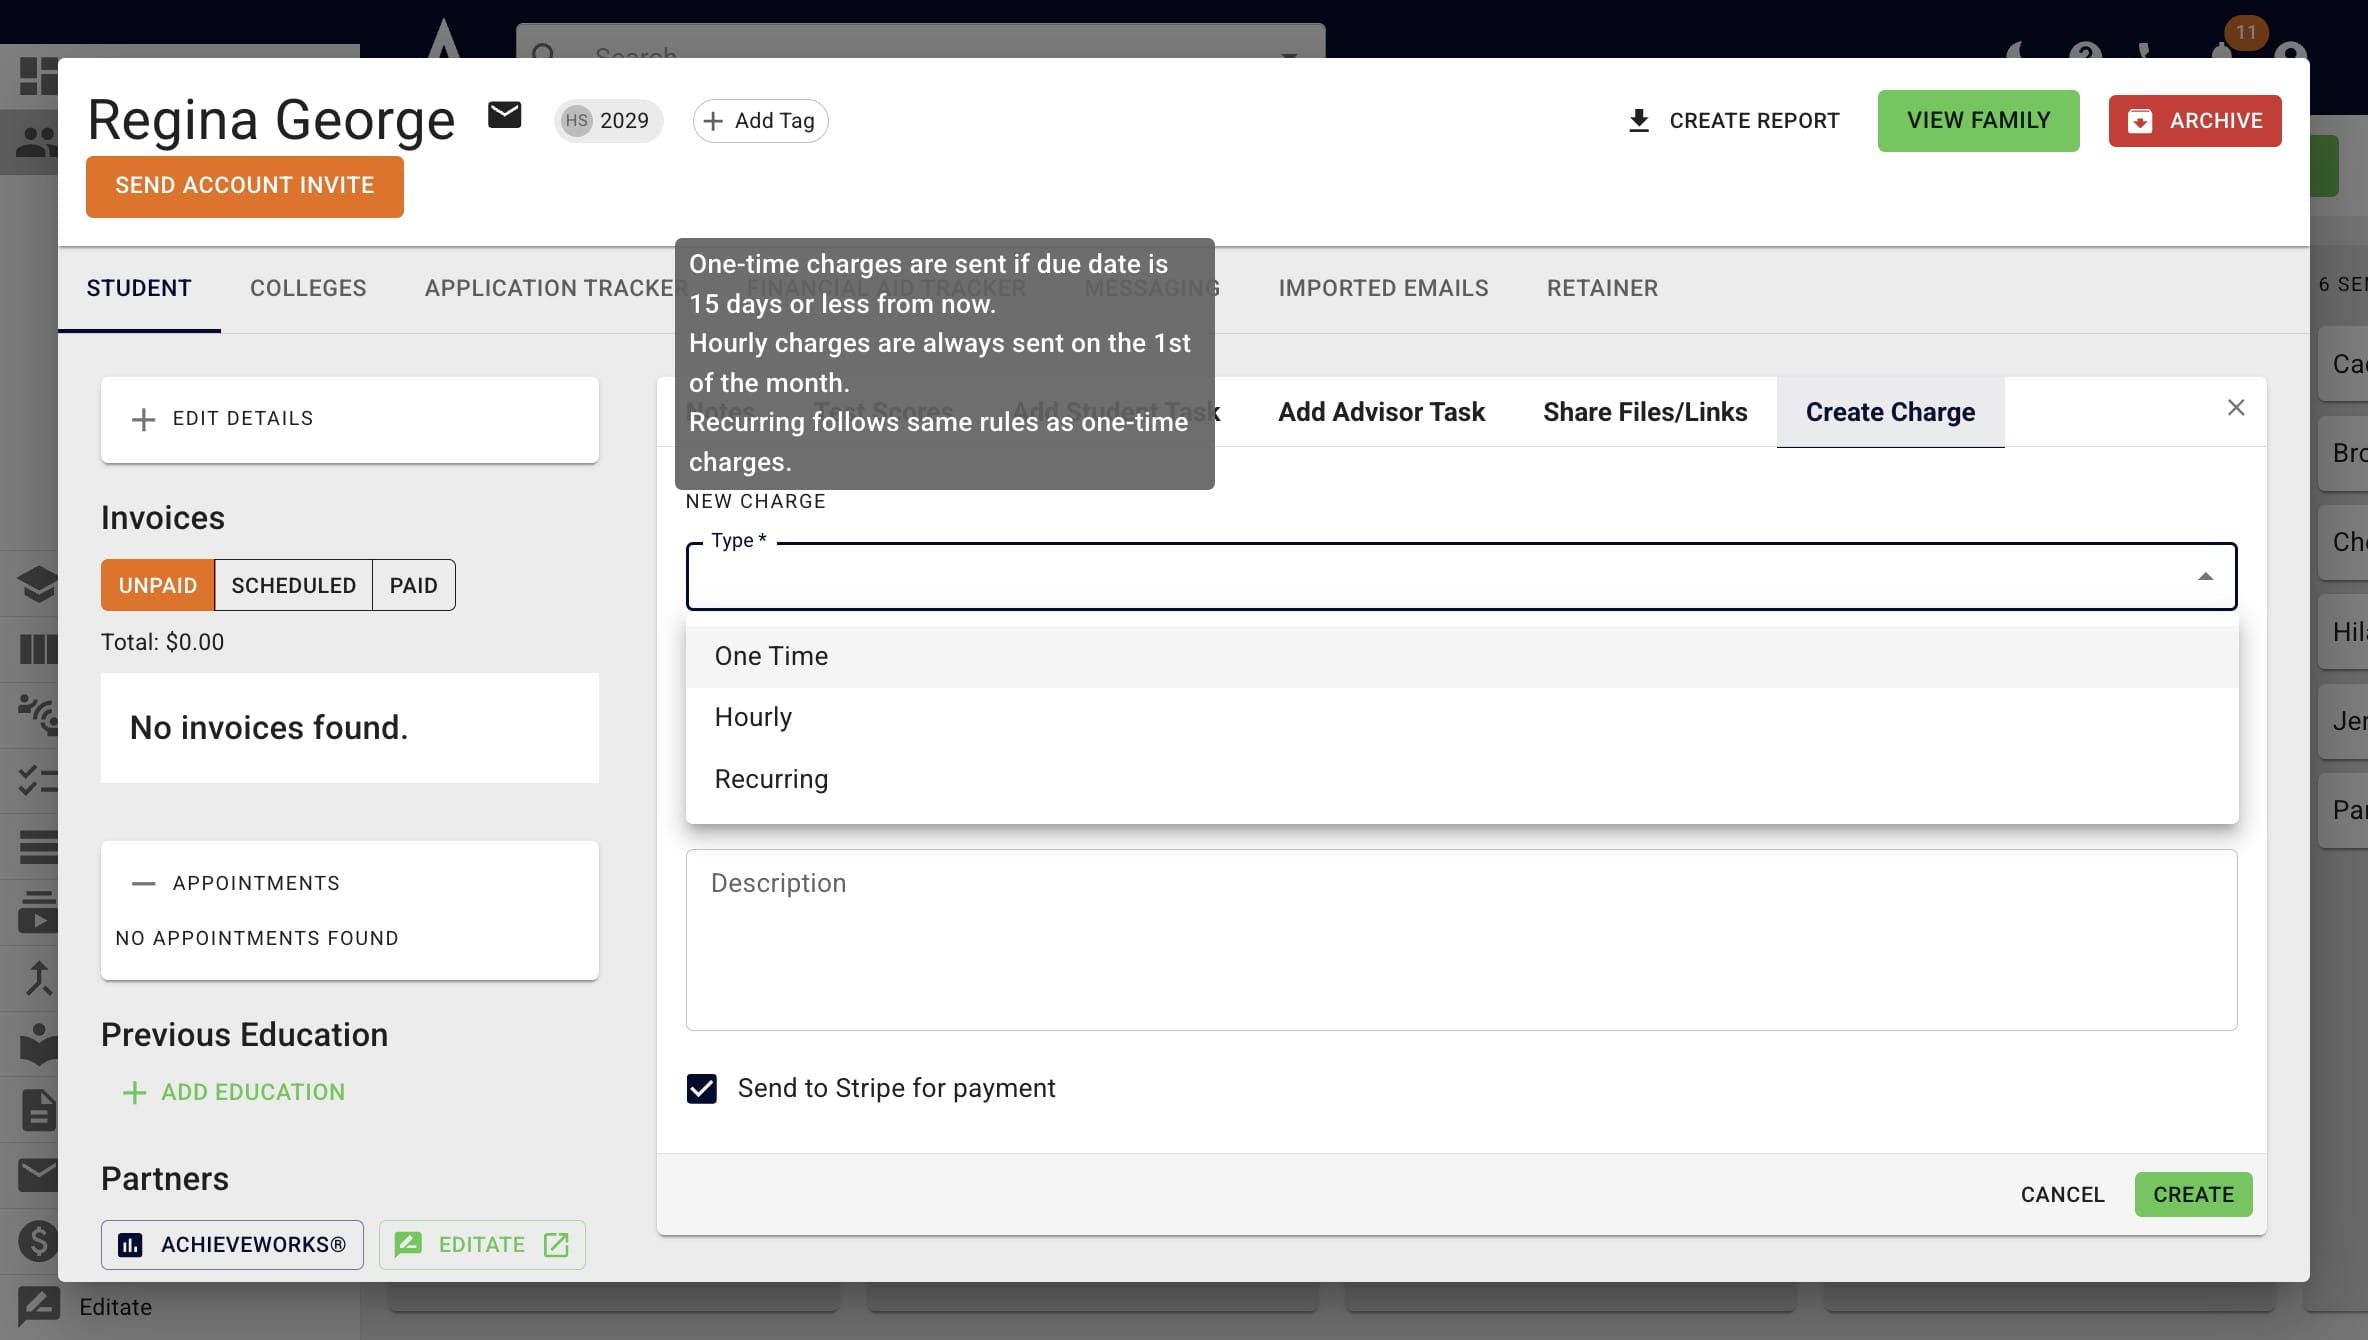
While the name may imply otherwise, you can have as many one-time payments scheduled as you like!
Put down when the payment is due in the Due Date field. If the due date is due within the next 15 days, you'll see a note saying the invoice will be sent when it's created. If the due date is 16+ days away, the date it will be sent out (i.e. 15 days before the due date) will be listed under the field.
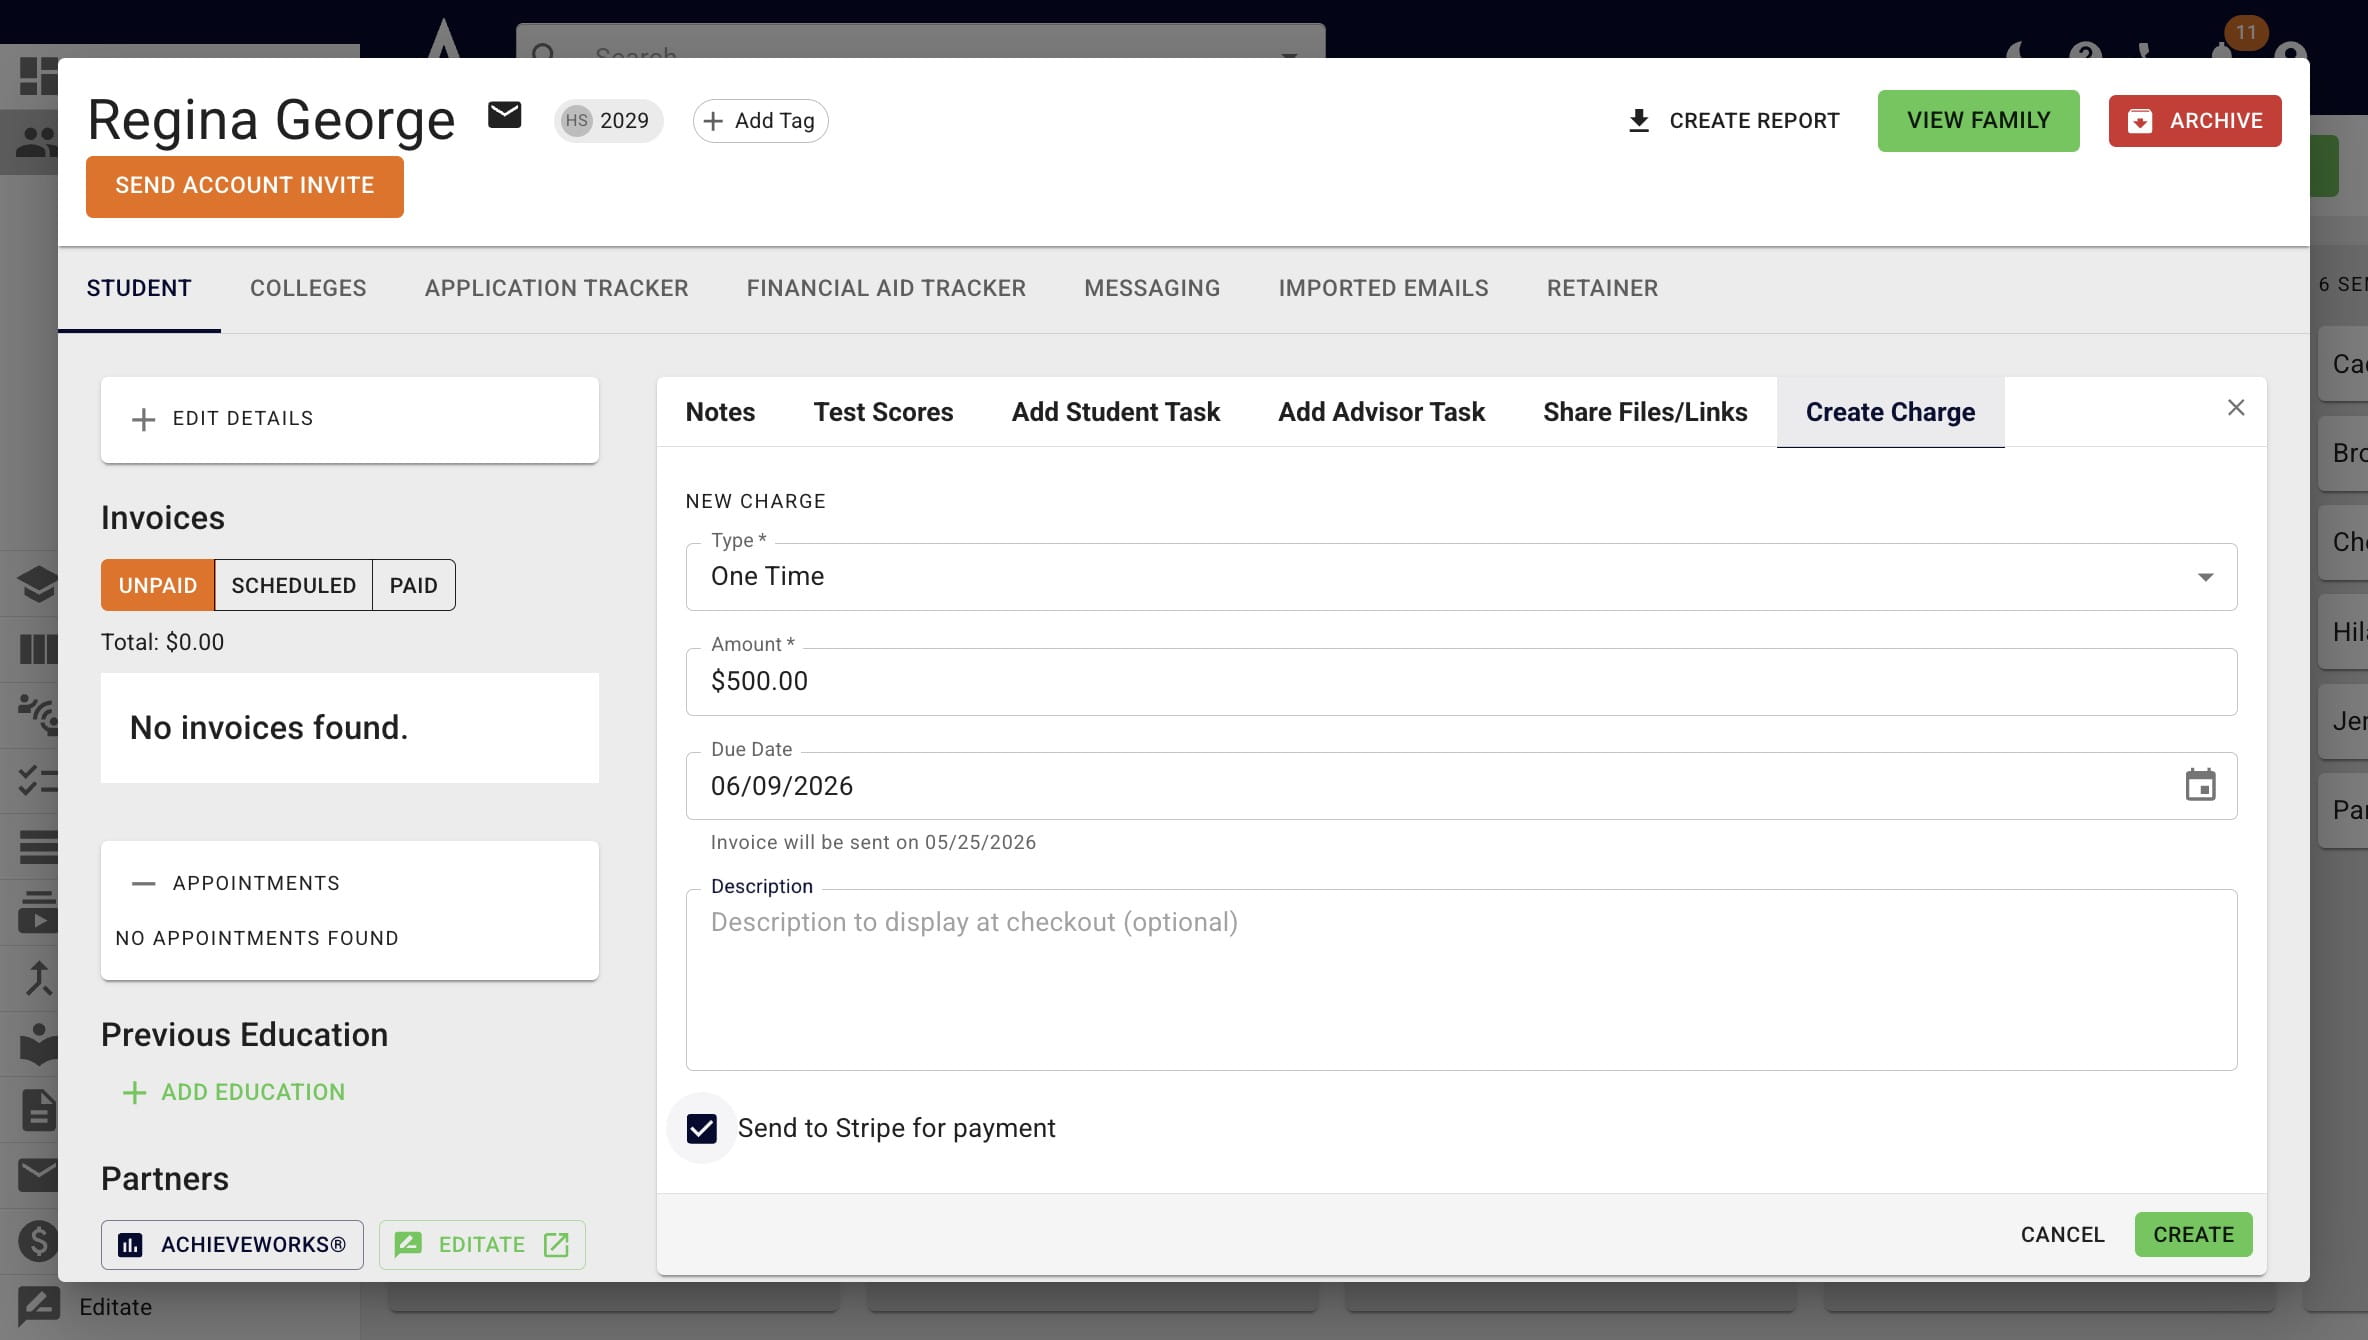
If you have integrated Stripe already, you'll see the Send to Stripe for payment box. It will be checked by default. If the recipient is paying via credit card or ACH, leave that box checked.
If someone is paying via Zelle, check, or similar uncheck the box.
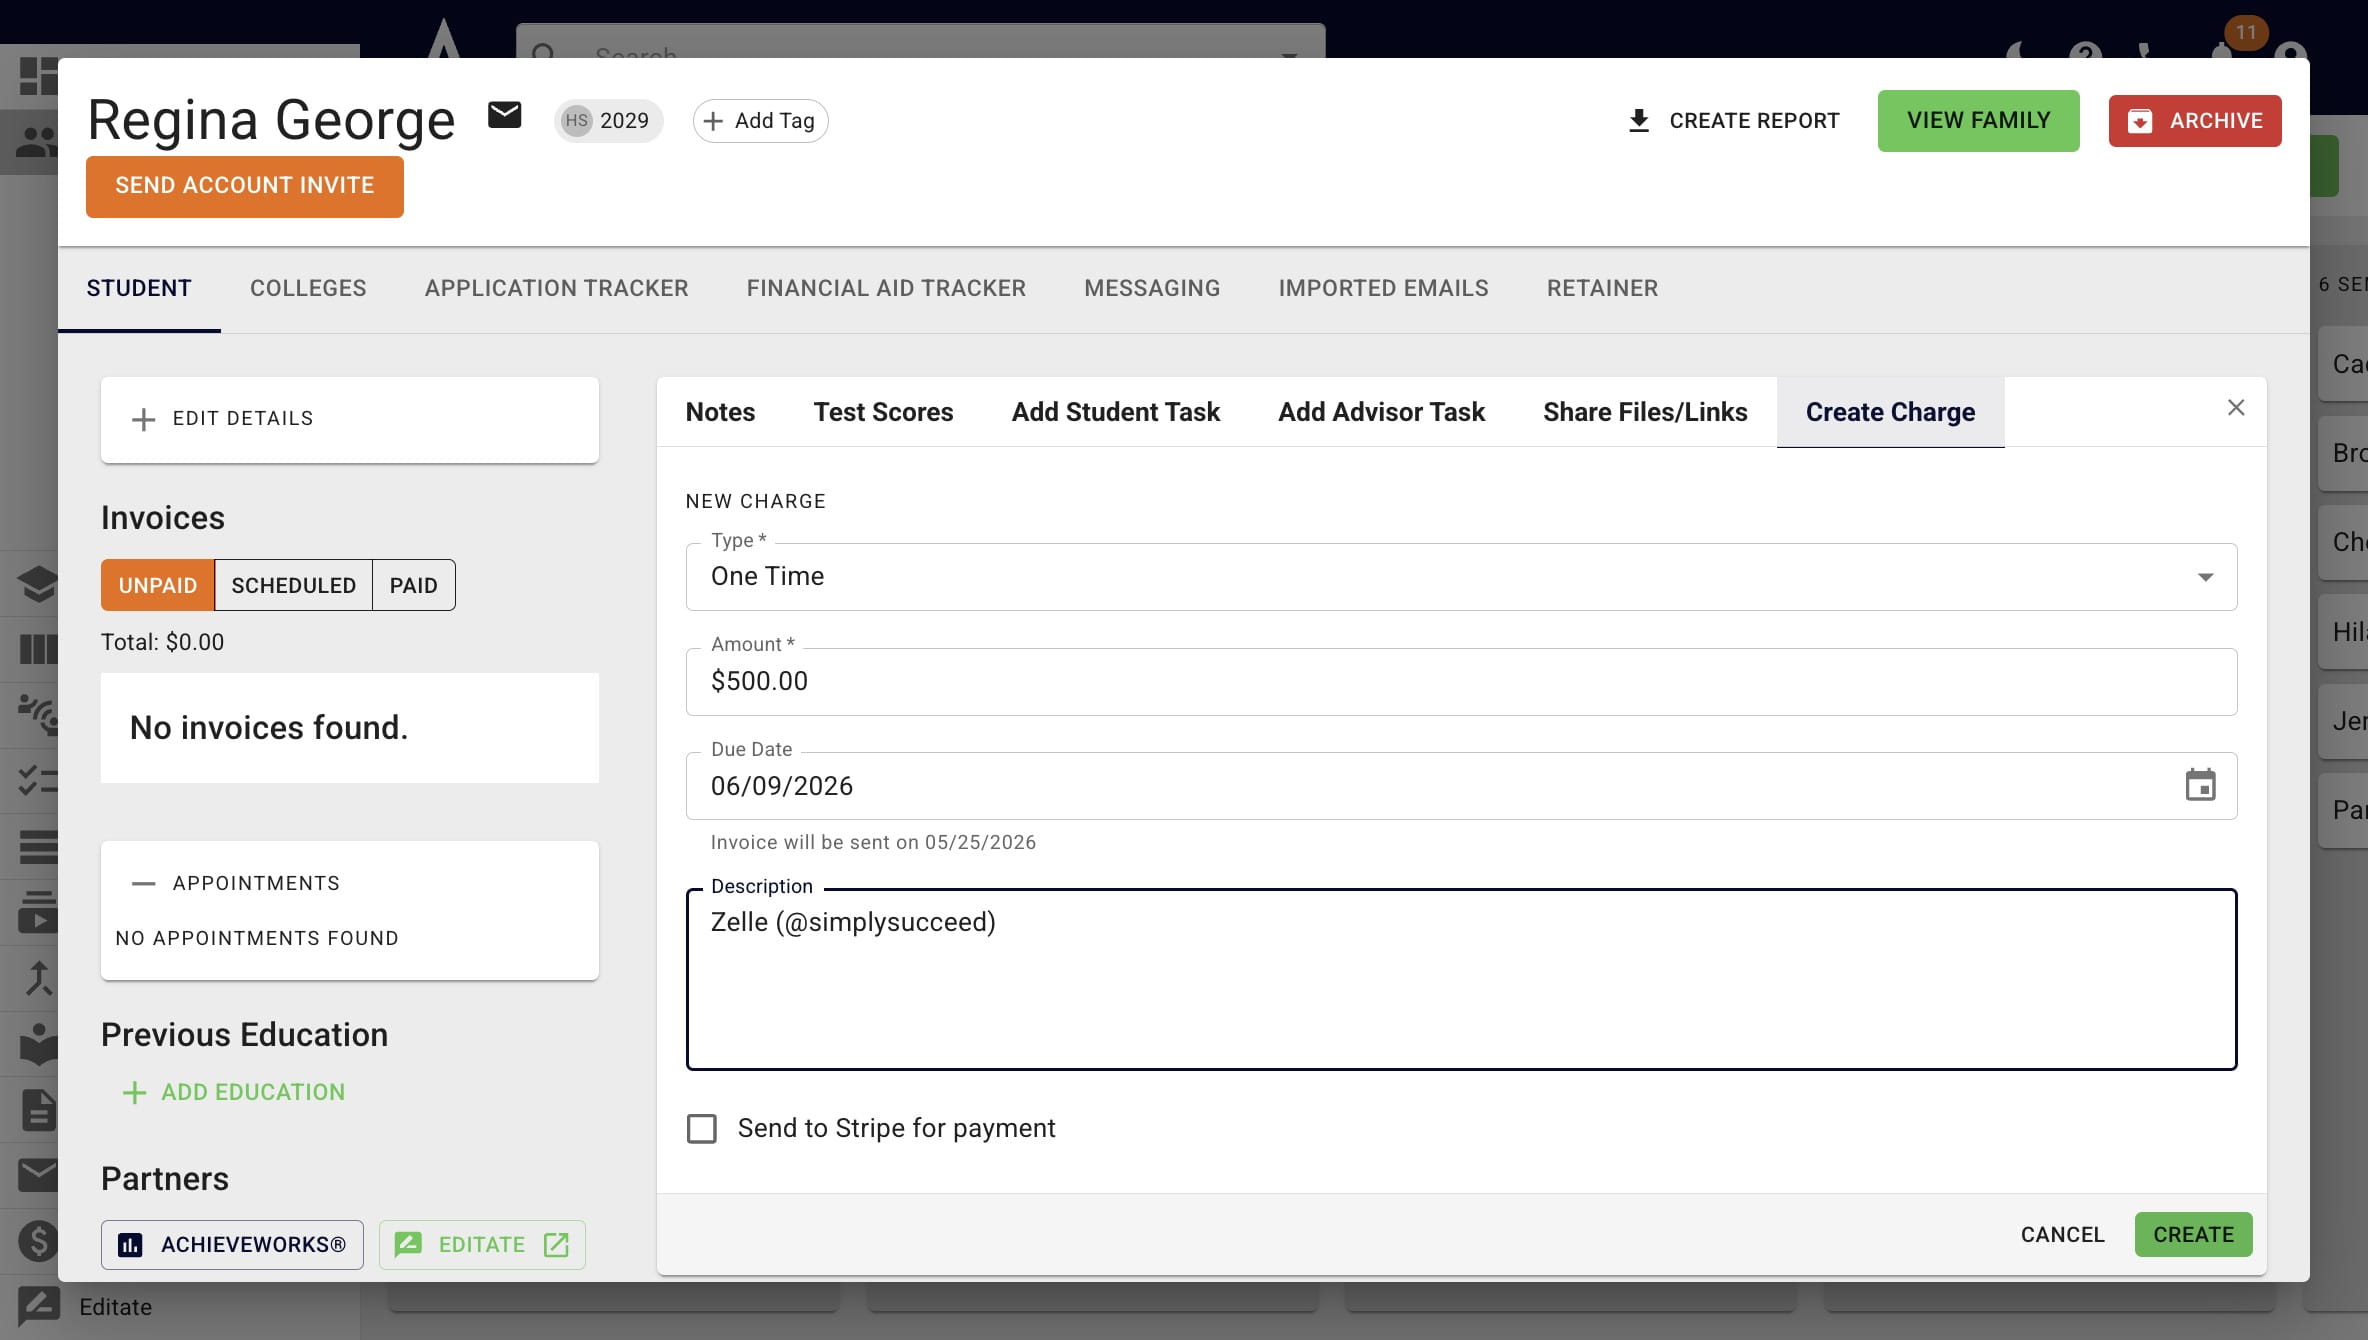
For non-Stripe invoices, you would add your payment instructions (Zelle, Venmo, etc.) under the Invoices section here: https://app.achieveiec.com/settings
When all the applicable information is added, press Create.
You can view any invoices under the Invoices section of the student's profile.
When the invoice is sent out, it will look something like below. You will be copied on the original invoice email and all invoice reminders.
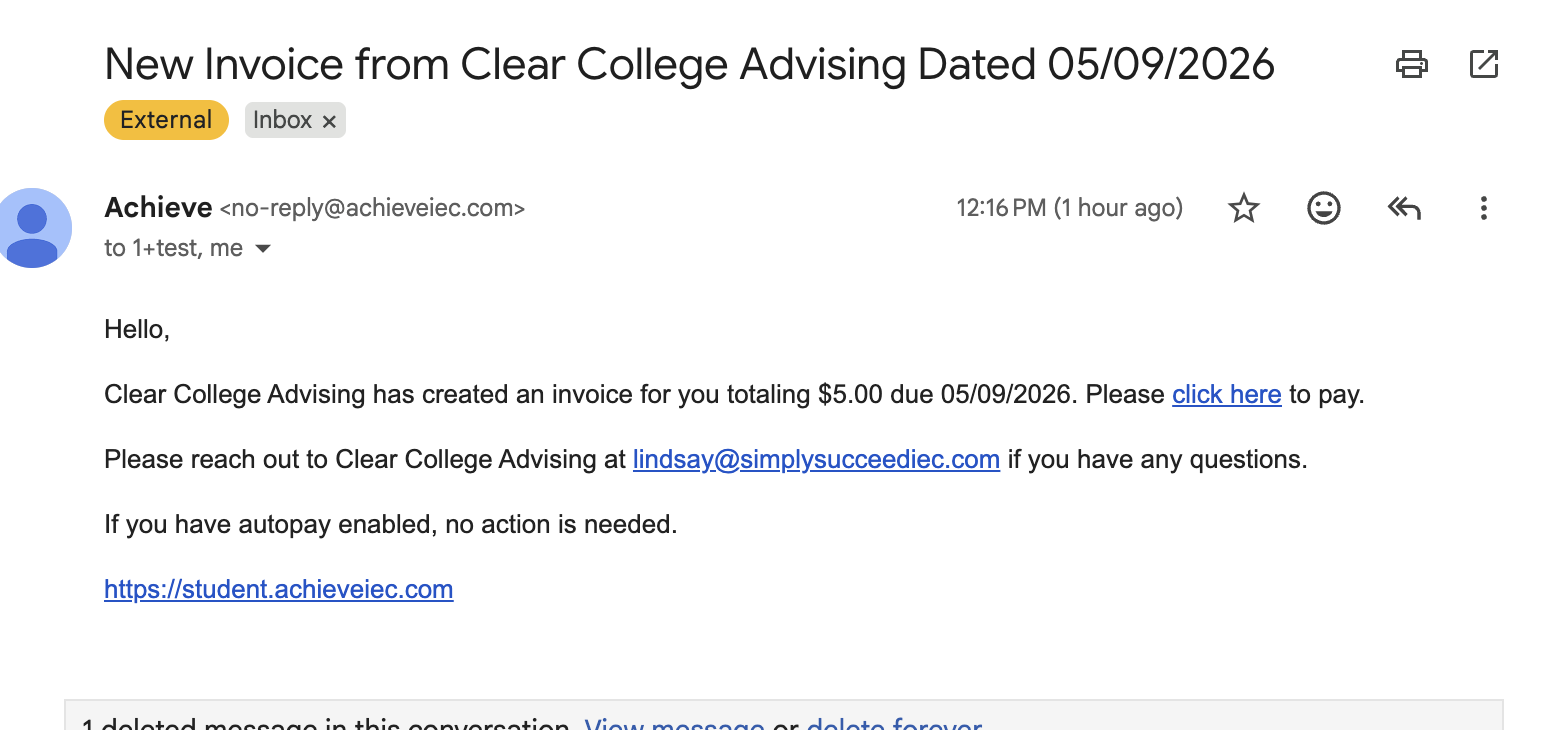
Invoice reminders go out 7, 5, 3, 2, 1, and 0 days before the due date. Additional reminders also go out 1, 2, 3, and 7 days after the due date. Reminders will stop once the invoice is paid.
Done 🚀