
Running Reports in Achieve
Learn how to create and run student reports in Achieve. The guide covers selecting a target audience (specific students or student status), choosing a report type, customizing which columns to include, saving a reusable template for future use, and generating a downloadable CSV report.
Reports can be run from a few different places in Achieve:
- Student Pipeline
- Prospect Pipeline.
- Individual Student Profiles
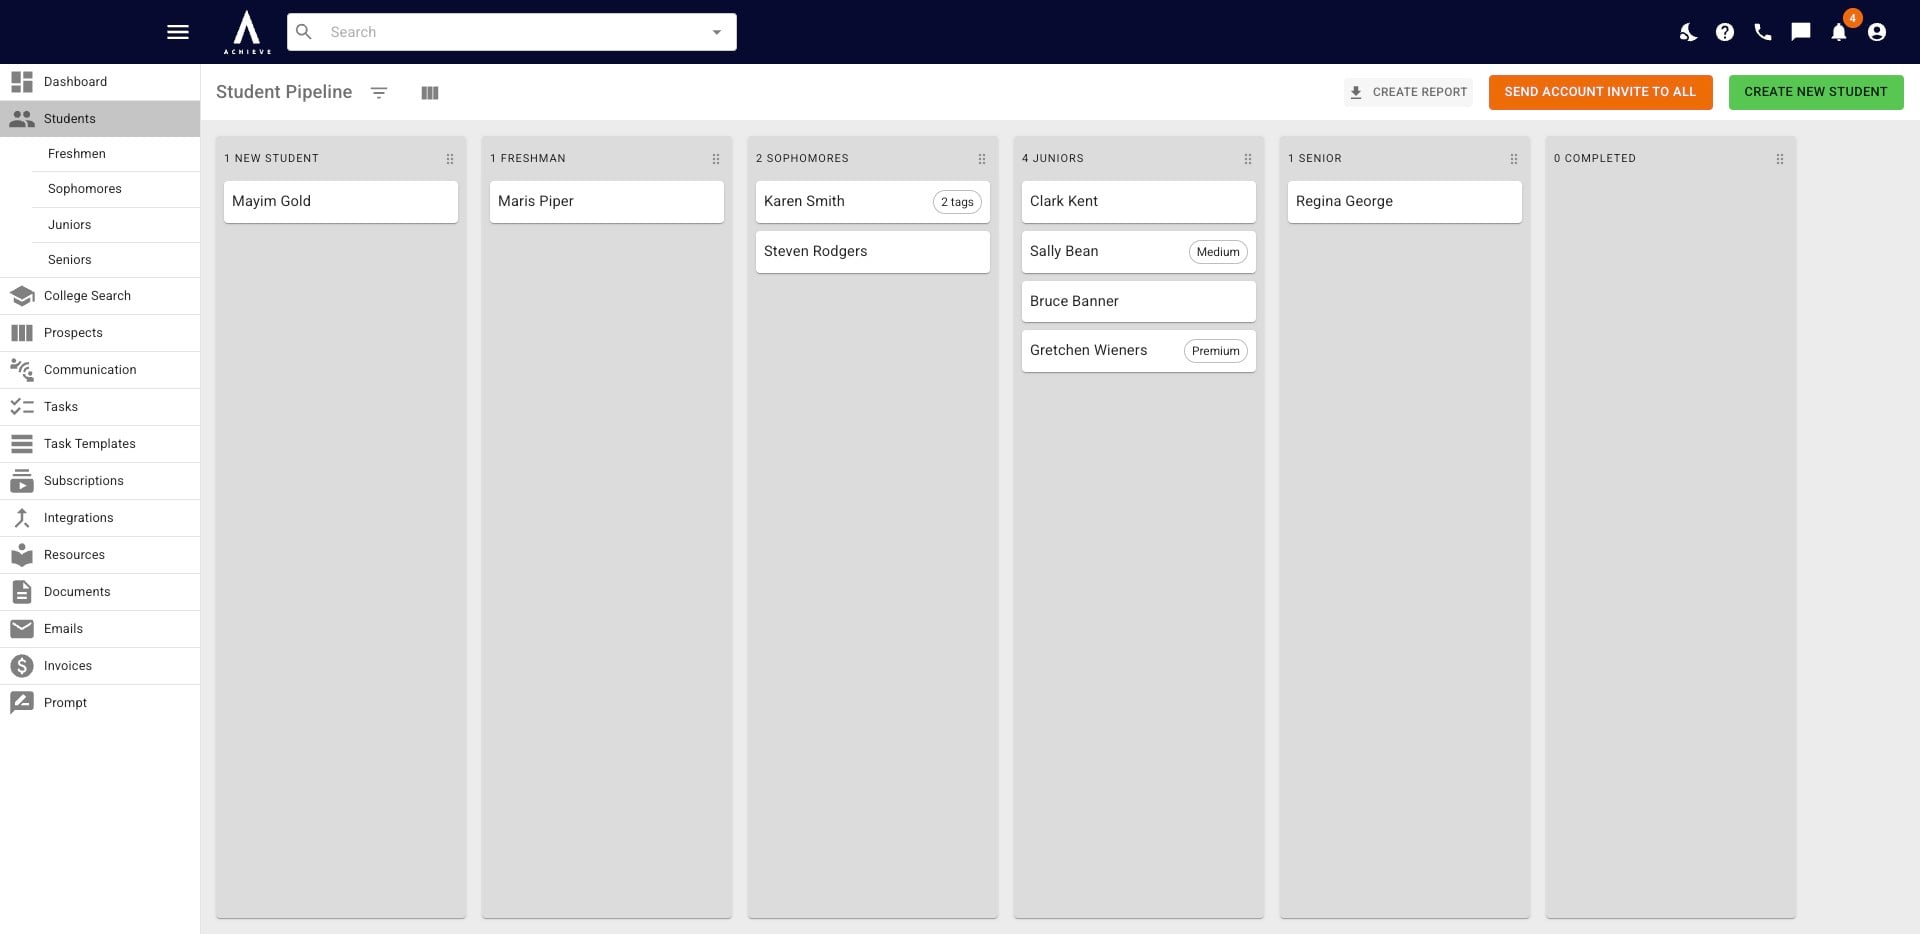
For this example, we will start by creating a report from the Student Pipeline. To begin, click on Create Report.
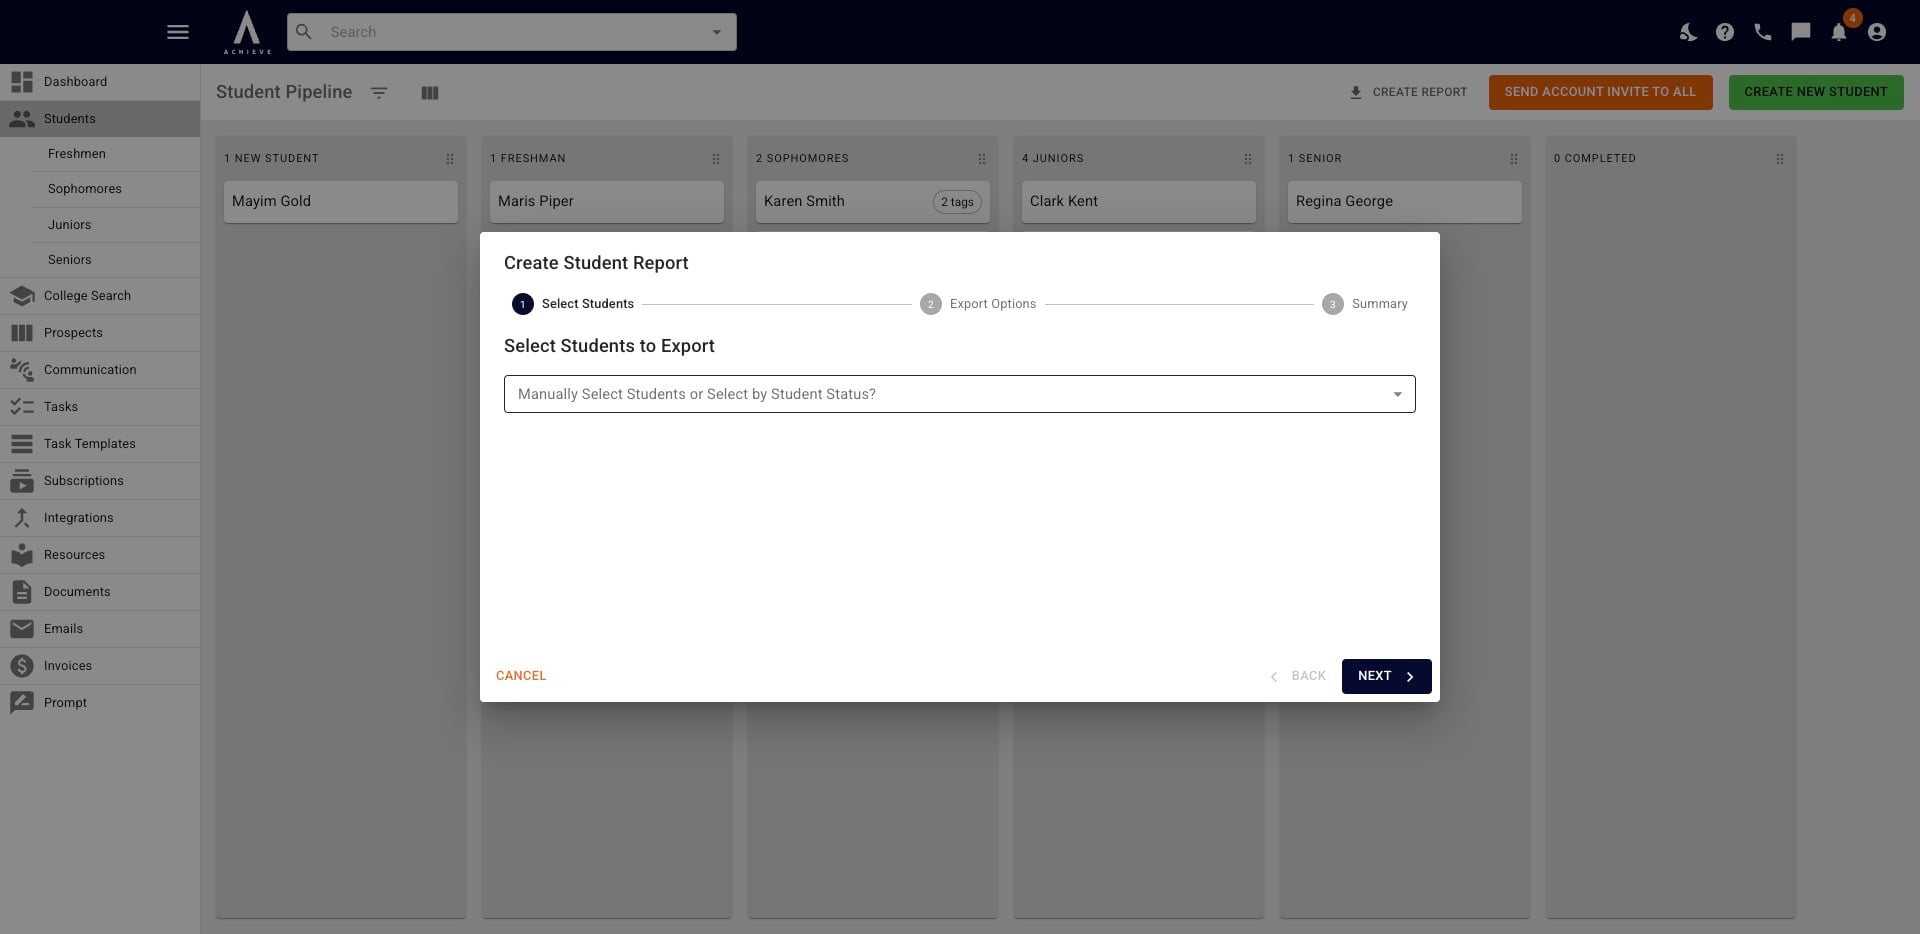
The Create Student Report pop-up will appear. Click in the box and a drop down menu will appear.
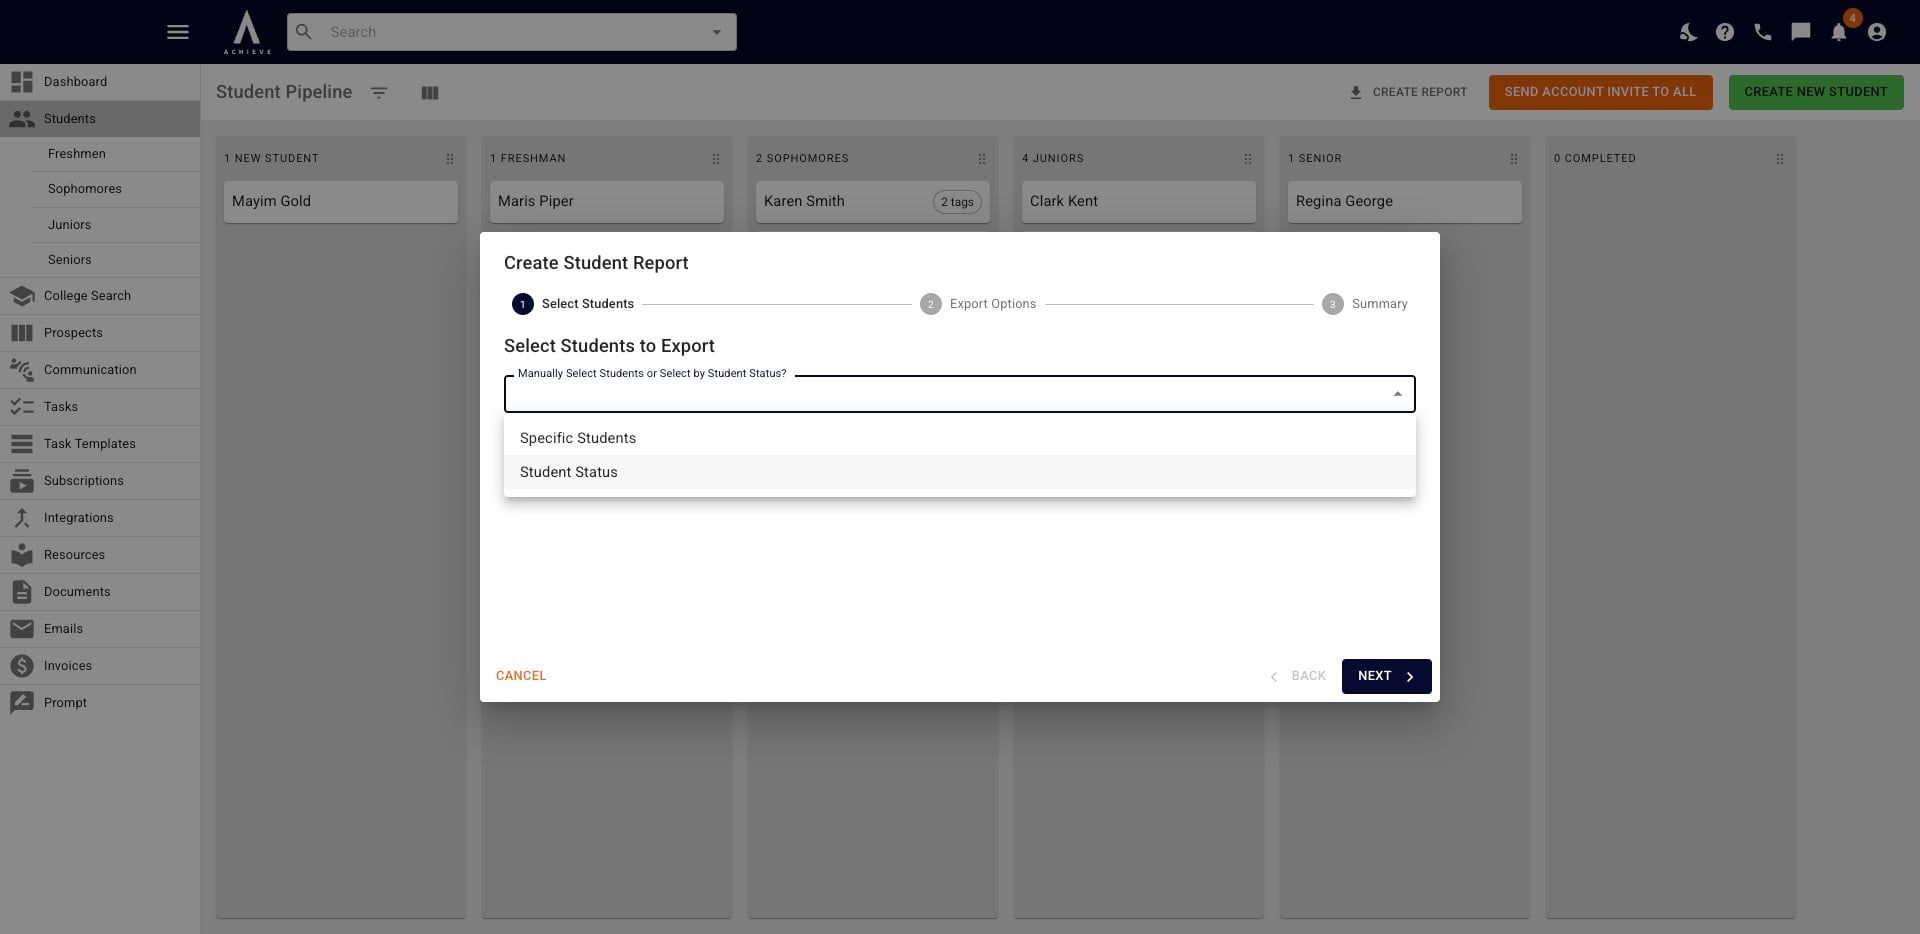
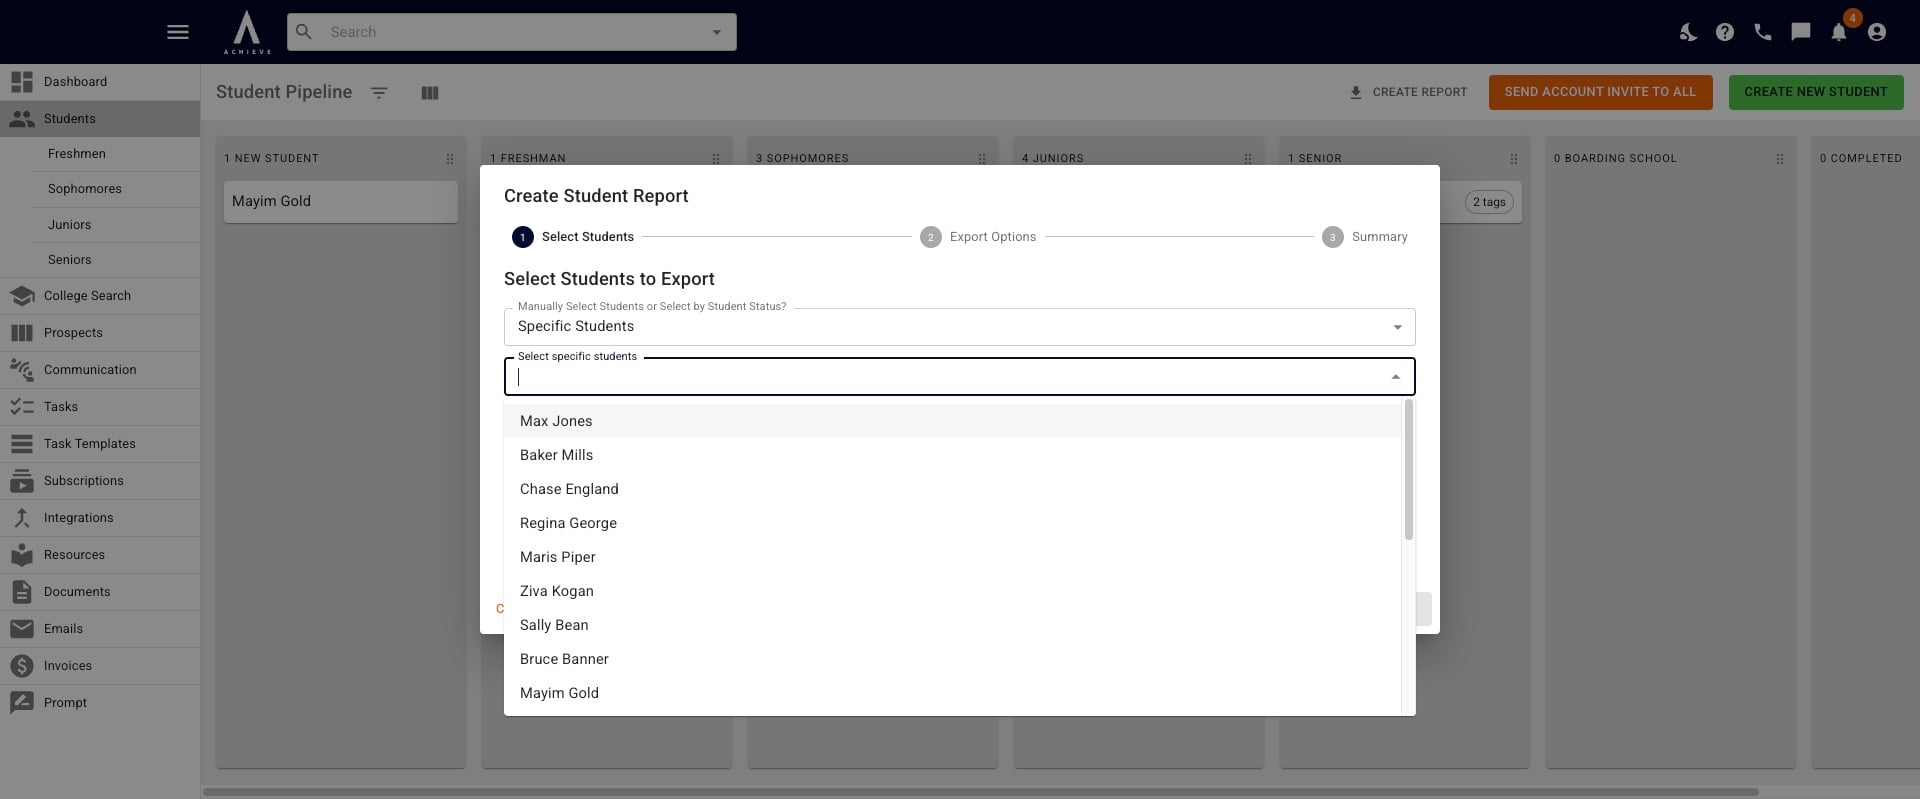
Choose if you want to run reports for Specific Students (it can be 1 student or more than 1) or Student Status (it can be 1 status or more than 1).
If you choose Specific Students, a drop-down list of your students will appear.
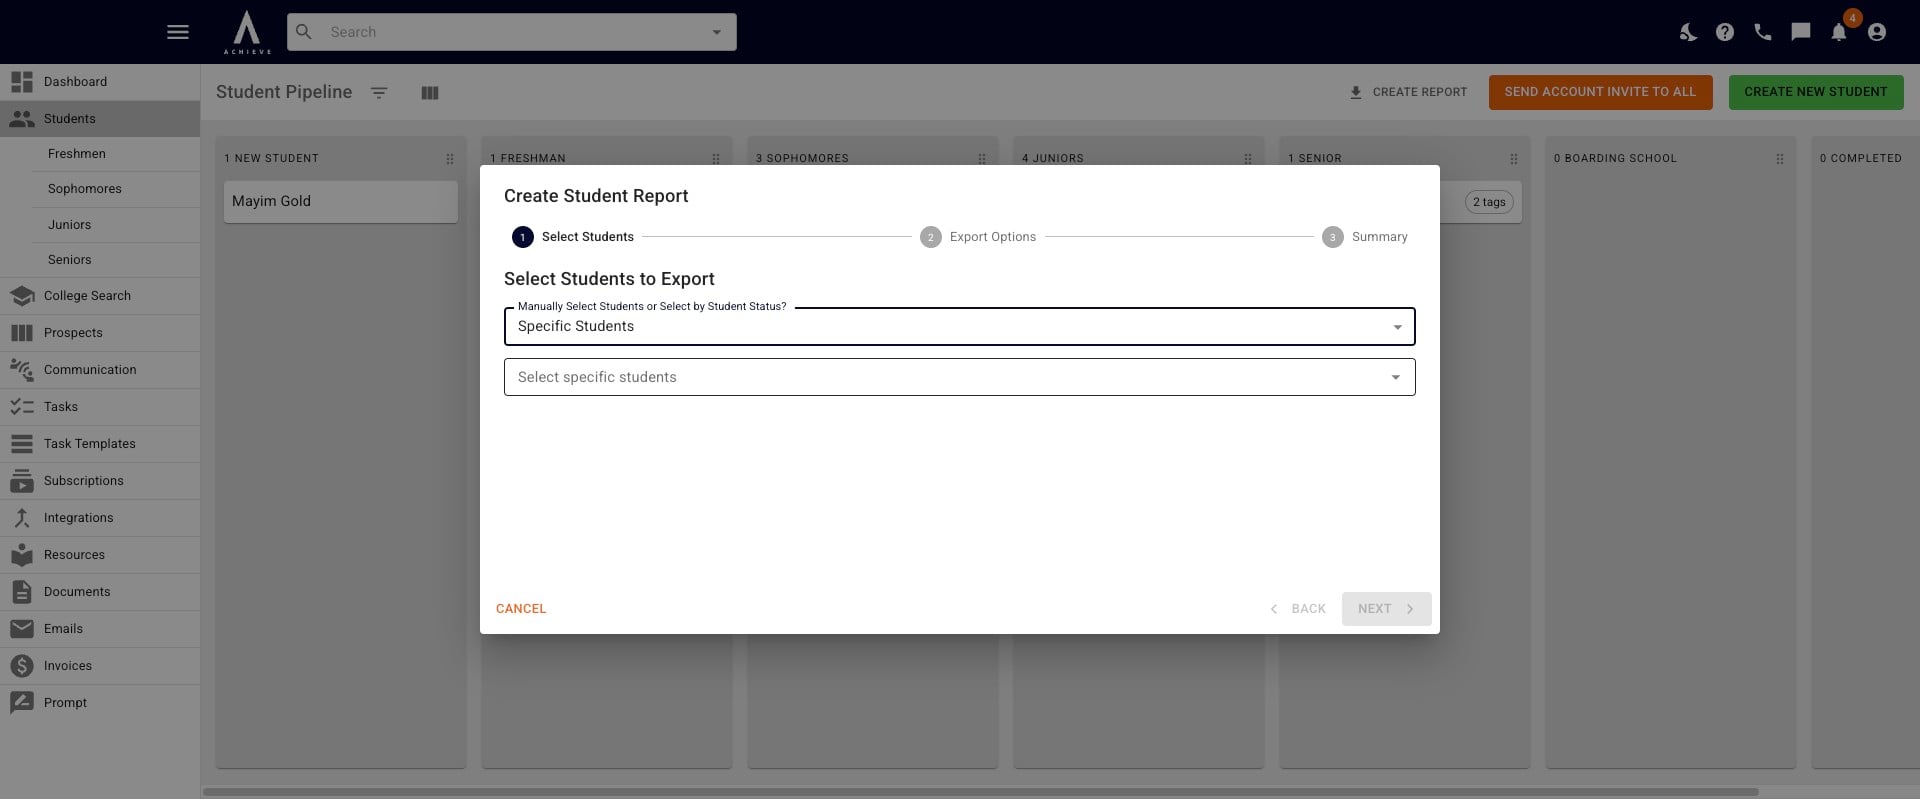
You can either choose a student from the drop down or start typing their name(s) and they'll appear.
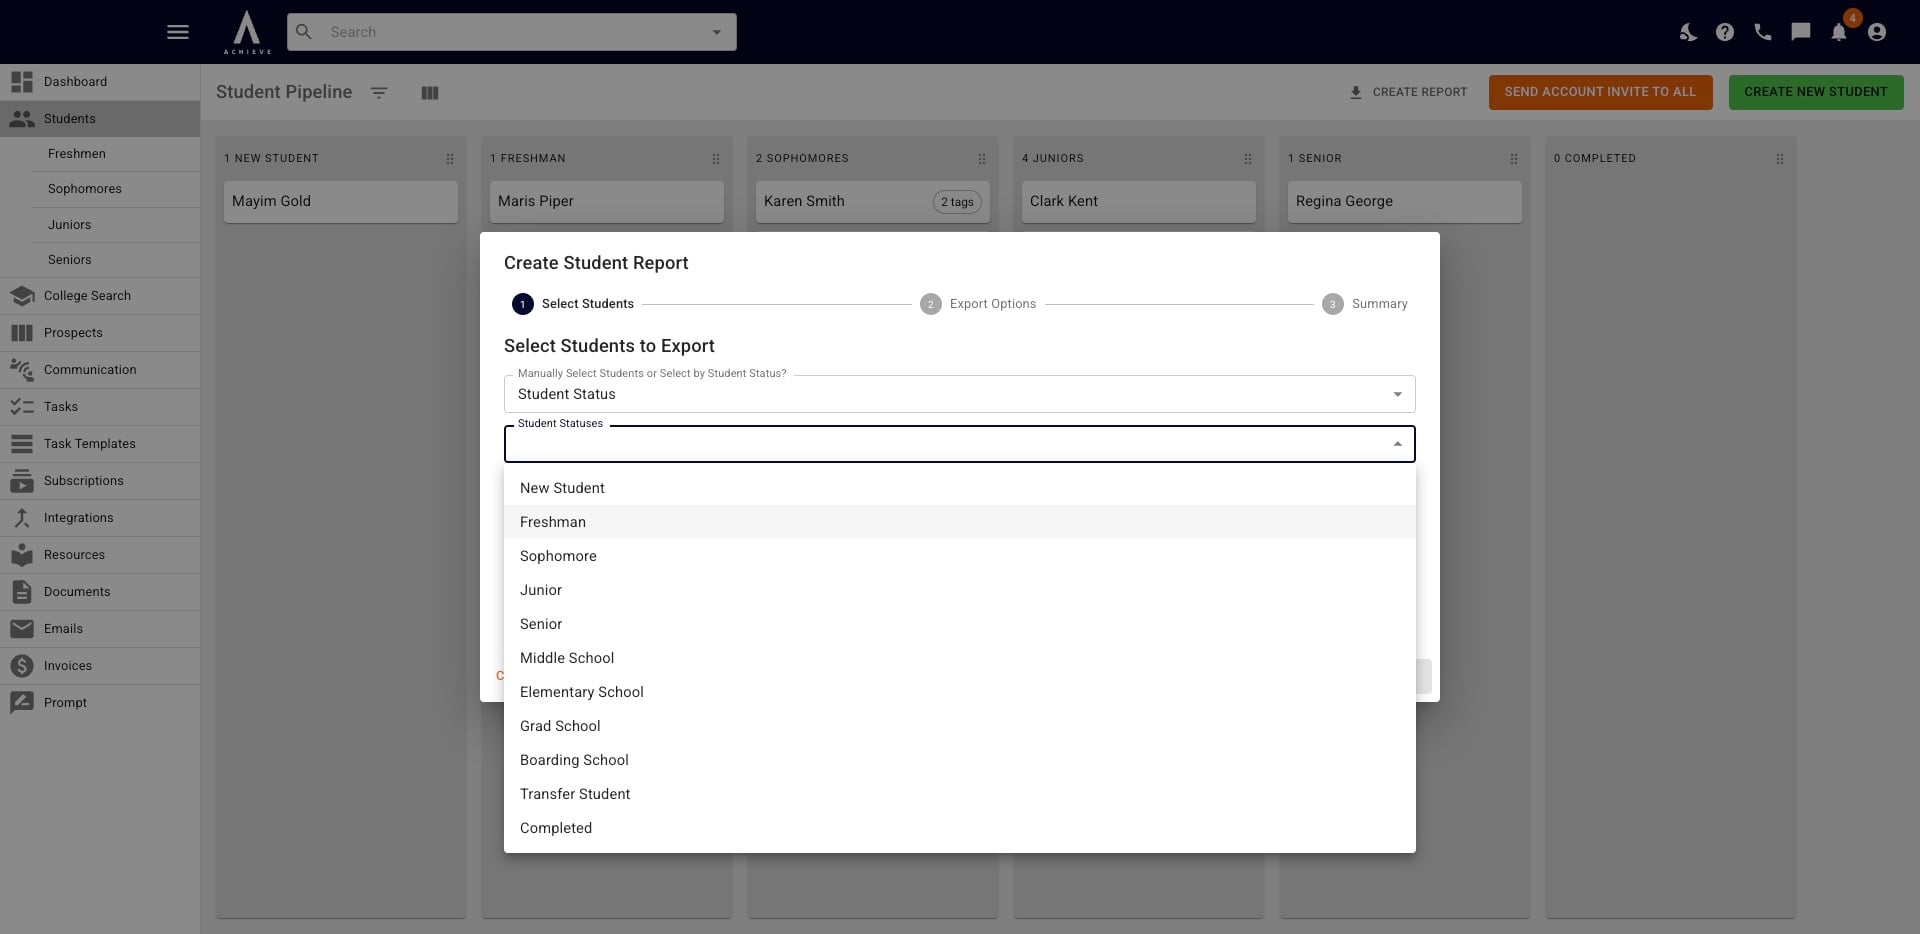
Alternatively, if you chose the Student Status option, you'll be able to select the student status(es) you want included in the report.
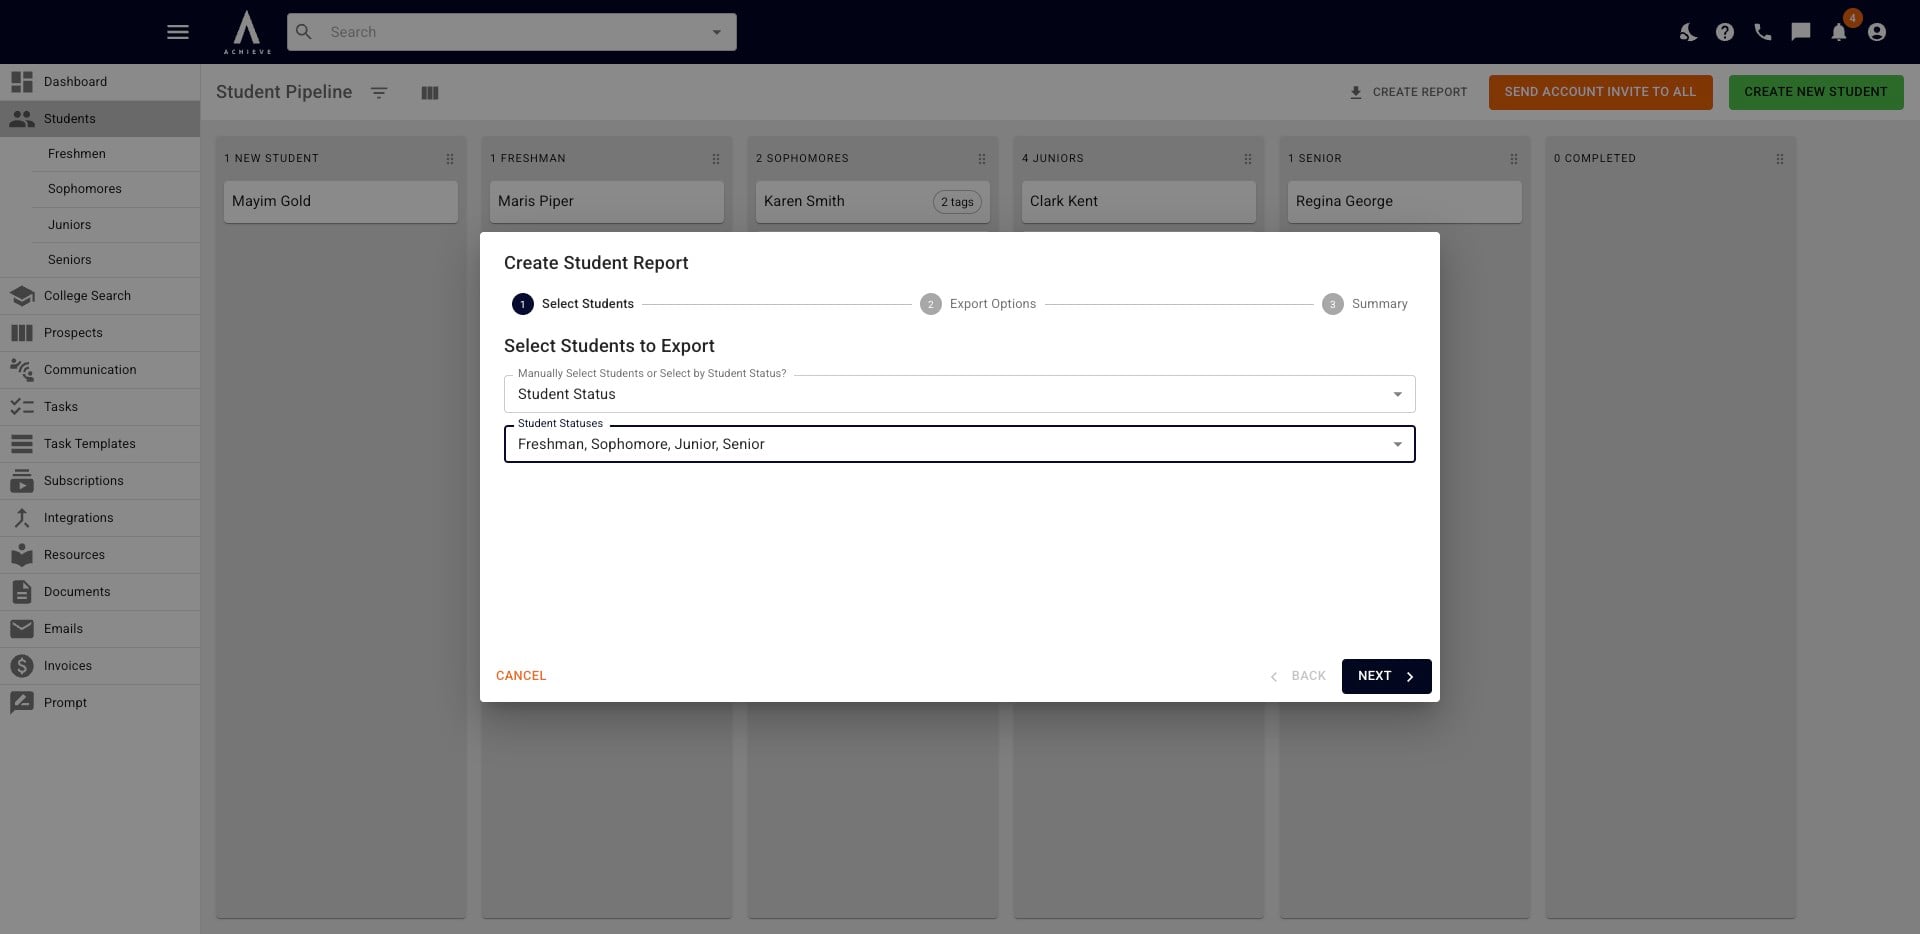
Once you've chosen student(s) or student status(s), click Next.
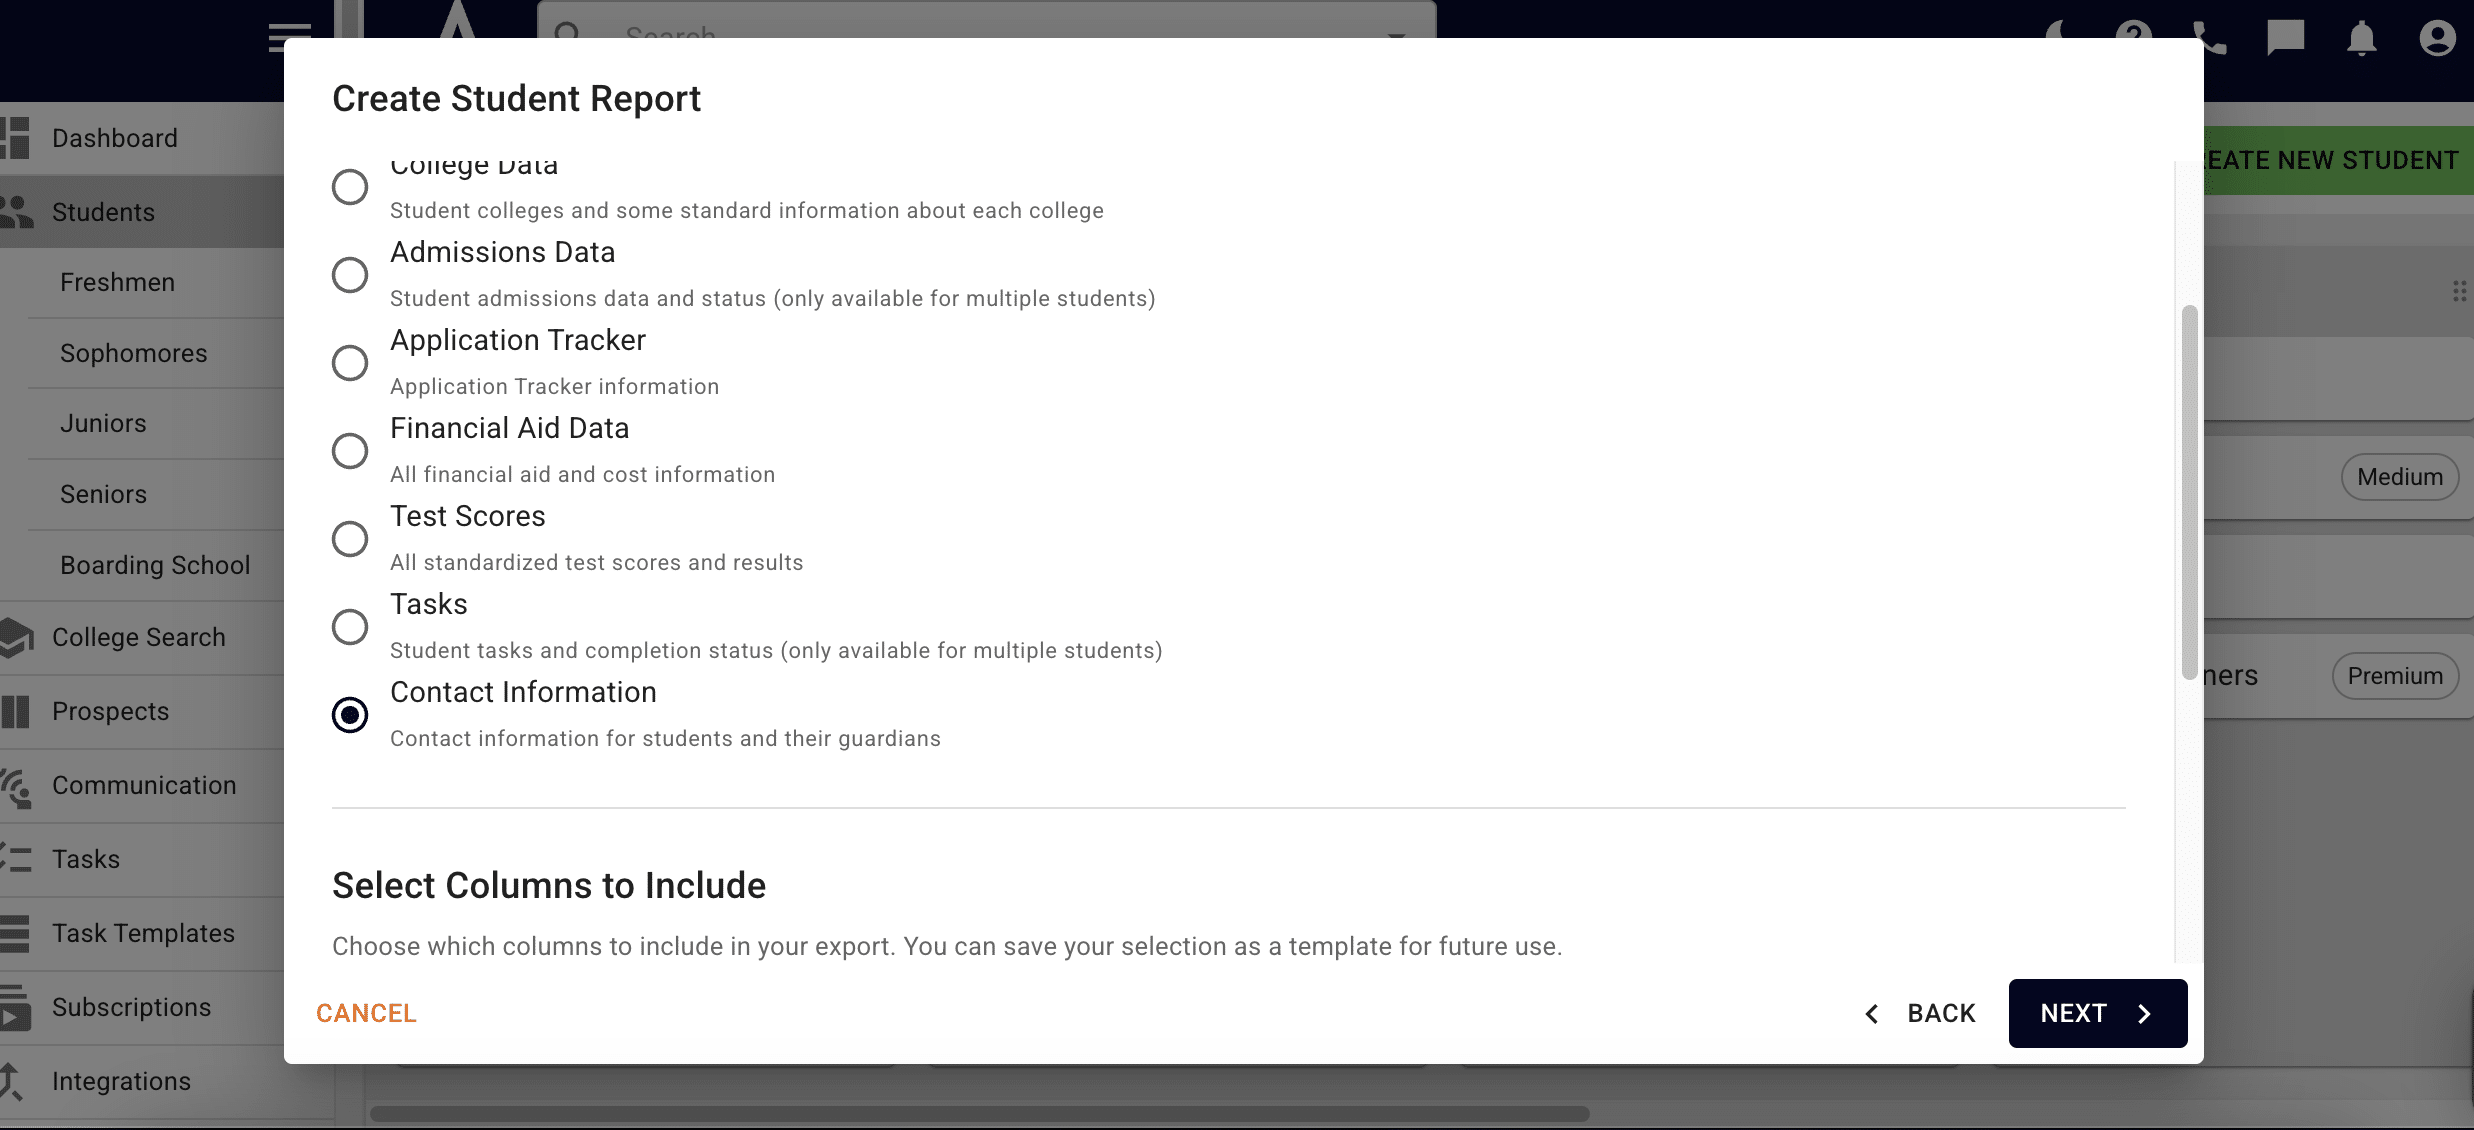
You will then be taken to the Export Options, which shows a list of the reports you can run along with a brief description.
- The College Data Report provides general statistics about colleges on a student's list
- The Admissions Data Report provides admission & merit decisions that have been uploaded to Achieve for specific students
- The Application Tracker Report allows you to export a student's application tracker
- The Financial Aid Data Report allows you to export a student's financial aid tracker
- The Test Score Report provides all test dates and score breakdowns from student profiles
- The Task Report provides all incomplete & complete tasks
- The Contact Information Report provides addresses, phone numbers, and emails for students and parents/guardians
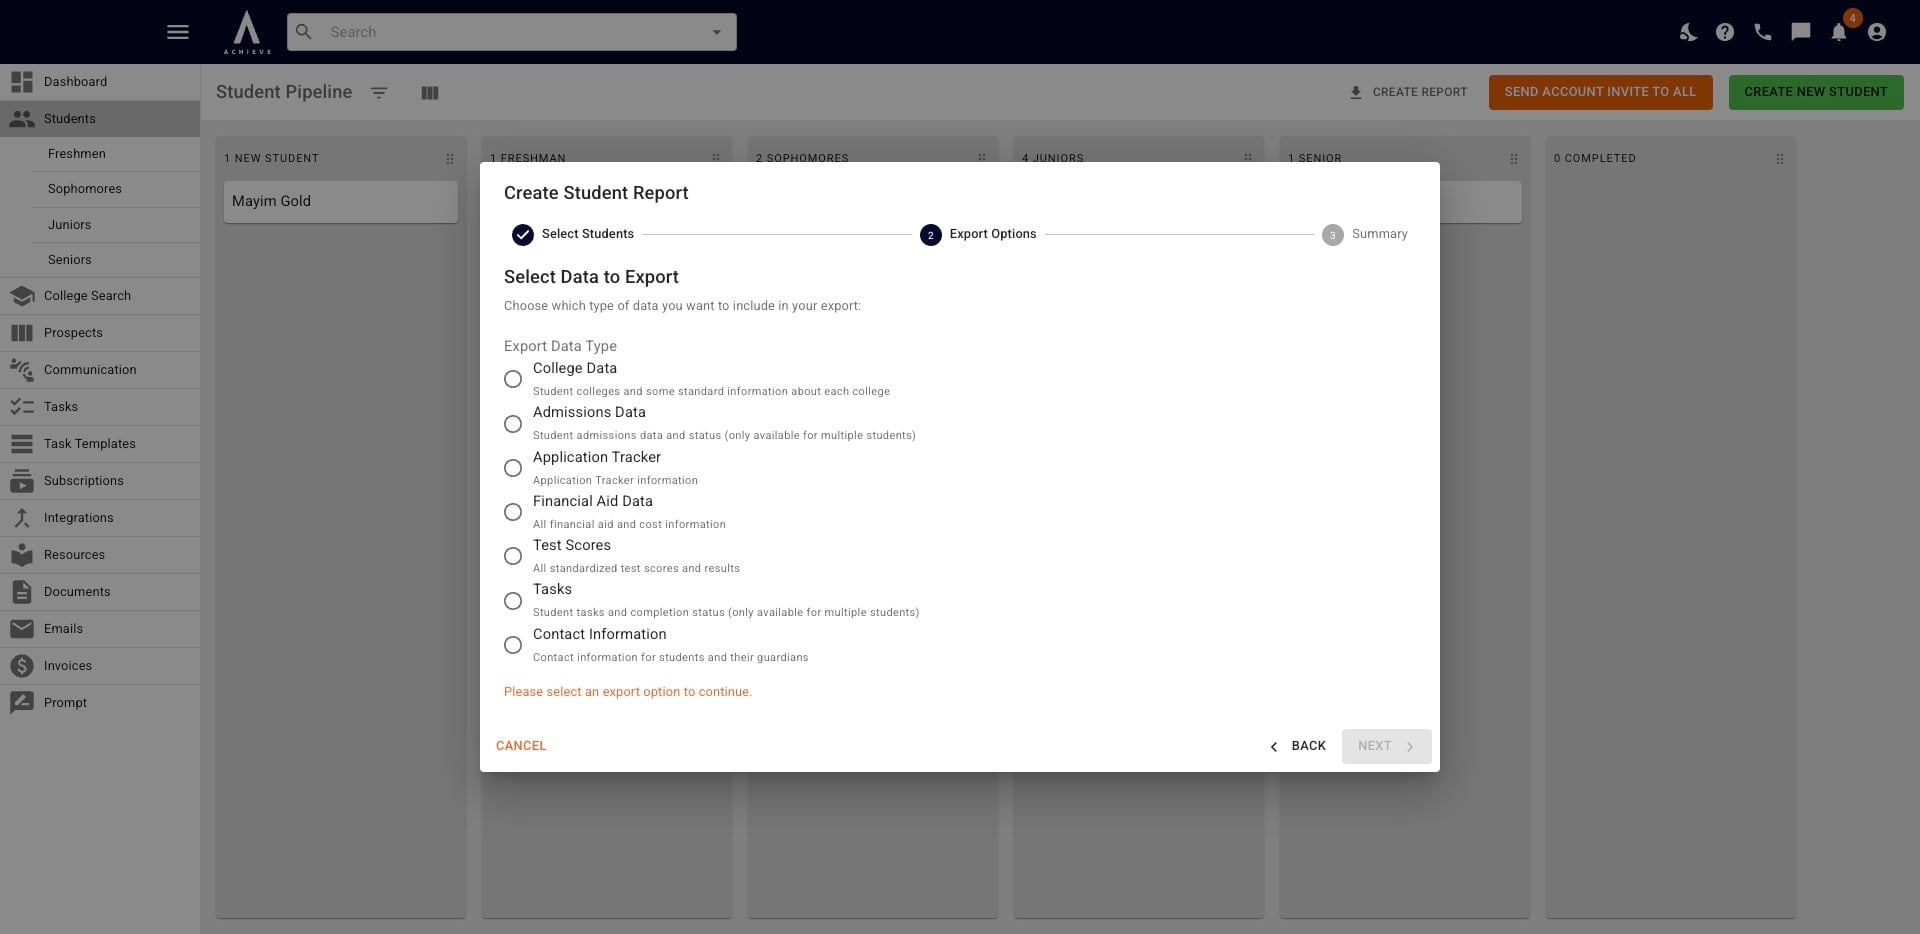
One you select your report type, click Next
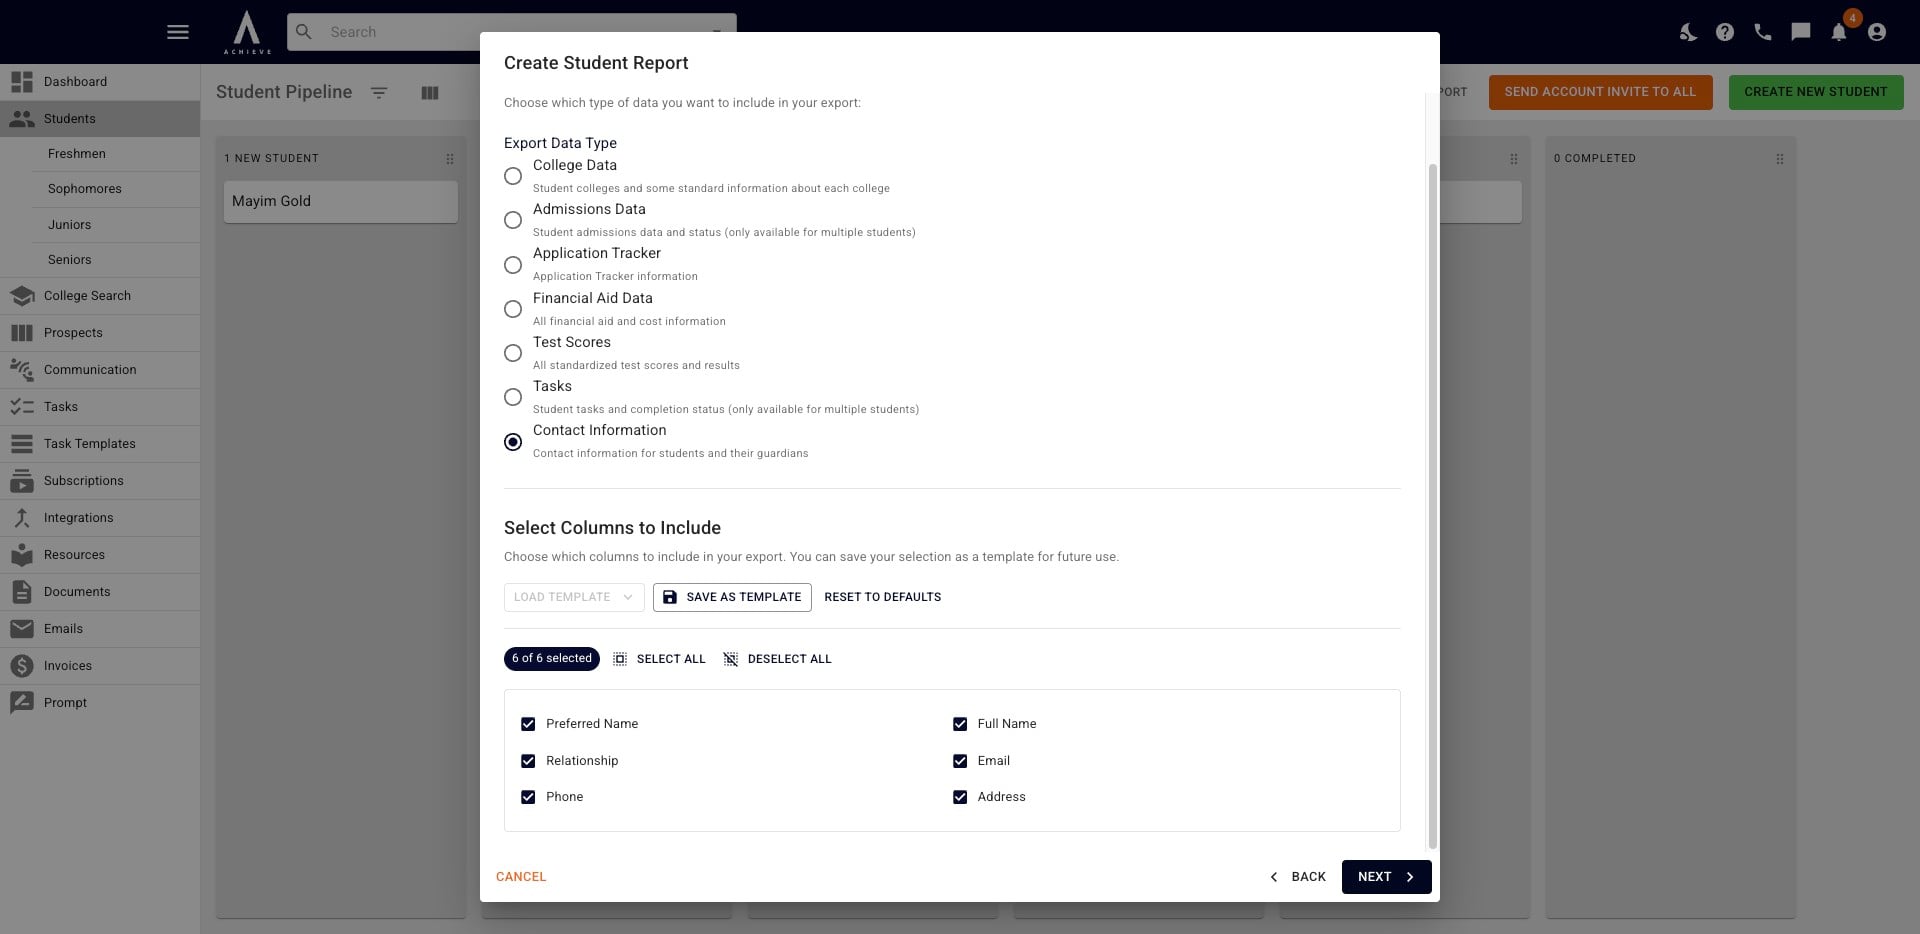
To customize your report, scroll down to Select the Columns to Include. If this is a report you plan on running regularly, select Save As Template.
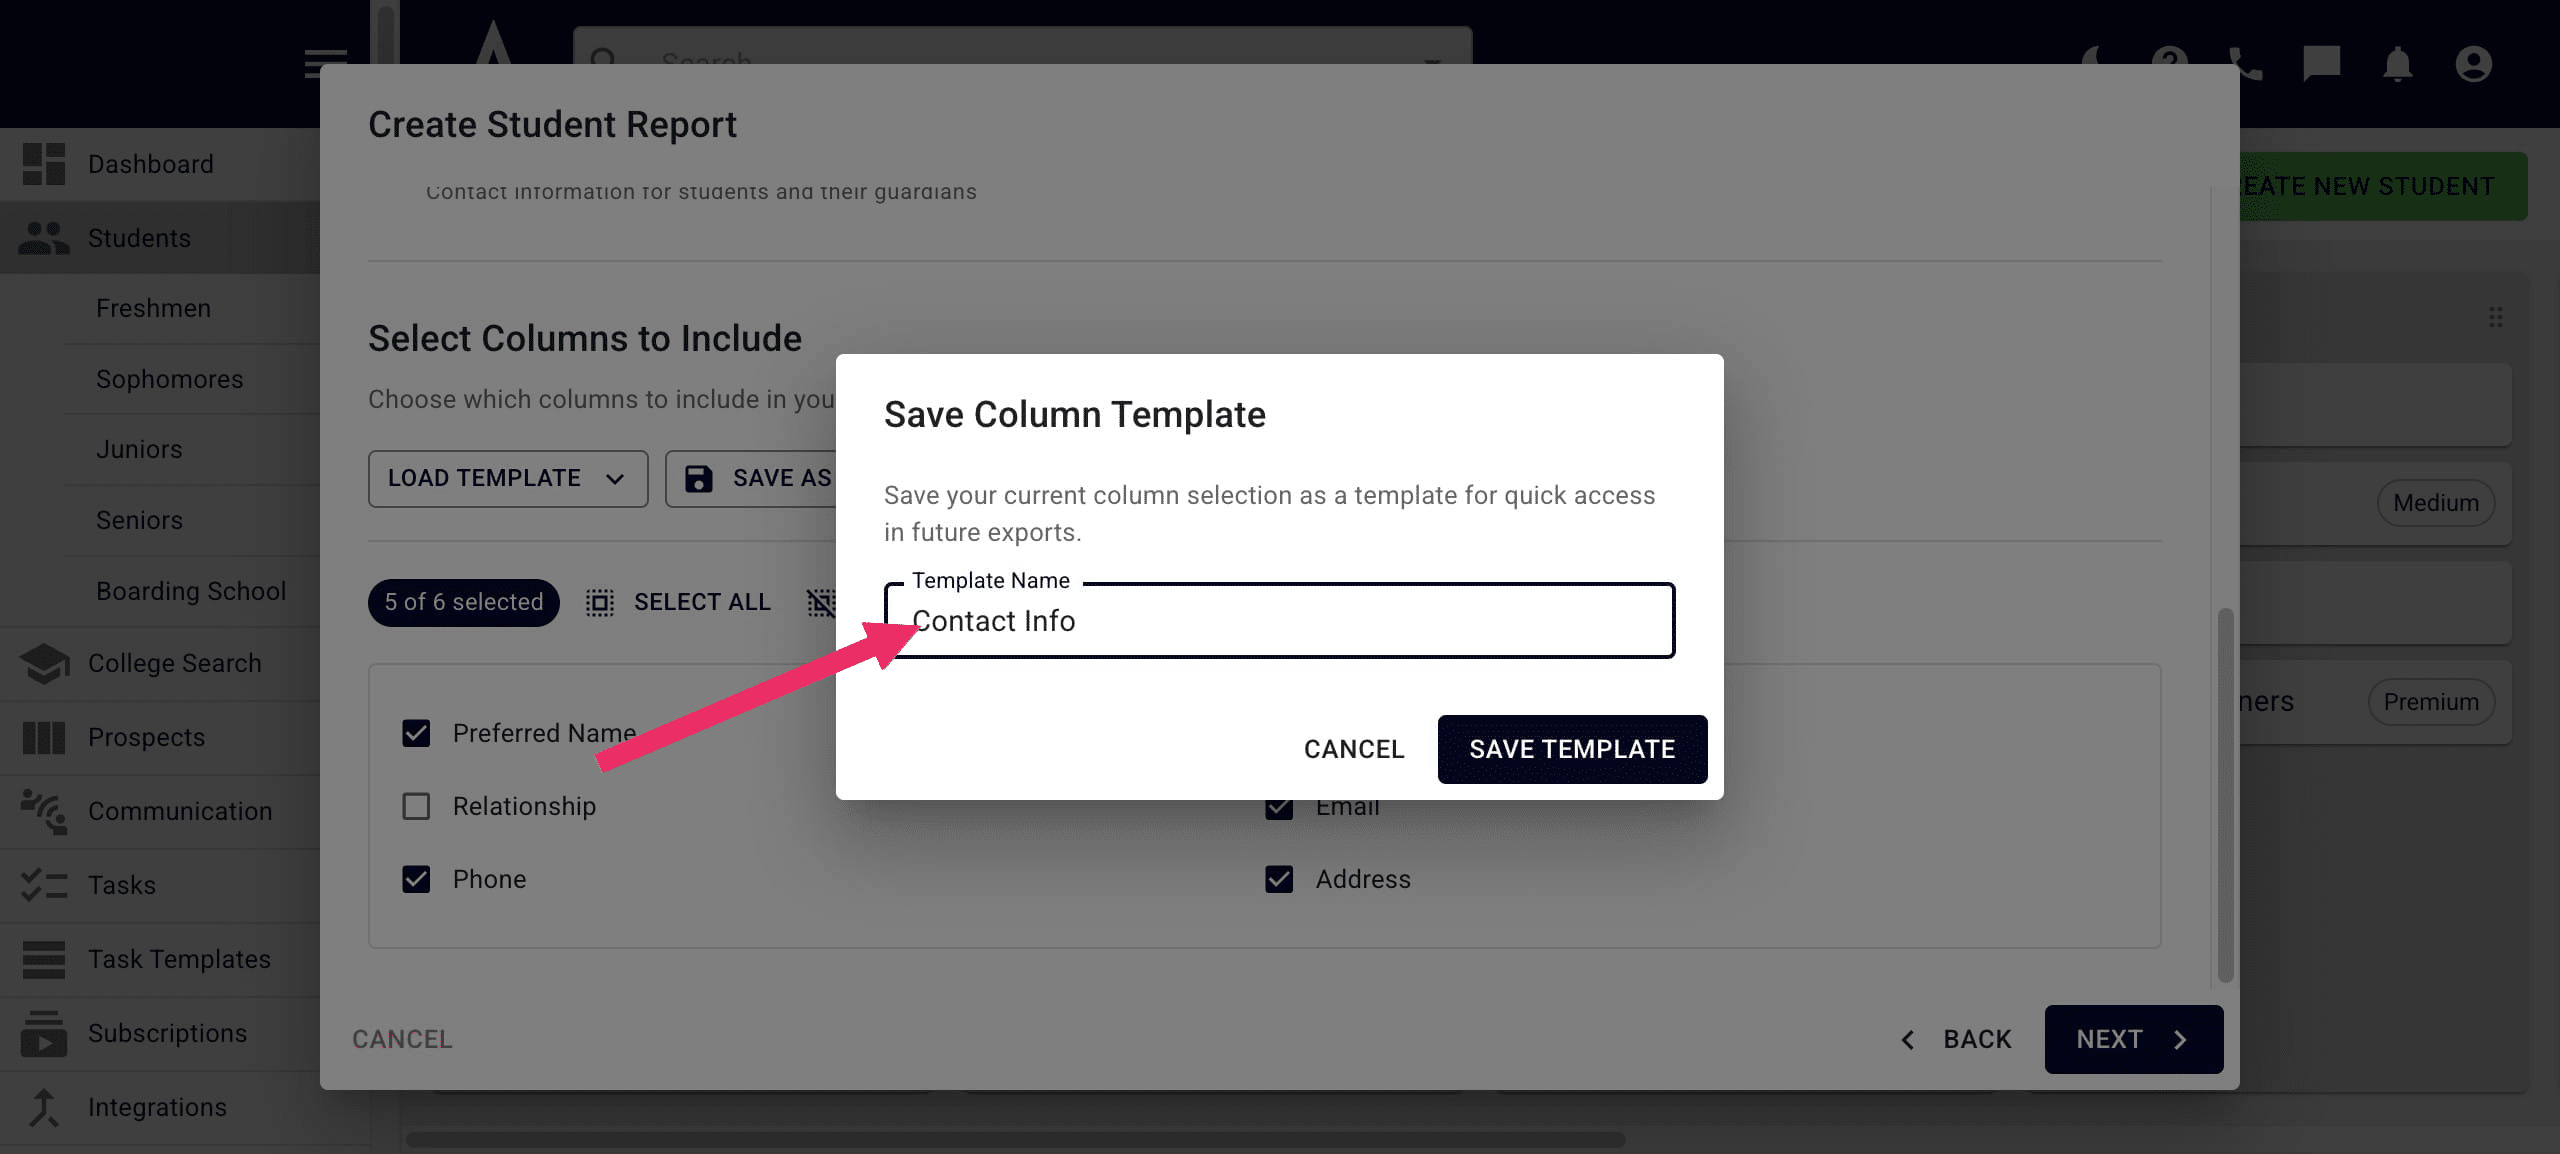
The Save Column Template pop-up will appear. Click into the Template Name box, name the template, and then click Save.
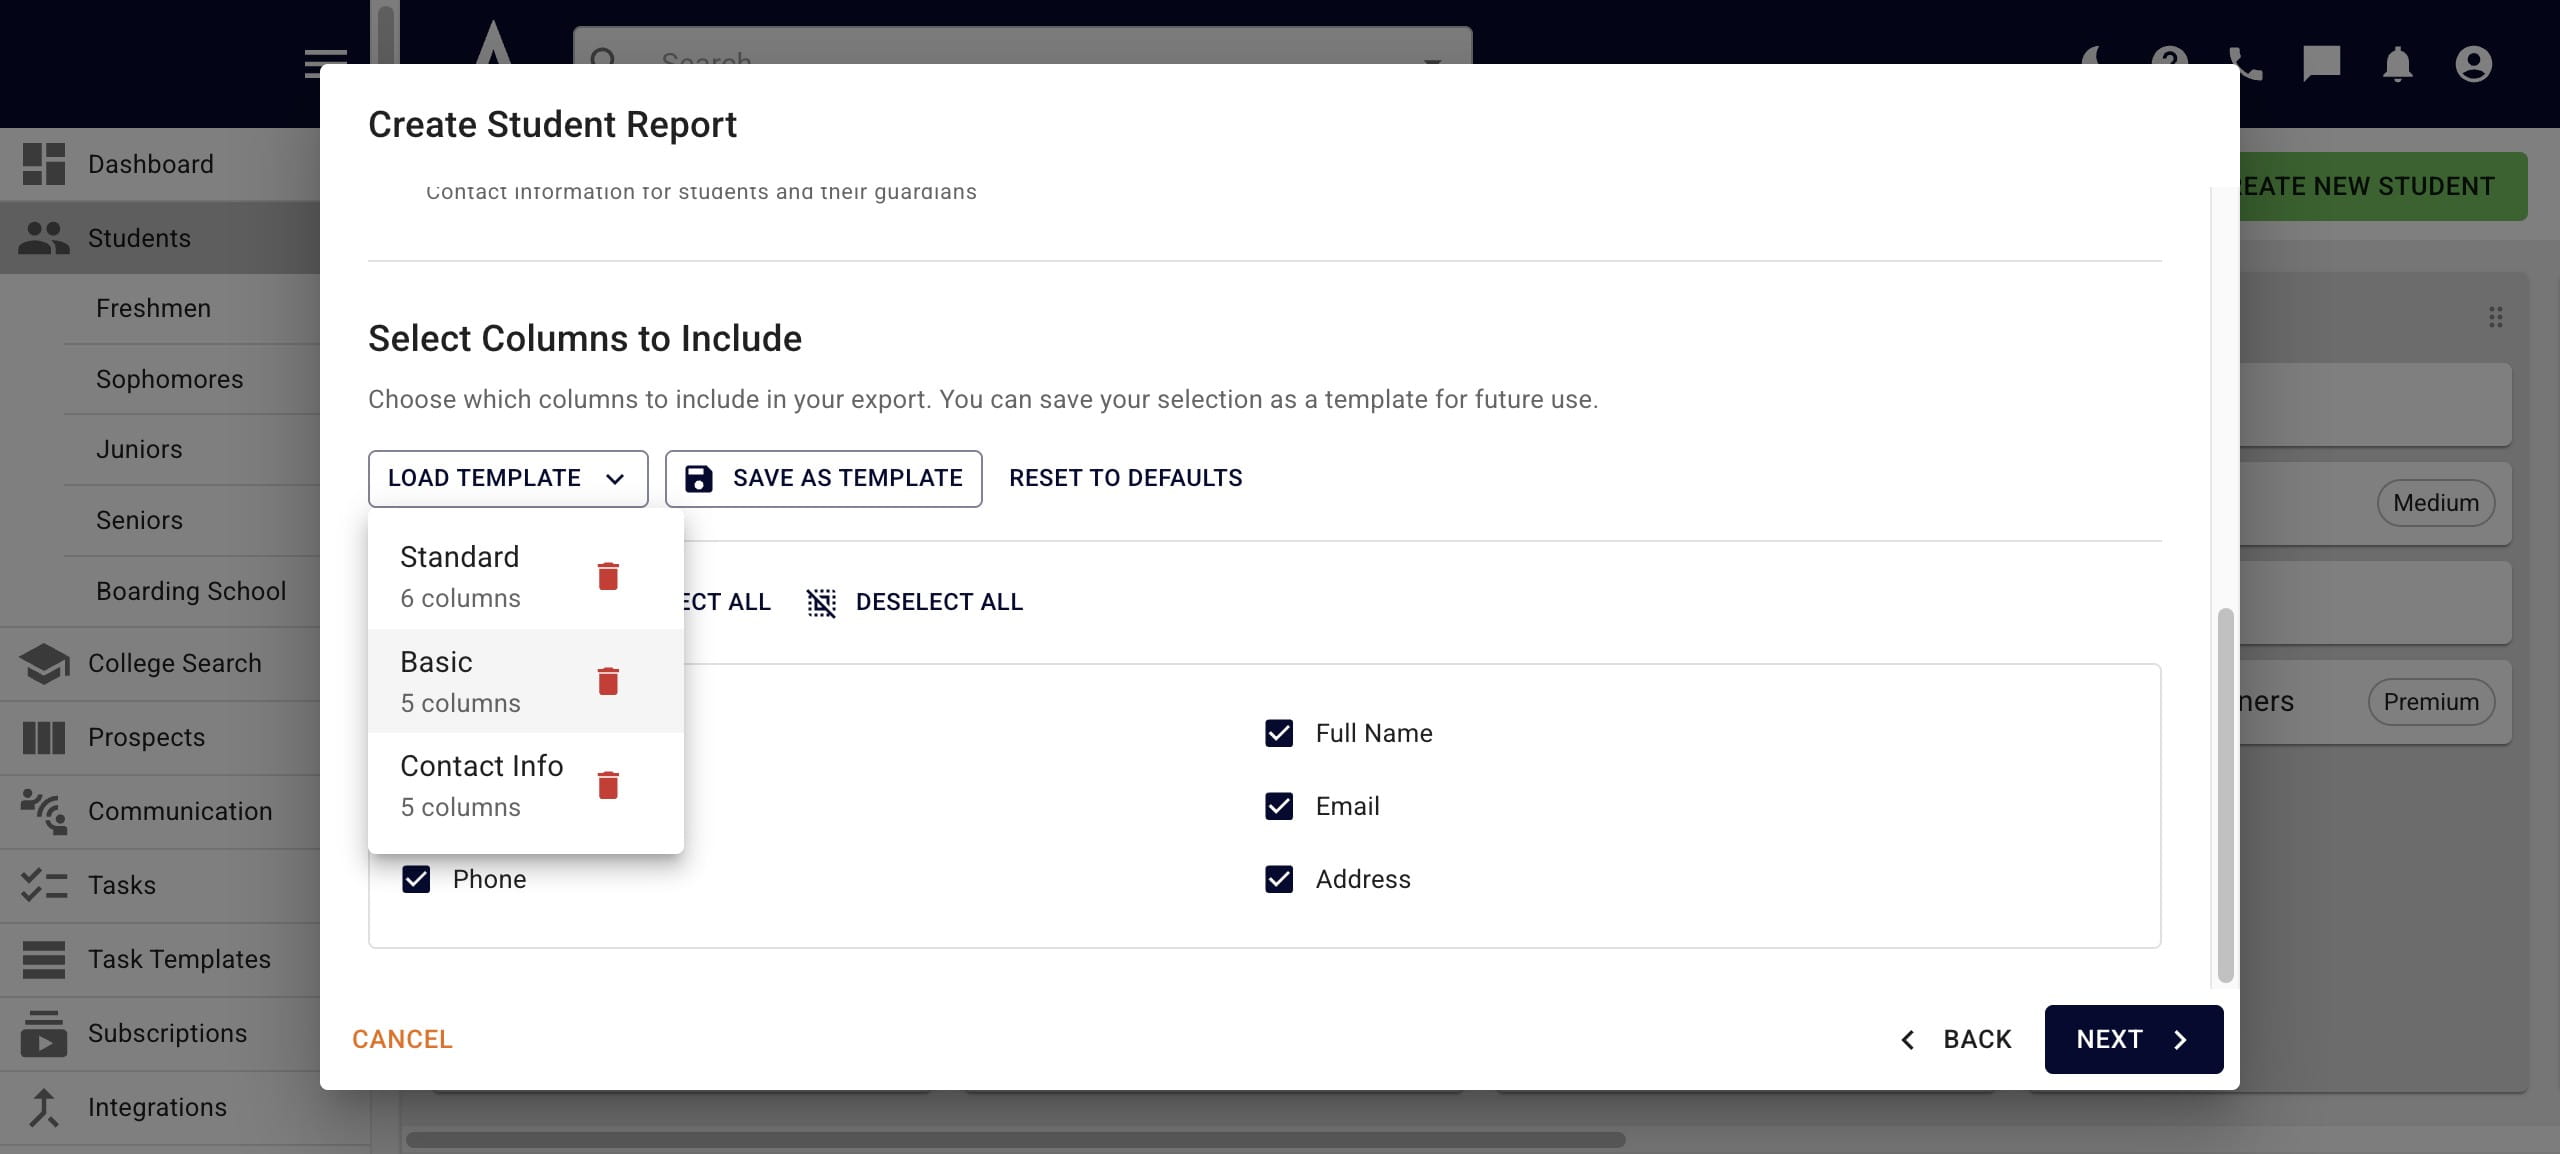
To use a previously saved report template, click on Load Template, click the Report Template you want to use, and then click Next.
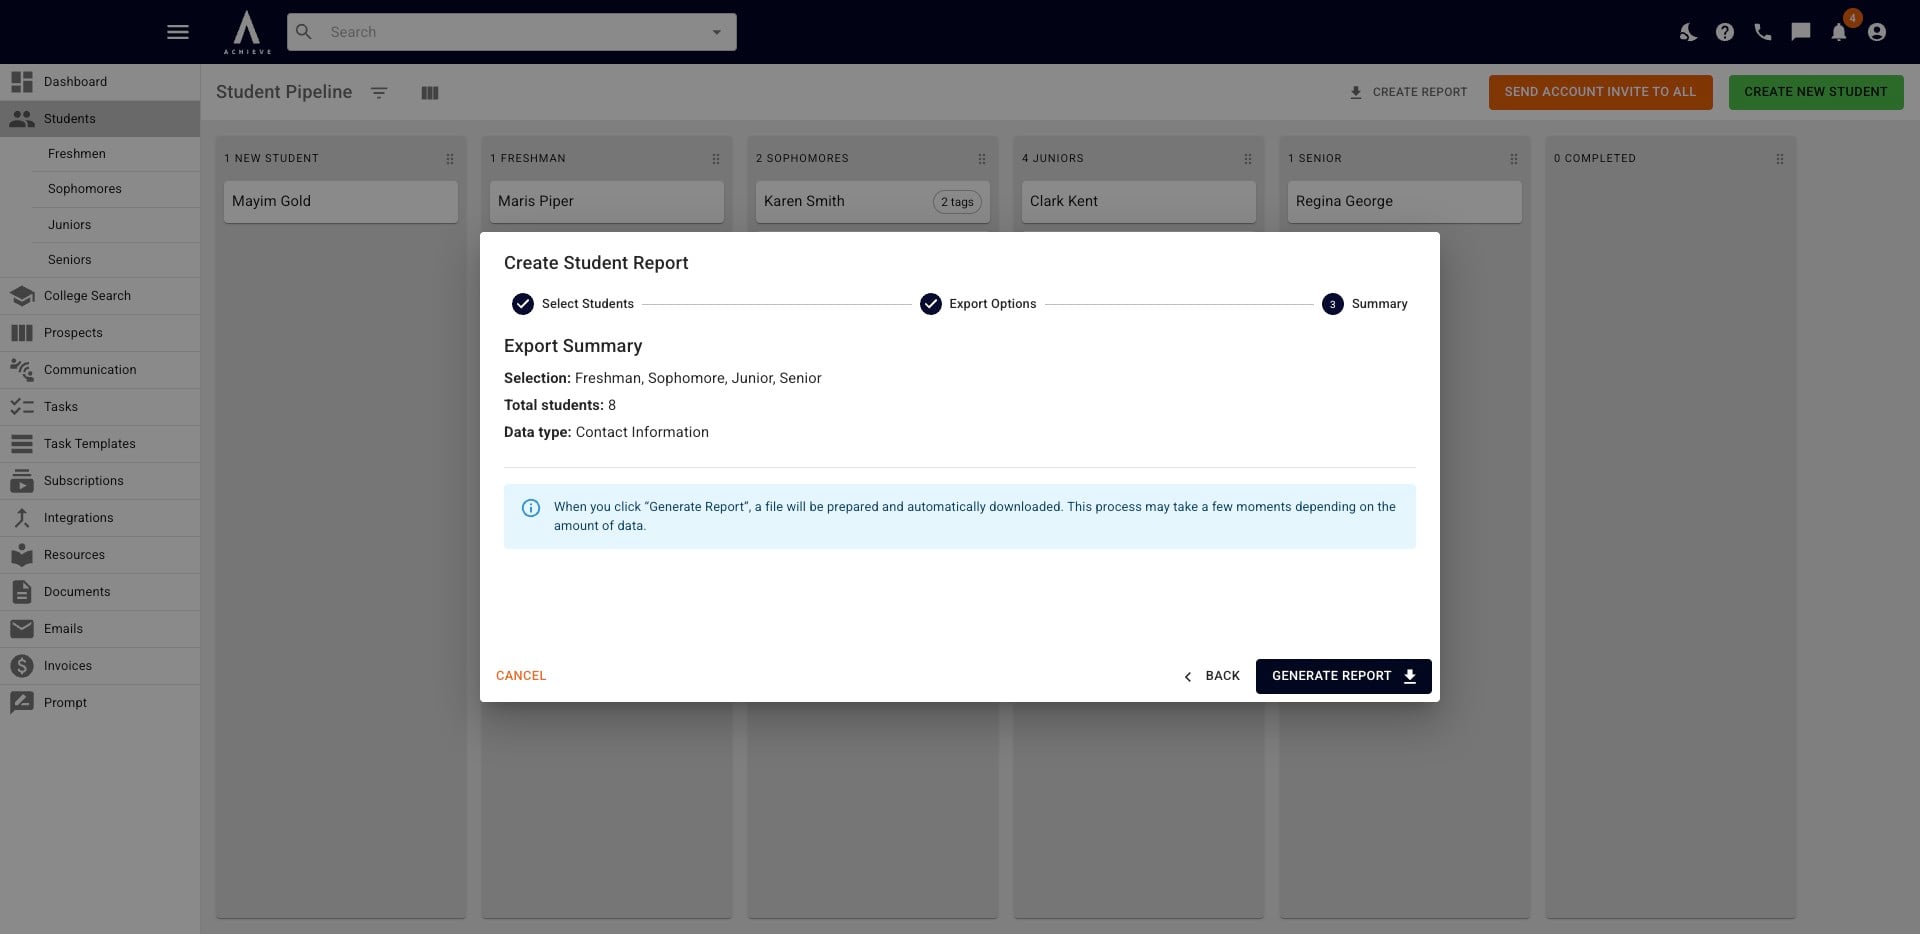
You will then be taken to the Export Summary. Review your selections and click on Generate Report. Your report will then be in your computer's downloads folder as a CSV file.
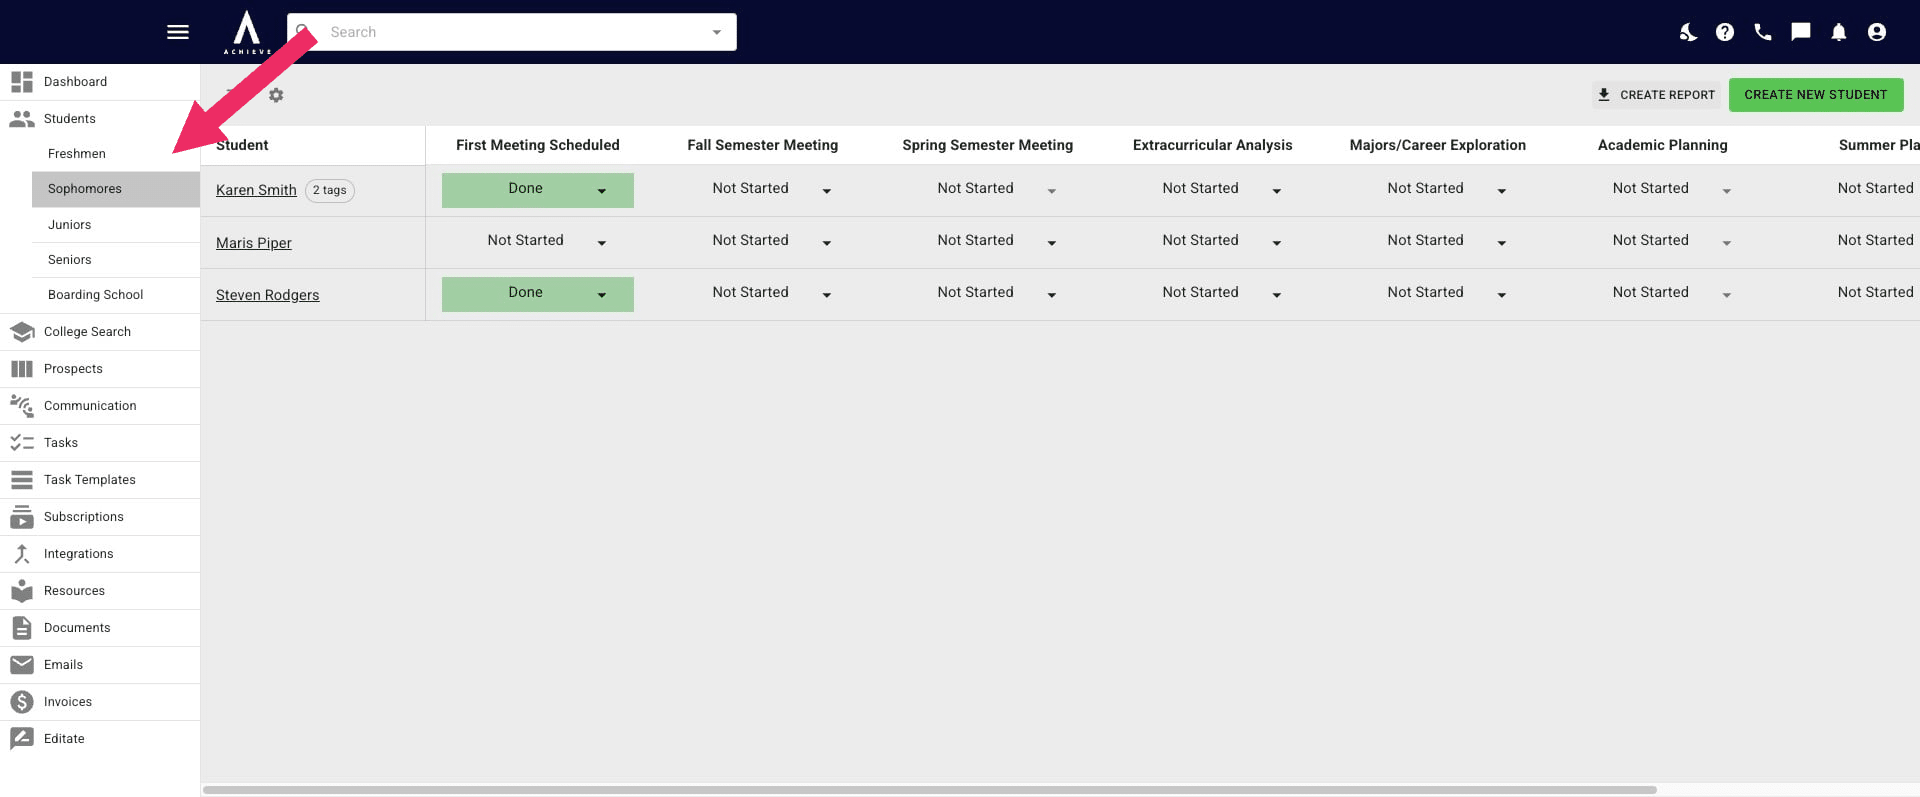
Another report option is to export a grade level or status tracker. If you click on any of the trackers on the left-hand side, you'll see a Create Report Button.
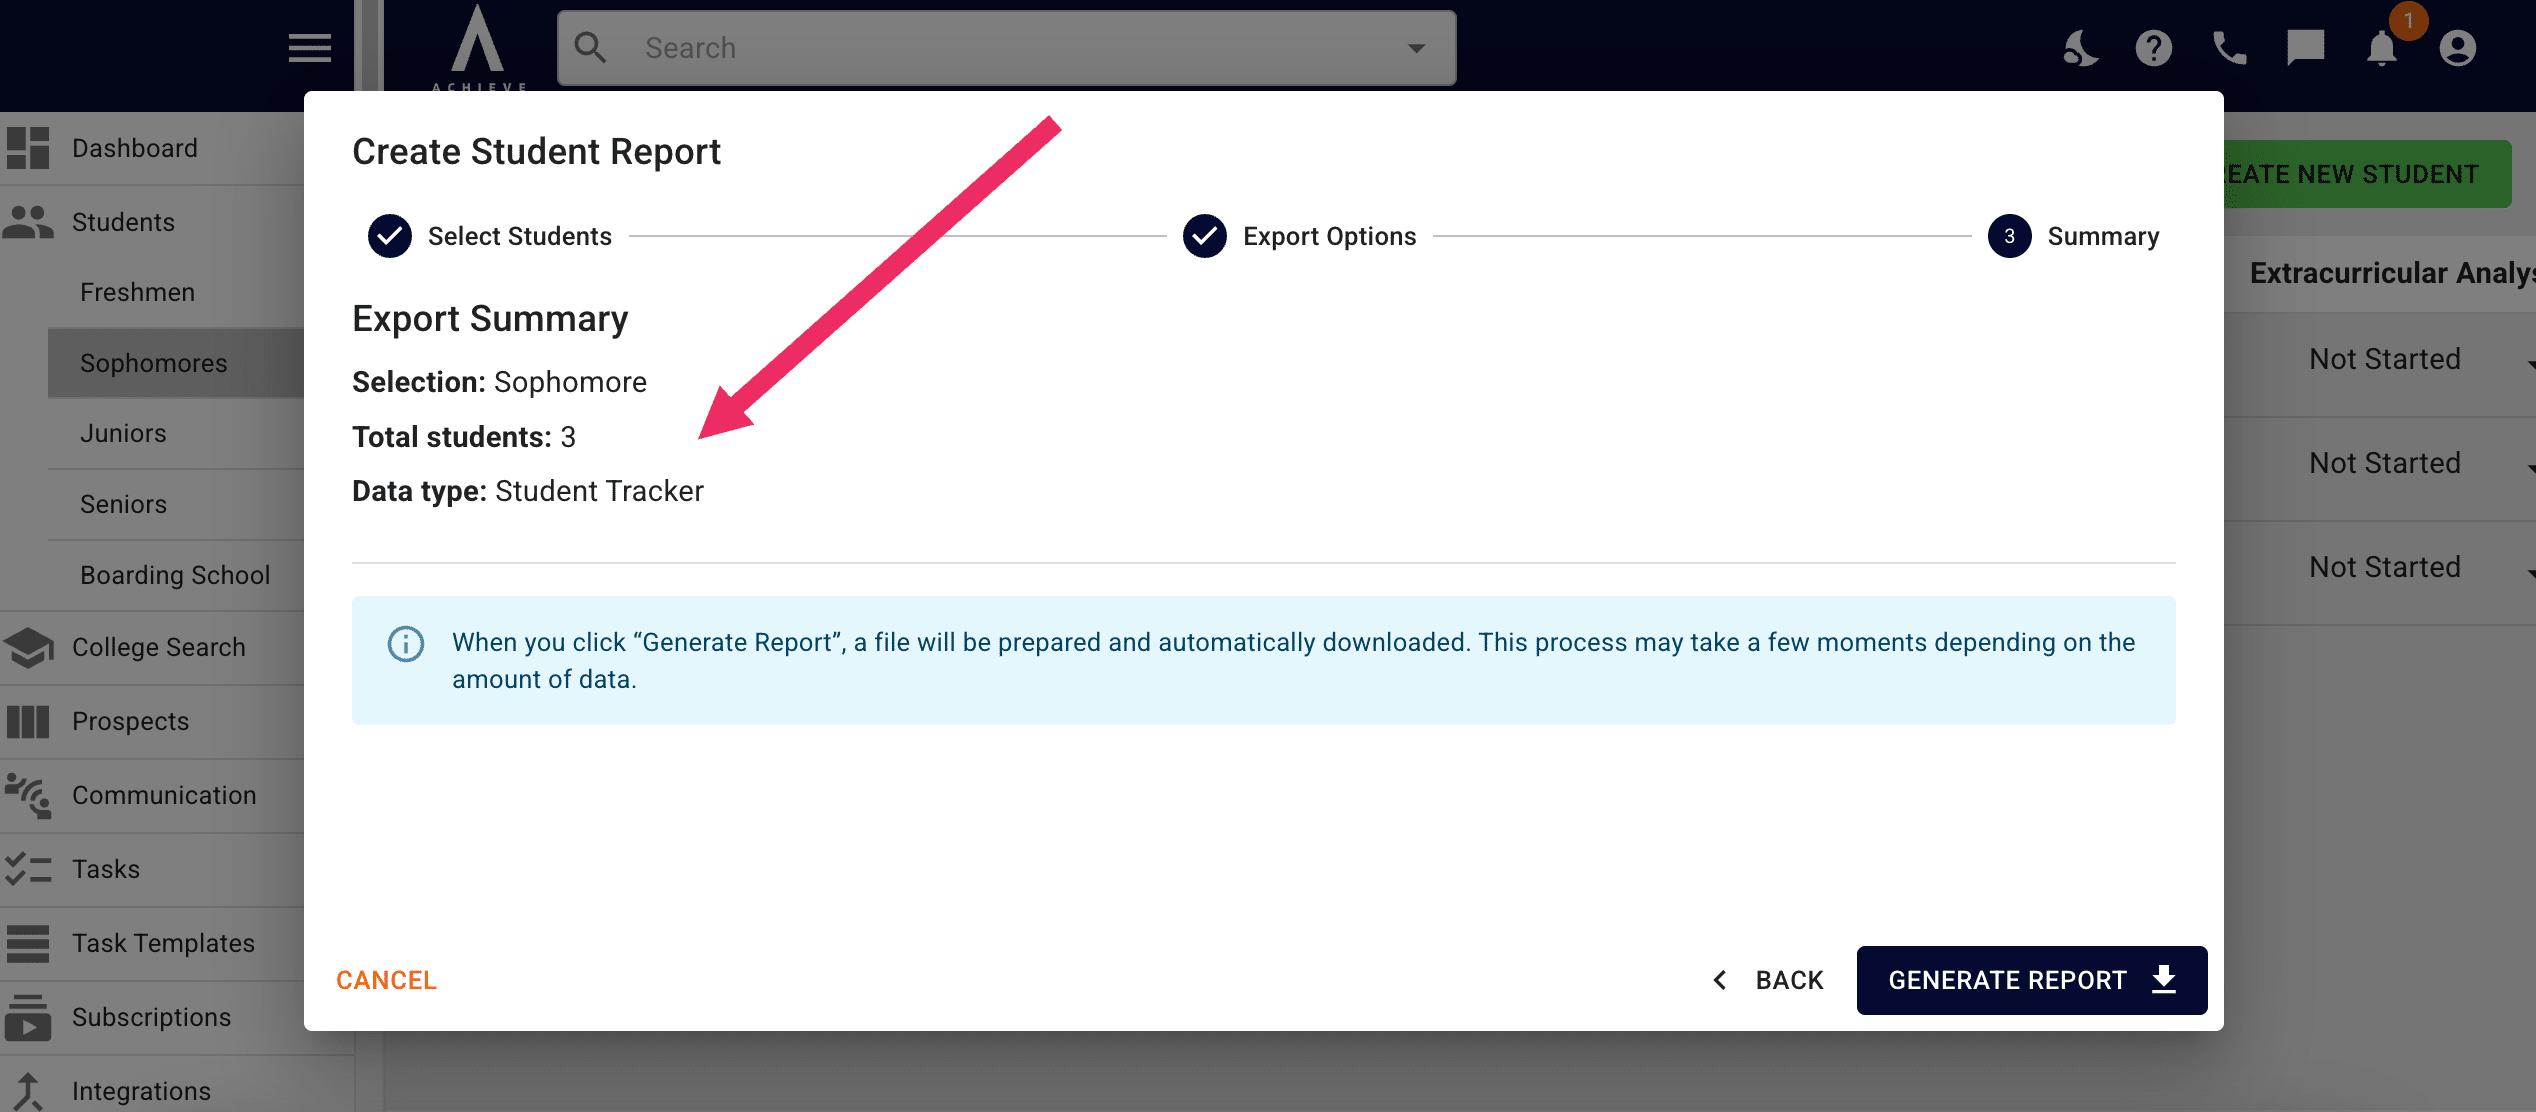
This will automatically bring you to a Report Summary that shows how many students you'll be exporting and which tracker you're exporting. Once you've reviewed the information, click Generate Report. Your report will then be in your computer's downloads folder as a CSV file.
Done 🚀